
Cambridge Polymer Labs (quest)
- View history
Cambridge Polymer Labs is a side quest in Fallout 4 . The objective is to find chemical samples in the abandoned Cambridge Polymer Labs and complete a 200 year old science experiment.
- 1 Quick walkthrough
- 2.1 Option 1: Complete the experiment
- 2.2 Option 2: Override the lockdown
- 2.3 Experiment samples numbers & names
- 3 Quest stages
Quick walkthrough [ ]
Detailed walkthrough [ ].
Upon entering the Cambridge Polymer Labs , the Sole Survivor is greeted by a Miss Nanny robot named Molly . She asks if they have come to fill a job position. By answering yes, Molly will give the player character a one-question survey for qualification, asking whether or not the player character has any research experience. She will assign a job and provide a uniform (set of clothing and items) based on the answer given:
- Expressing confusion: Janitor, a mop , and a green mechanic jumpsuit .
- Yes: Researcher, a lab coat and clipboard .
- "You need me" (Charisma check): Sales Coordinator if successful, a dirty tan suit , and a pen . Lab assistant if failed.
- Threaten: Security, dirty army fatigues , a baton and a pair of patrolman sunglasses .
Molly will then ask if the Sole Survivor would like an orientation, which is optional. If they agree, she will move into a side room with a broken slide projector and relate the history of the company. The Sole Survivor is asked to change into suitable attire and Molly leads the player character through a changing area with sets of lockers, then they are told to proceed to the cleanroom.
If one brings Curie for the quest, a possible affection boost of 35 points is possible for completing the research. She must be selected as a companion from this point onward to receive the boost. In addition, one must not override the lockdown until the research is complete. The affection boost will not happen unless the experiment is completed first.
As soon as the Sole Survivor enters the cleanroom, Molly locks the door and informs the player character that Director Elwood has issued a mandatory overtime edict to the staff and that no one may leave the laboratory until the project has been completed. The room will then fill with high-level radiation, though Molly will decontaminate it shortly after. The player character may then ask Molly questions, but her responses are generally that the player character should look at the research already done and see if it can be moved forward.
Just past the cleanroom, the player character will come to a room with a terminal directly in front and a large machine called the polymer coating applicator filling the right side of the room. The terminal will have the research data of the experiment that's been performed up to this point.
To complete the project, the Sole Survivor must supply the applicator with the reagents lithium hydride and gold in addition to the radioactive material, U-238 . Sitting right on the applicator is a silver canister that contains unidentified sample 11317 , which when inserted into the applicator will identify it as hydrochloric acid. The Sole Survivor must explore the rest of the facility and find the components for the project.
There is a door leading from the room with the applicator out into the main atrium, which is filled with feral ghouls . Up to ten ghouls will attack at once, but once they are dead, the Sole Survivor is free to explore with only occasional interference from additional ghouls elsewhere in the facility.
Entering the atrium there are two doors straight ahead. The storage room on the left contains unidentified sample 3111 (lithium hydride). The adjacent door leads to another small lab containing unidentified sample 413 (gallium). In this room is a hole in the wall leading into the next lab, which contains unidentified sample 65 (tungsten), a window to view into the containment room, which contains the U-238, and a wall-mounted terminal that opens the containment room. Opening the room causes alarms to sound and a glowing one to rise out of the standing water in the containment room. The containment room can be accessed via the door on the first floor at the bottom of the stairs, to the left of the door leading back to the applicator room.
Up the stairs on the second level and turning around, there will be two doors at the end of walkways on either side. At the end of the left walkway is an office space in which the player character will find unidentified sample 49 (cobalt) sitting on a desk. Near this desk is a ramp leading into the ceiling ducts, which will grant access to the aforementioned righthand office, if one is unable to hack the Expert-level terminal at the door outside. Deal with the ghoul inhabitant, disable the tripwire and mines before they can go off, then look around the lab.
This is Dr. Wilfred Bergman's lab and the final reagent, unknown sample 611 (gold), can be found sitting on a desk next to a terminal. At this point, one has two options:
Option 1: Complete the experiment [ ]
Return to the applicator room and insert the components. Insert unidentified sample 3111 (lithium hydride) and unidentified sample 611 (gold) into the chemical reagent slots on the left and U-238 into the isotope sample slot on the right. Use the terminal to start the fabrication process by selecting "run loaded fabrication routine." One can watch the polymer lining be applied to a piece of power armor, producing the piezonucleic power armor , a unique legendary power armor piece. Collect it on the far right and present it to Molly.
With the project completed successfully, she will unlock the cleanroom, adding that the director will be impressed and will want to meet the Sole Survivor. Following her will lead to the director's office on the second floor of the main entrance area. Upon opening the door, the director, now a feral ghoul, tries to attack the Sole Survivor. Molly intervenes, re-informing the director of company policies about assaulting coworkers before killing him with her saw arm.
If the Sole Survivor has already killed the director before this, Molly will apologize and refer to an office flu. At this point Molly pays the Sole Survivor for their efforts (in pre-War money), apologizes on the director's behalf, and shuts herself down for good, ending the quest. The piece of power armor remains available for the Sole Survivor to use as they see fit.
Option 2: Override the lockdown [ ]
Alternatively, activating the terminal in Dr. Bergman's lab and accessing the "facility defense system" directory will provide the opportunity to use the emergency override, which will open the cleanroom and fulfill the optional objective of finding another way out of the facility. It will also activate all defenses including turrets and Molly, resulting in the player character having to fight their way out of the facility.
Experiment samples numbers & names [ ]
Quest stages [ ].
- The player character does not actually have to put on the clothing items given by Molly in order for the quest to progress.
- The player character can choose to destroy Molly before entering the cleanroom. Subsequently entering the cleanroom will cause Molly to respawn, lock the door and activate the decontamination process.
- Occasionally Molly will become hostile when opening the cleanroom doors. The key to the director's quarters will be in her inventory when searched. This can complete the quest, but one can still complete the research project afterward and get the power armor piece.
- Once the player character enters Cambridge Polymer Labs, the piezonucleic power armor chest piece model is set as dependent on the player character's level from the moment the player character steps in the interior cell (the "labs" collectively).
- A segment of the Railroad quest Underground Undercover sends the Sole Survivor to Cambridge Polymer Labs to retrieve a password from Dr. Bergman's terminal. If the player character has not yet completed this quest, it will become a prerequisite to leaving the facility.
- Shooting any of the turrets in the facility will cause Molly to become hostile.
- If the player character does not follow Molly to the director's office after completing the research project, Molly can be heard making apologies for the director's condition, but no fight will be heard, nor will she comment on him attacking the player character. Upon entering the director's office after Molly's shutdown, he will be dismembered on the floor anyway.
- Curie loves it and Danse likes it if the player character opts to complete the research.
- If the player character chooses the second option, but does not loot Molly's body, her corpse may despawn after leaving, making it impossible to enter the director's office without picking the door.
- If the player character hacks Molly and shuts her down prior to entering the cleanroom, this may cause the quest to remain uncompleted despite obtaining the unique power armor. This can be fixed by destroying Molly and collecting the key to the director's quarters from her inventory.
Gallery [ ]
")
- 1 Vault-Tec bobblehead (Fallout 4)
- 2 Fallout 4 perks
- 3 The Ghoul
DualShockers
Fallout 4: cambridge polymer labs walkthrough.
Your changes have been saved
You’ve reached your account maximum for followed topics.
From giving Molly the 'right' answer to finding the optional exit route, here's a guide to the tricky Cambridge Polymer Labs side quest in Fallout 4.
There are many side quests in Fallout 4 , often given to the player through a companion or faction leader . But there are also side quests discovered only by talking to specific NPCs, more of the quirky characters found by exploring The Commonwealth. One of those NPCs is a Mr. Handy robot named Molly, found at the Cambridge Polymer Labs.
RELATED: Best Settlement Locations In Fallout 4, Ranked
Cambridge Polymer Labs is located just to the left of the CIT Ruins. Once inside, Molly will float over to the player to start talking about the lab. If you struggle to complete your objective in this tricky location, this guide will show you the way.
Finding The Labs And Being Hired By Molly
On arriving here and speaking with Molly, she will mention the need for extra staff and will offer a job to the player. The player must speak with Molly, as killing her or hacking her using the Robotics Expert perk will not start the quest. It will not softlock the quest either, as the player can enter the lab by themselves, but you will miss the relevant information. As such, it is advised to play as intended and answer Molly's questions.
Pressing "What?" will result in Molly repeating the question but in further detail. Pressing "No" will result in Molly telling the player they are not allowed anywhere beyond the lobby and will not activate the quest, meaning the player has to speak to her again. Pressing either "Sarcastic" or "Sure" will continue to the next part of the quest start-up, which is another question from Molly. She'll ask if the player knows about polymer synthesis.
All answers from the player will work, but each will lead to a different career option. "Threaten" will result in Molly hiring you as a security guard, "Polymer synthesis?" will result in Molly hiring you as janitorial staff, "Yes" will result in being hired as a researcher, and a successful "You need me" will result in the player being hired as a sales coordinator. After this, Molly will tell the player about the orientation, which can be further elaborated on if asked. This orientation is only there for the backstory and can be skipped outright. After either skipping or sitting through orientation, Molly will ask the player to follow her to the lab itself. Molly will hand the player clothes based on their chosen career and then lock them in a room. This is where the quest officially starts.
Creating The Piezonucleic Power Armor
You are tasked with finding the correct materials, bringing them to the terminal, and starting the procedure to create a new alloy. The three ingredients are:
- Lithium Hydrate
- Isotope U-238
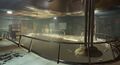
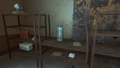
There are multiple canisters containing an element but only one isotope, and each canister is labeled secretly. When placed on the left or right reagent dock, the computer can scan the canister to reveal the contents, but this can cause a problem for players not using mods or console commands. The reason for this is that all canisters are quest items and remain so even after completion, meaning they will be forever stuck in the player's inventory. Thankfully the canisters are always in the same location and are color-coded. The lithium hydrate is located on the first floor, directly across from the start, as pictured here:
It's the green canister on the shelf and just above it is a hazmat suit that the player can also pick up (which will prove very useful a little later). For gold, the player must go up the stairs and the room to the right, where they will find a hole in the ceiling.
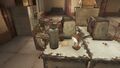
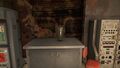
Walk to the very end and find another hole leading to a sealed-off room. The canister of gold is on a table.
It is the red canister next to the terminal, and further to the left on another table is a password. On exiting the room, be warned: there is an explosive trap.
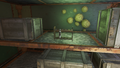
Drop back down to the bottom floor and enter the room adjacent to where the lithium hydrate was located. Here you'll find a novice-level terminal. Use the password or hack it to unlock the room on the opposite side.
This room is heavily irradiated. Players without strong radiation resistance may need to rely on the hazmat suit to progress safely. Once you've dealt with that deadly danger, simply pick up the isotope U-238.
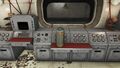
Take all three ingredients and place them on the console; hydrate in the left reagent space, gold in the right reagent space, and isotope in the far right space. Use the terminal the start the procedure. When the process is complete, you will gain a piece of power armor. Report back to Molly.
Speak with Molly and tell her you are done. Molly will let you out of the lab and walk you upstairs to see the Director. She unlocks the master level door, where the player discovers the Director is another feral ghoul that must be defeated.
RELATED: Every Fallout Game Ever Released, Ranked
After killing the Director, Molly thanks the player for their work, pays them 25 pre-war money, fires them on the spot for being redundant, and permanently shuts off. Players can loot her corpse, but the most important thing to pick up here is the Massachusetts Surgical Journal on the desk.
Optional Exit Route
If the player chooses, they can instead instantly leave the lab without doing the experiment. In the same room as the gold is a hackable terminal. The terminal is an expert-level one, and there is no password to find. This room, again, can be accessed by a hole in the roof, but the player can also hug this wall and use a terminal to open the door from the outside.
If you choose to do this, you will take damage due to the tripwire. Walk up to the terminal to start hacking.
If successful, the override will commence, and the lab door will open back up. Molly will be hostile to you and killing her is required to end this optional route.
The key to the office will be on her corpse, so the player can still acquire the Massachusetts Surgical Journal if they complete the quest through this optional path.
NEXT: Classic Fallout Moments: The Silver Shroud (Fallout 4)
Search Results
Cambridge polymer labs (quest) | fallout 4 wiki.
- Create new page
- Recent Changes
- Permissions
- Edit Open Graph
- Clear page cache
- Clear comments cache
- File Manager
- Page Manager
- Wiki Templates
- Comments Approval
- Wiki Settings
- Wiki Manager
Cambridge Polymer Labs (Quest) Information
- (Optional) Find another way to escape the laboratory
- Complete the research project
- Cambridge Polymer Labs
- Feral Ghoul
Walkthrough

Notes & Notable Loot
You get power armor but on the rare power armor wiki you have it says there are two types of armor you can get at Cambridge Polymer labs, how do you get each one?
- Recent Changes +
- File Manager +
- Page Manager +
- Create Wiki +
- ⇈ Back to top ⇈
The Vault - Fallout Wiki

Cambridge Polymer Labs (quest)
- View history
Cambridge Polymer Labs (quest) is a quest that can be obtained in the Commonwealth in Fallout 4 .
- 2 Walkthrough
- 3 Quest stages
Synopsis [ ]
In order to explore the deepest parts of the Cambridge Polymer Labs facility, the Survivor has to accept a provisional position as Sales Associate at the laboratories. What the robot doesn't say is that it also means that they are stuck inside the labs if they choose to pass the clean room. The only way out is to complete the long-forgotten experimental project...
Walkthrough [ ]
The goal of this quest is to complete the pre-War project and escape from the laboratory. In order to do so:
- Search the labs to retrieve all six unidentified samples. Laboratory C5 is accessed through a hole in the wall connecting it to lab C4. C3 is opened through a wall terminal or the crawlspace. C3 contains the password for the radioactive containment area as well.
- Unidentified Sample 11317: Hydrochloric Acid
- Unidentified Sample 3111: Lithium Hydride
- Unidentified Sample 413: Gallium
- Unidentified Sample 65: Tungsten
- Unidentified Sample 49: Cobalt
- Unidentified Sample 611: Gold
- The samples you need are 3111 (located in the storage room next to lab C4) and 611.
- Enter lab C5 and use the isotope containment terminal to open the containment chamber. Retrieve isotope U-238 from inside the containment chamber.
- The optional objective can be completed at Bergman's terminal on the upper floor or lab C3. Otherwise, report to Molly with the piezonucleic power armor chest in inventory.
- Follow Molly upstairs to the Director's office. After defeating him, Molly will pay a completion bonus, 25 pre-War money, and shut down. The quest should complete now.
Quest stages [ ]
Depending on the option chosen to respond to Molly during the questionnaire she will dispense items.
- Sales Coordinator = Dirty Tan suit & Pen
- Researcher = lab coat & Battered clip board
- Janitorial Staff = Mechanic jumpsuit & Mop
- Security Personnel = Dirty Army fatigues, Patrolman sunglasses & Security baton
- Fallout 4 Achievements
- Fallout 4 News
- Walkthrough *
5. Fallout 4 Story: Act 2

Welcome to Act 2 of the Fallout 4 main story. So far we've met Nick Valentine, killed Kellogg, and have a lead on a former Institute scientist. We're also friends with the Minutemen, Brotherhood of Steel, and Railroad. Onwards now through Act 2, as we work towards the story finale.
Before we continue on, just a reminder that you should be continuing to pick locks and hack terminals until you reach 50 of each. This is when the respective achievements unlock. If you haven't unlocked either of the following yet, keep leveling up the relevant perks, as well as hacking and picklocking whenever given the opportunity.
Pick 50 Locks
Hack 50 Terminals
The Glowing Sea
We're returning to the main story now with The Glowing Sea . Virgil's last known location was deep in the Glowing Sea, a highly irradiated wasteland to the southwest. I'd recommend bringing your power armor, or if you plan to avoid combat, a protective hazmat suit. Stock up on Rad-X and RadAway too. Fast travel to the nearest location you have to the Glowing Sea, and then begin heading southwest towards the map marker. It should lead you to the edge of the Glowing Sea, and then on to the Crater of Atom. Look for the buildings on the hill side, and you'll find Mother Isolde who you can speak with. She will direct you to a nearby cave, but before you leave, head up the stairs behind her to find an Astoundingly Awesome Tales (#19 of 20) . Make sure to grab that before proceeding on to the next waypoint for Virgil.
When you get to Virgil's cave, you may encounter a Deathclaw outside, so be prepared. You'll find Virgil inside, and he'll explain how we now need to track down a Courser to potentially gain access to the Institute. He also asks you to retrieve a serum that will cure him of FEV, however this is a side quest that we'll ignore. After speaking with Virgil, the quest will end, and the next will have begun automatically.
Before you leave, make sure to pick up the copy of Tesla Science (#20 of 20) on one of his desks, between his chemistry table and computer. If you've grabbed every magazine I've mentioned so far, then that will be number 20, and you'll unlock the following achievement. If you've taken any detours, or done any additional side quests, you may have reached 20 earlier on. There are no more magazine related achievements, but I will point out any obvious ones we encounter on the remaining quests.
Read 20 Magazines
Hunter/Hunted
Thankfully we can fast travel out of the Glowing Sea, and save ourselves any more hassle with radiation and enemies. Fast travel as close as possible to the C.I.T. Ruins, at which point you'll gain a new radio frequency. Tune into 'Courser Signal' and you'll get a regular updating percentage for how close you are to the source of the signal. To save time though, you want to head towards Greenetech Genetics, which is directly east (and slightly north) of the C.I.T. Ruins map marker. It's also directly north of the Boston Public Library marker, which you may have on your map by now. Once you find the building entrance, your objective will change to Kill the Courser, and you can turn the radio off.
The building is full of Gunners who are also fighting the Courser. They'll fight you, but are also fixated on the Courser who seems to be just ahead of you in the building the whole time. As you work your way up the building, look out for a Massachusetts Surgical Journal on the north side of the third floor. Continue up until you reach the seventh floor, and look for an elevator that will allow you to continue after the Courser. Once you get off the elevator, you'll hear the Courser talking to some hostage Gunners. As you approach, he'll turn his attention to you. After a short conversation with Z2-47, he'll engage you in a fight. He's a tough opponent, and like Kellogg will use stealth boys to hide himself, so don't hold back on the heavy weaponry. Once he's dead, loot the Courser Chip from his body, and the quest will come to an end.
Complete "Hunter/Hunted"
The Molecular Level
This quest will have begun as soon as you looted the Courser Chip from Z2-47. Once you've obtained the Courser Chip, you'll need to get it analyzed. For this we're going to go to the Railroad, so fast travel over to their HQ. Talk with Desdemona who will ask you to hand the Courser Chip over to Tinker Tom for analysis. After Tom has analyzed it, you'll need to take your findings back down to Virgil. Exit the Railroad HQ and then fast travel down to Virgil's hideout in the Rocky Cave. It might be worth grabbing your power armor first, as you may encounter a deathclaw outside. But if you're confident about sneaking in and out, or can hold your own against the rads and a deathclaw without the power armor, just head on down. Run into the cave and have a chat with Virgil who will explain what needs to be done next. He'll advise you to continue working with your friends, and have them build the Signal Interceptor for you. You'll end up with 3 objectives, one for each of the 3 factions you've met so far. However, we will be returning to the Railroad to keep all the quest lines open for as long as possible. Exit the cave and fast travel straight back up to Railroad HQ.
You must build the device with the Railroad! (for anyone who's skim reading this)
Speak to Desdemona and she'll point you over to Tinker Tom again. Hand the schematics over to Tom and he'll explain that you need to find a site to build the signal interceptor. At this point you have a choice: you can use any of your existing settlements, as long as they have enough flat ground (Sanctuary Hills is probably a good bet), or you can follow the Railroad's recommendation to capture a current target settlement for them, and then build there. This will be a random settlement, just like the procedurally generated Minuteman quests. If you want to help the Railroad out that extra step, go talk to P.A.M. to receive the extra information, and proceed with clearing the settlement as normal.
Regardless of which settlement you go with you will need to build the teleporter/signal interceptor. First build the Stabilized Reflector Platform. Once this is placed, you will need to go back to Tinker Tom at the Railroad, and he'll then provide the rest of the details on what needs to be built. Head back to your settlement and you can now construct the Relay Dish, Molecular Beam Emitter, and Control Console. These items do require a number of resources, some of which are on the rarer side. Hopefully you'll have collected a sufficient amount in your settlement of choice by now, however if not you may need to go source them. You'll also need to keep in mind the resource requirements of building several generators to power the signal interceptor. Tom should now be at your settlement, so no more running back and forth, and everything is built and you've powered them on the same grid, you'll be directed to speak with Desdemona who has also shown up at your settlement.
Now at this point she will also introduce the Underground Undercover quest, but because we're already working with the Railroad, it'll get triggered during a joint conversation as she encourages you to use the signal interceptor. Once you step into the signal interceptor, the quest will end and Institutionalized will begin.
Complete "The Molecular Level"
Institutionalized
You'll arrive in the Institute. A voice will greet you as you begin to follow the linear interior corridors, and then into an elevator. I won't spoil the rather pivotal story moments that come ahead, but ultimately you'll find yourself speaking to Father, the director of the Institute. During this conversation, agree to join the Institute, and Father will welcome you into the greater facility. Your quest objectives at this point will be to speak to the other Institute leaders. Work your way around the facility, and introduce yourself to everyone necessary. During these interactions you will also gain the ability to fast travel in and out of the Institute at will. Once you've spoken to all the department heads, the quest will complete and you'll unlock the achievement below. You will also get Synth Retention added to your quest log, but we'll come back to that later.
Complete "Institutionalized"
(Railroad) Underground Undercover
While still in the Institute, let's help the Railroad out by uploading that Network Scanner holotape to their systems. Find any console, and upload the holotape. Select the option to upload the message to PATRIOT and then read the reply that comes through. You'll be directed to a maintenance room where you'll meet Liam Binet (AKA PATRIOT). After a brief talk with Liam, follow him to meet a synth and you'll be included in a conversation about helping 13 synths escape. Afterwards, talk to Liam again to be informed that he needs an admin password from the surface. Your next objective will direct you to Desdemona for more help in locating one of these, so go ahead and fast travel to Railroad HQ. After debriefing with Desdemona, she'll ask you to enter your report into P.A.M.'s terminal. Head to the side room, and select the appropriate option on the terminal. Exit the terminal, and you'll find Desdemona and P.A.M. ready to discus next steps. P.A.M. will identify one remaining location that may contain the terminal password that Liam/PATRIOT needs. Head out of the Railroad HQ and fast travel as close as you can to Cambridge Polymer Labs.
When you enter the labs, you'll be greeted by a robot who assumes you are a new hire at Cambridge Polymer Labs. You can follow her prompts, or just skip through to the lab entrance, where Molly will ask you to enter the Clean Room. When you do this, you will be locked into the labs by Molly, and unable to directly escape. The quest Cambridge Polymer Labs will have started. Molly's directive is to keep the lab secure until a 200+ year old research project has been completed. You can complete the research yourself to be released, or you can find an alternative route out.
The most direct route out, if you don't mind combat, is the optional escape route. Continue through the interior into an atrium where you'll fight some feral ghouls. Go up to the second floor, and then get into Dr. Bergman's office either via a hacked terminal, or crawling through some ceiling ducts. In Bergman's office, use his terminal to both grab the password for the Code Defender, as well as lifting the lockdown from the Facility Defense System menu. This will allow you to escape the lab lockdown, however it will turn Molly hostile, as well as a number of turrets throughout the facility. Fight your way out of the building, and then fast travel back to Desdemona.
If you'd rather solve the scientific challenge in the labs, you'll need to find a number of scientific samples around the lab area. In the first room you enter, you'll see an applicator, and dotted around the labs are numbered scientific samples. We need samples 3111 and 611, which are lithium hydride and gold. We also need the radioactive element U-238. For the first two samples, head through to the atrium and into the room ahead of you on the left. You'll find sample 3111 here. Head upstairs from the atrium and make it into Dr. Bergman's office, as described above. Here you'll find sample 611, and be sure to grab the Code Defender password from his terminal. There's also a password nearby for the containment room back downstairs. We're heading there next, so go back to the atrium, and use the password you just grabbed to access the containment room, which is where you'll find U-238. Head back to the room with the applicator, and insert both samples and the radioactive U-238 into the applicator device. This will create a specially lined piece of power armor, which you can present to Molly to prove that you solved the research project. You might as well wrap up the quest before you leave, in which case follow her up to the director's office, and then finish up the conversation after events go down there. Be sure to grab the Massachusetts Surgical Journal while in the director's office. Now it's time to head back to Desdemona with the password in hand.
Desdemona will give you an update on your objectives, and send you back to the Institute. Now that you've been there, you can simply fast travel to the map location right by the C.I.T. Ruins. Once you get to the Institute meet with Z1-14 and Binet, and you'll then be required to wait a day before meeting Z1 again. You can easily wait on one of the nearby benches. Once Z1 returns, he will explain that the synths need weapons, and ask you to help stage a mining accident in a tunnel. Follow his directions to find the tunnel guards, and wipe them out as quickly as possible, before then returning to Z1. After a brief conversation, you'll receive the quest objective 'Continue working with Father'. However, we are going to leave the quest at this point, and return to the Brotherhood of Steel. Do not complete Undercover Underground at this time!
Fast travel over to the Prydwen and go speak to Elder Maxson on the bridge. He'll be pissed that you didn't build the device for accessing the Institute with the Brotherhood, but he'll get over it quickly. During the following conversation, you'll have two quests added to your quest log. The first will be Outside the Wire , followed by From Within . For now, we will do the latter.
(BoS) From Within
Head back outside the airship, and fast travel back to the Institute. We met Dr Li earlier during Institutionalized, and she's easy to track down in her office. During the conversation you can attempt to convince her to rejoin the Brotherhood. If you're able to pass a number of speech checks, you can convince her during this conversation, but it may be tricky. If you fail, she'll require you to run an errand to gain her trust. Follow the objectives to recover the evidence she's after from a sealed part of the BioScience Division. Once you make it to the end of the area, you'll find a personal log holotape, which you can return to Li. Once Li has agreed to return to the Brotherhood, you can make your way back to the Prydwen and inform Maxson.
(BoS) Outside the Wire
Maxson will remind you to deliver the data you're carrying to Proctor Ingram. Now, you should have retrieved this data during the Underground Undercover quest earlier. If, however, you do not have the holotape on you, then follow whichever objectives are presented to retrieve it. Ingram is down at the Airport, so head down and speak with her. After a brief conversation, Ingram will invite you to come see the secret weapon the Brotherhood is working on. As you begin to follow her, Outside the Wire will be marked complete, and you'll begin Liberty Reprimed .
(BoS) Liberty Reprimed
Ingram will let you know that the next key component missing from Liberty Prime is it's nuclear weapons. Good news though, the Brotherhood thinks there are some in the Glowing Sea, and you're just the man or woman to go retrieve them. Fast travel over to Waypoint Echo and check in with Scribe Haylen for the quest details. She'll hand you a Signal Pulser and instruct you to head into the Glowing Sea - your destination: Sentinel Site, a military storage facility containing the bombs you need. Now if you happen to have discovered this location already, you can probably get away with fast traveling, and then heading straight inside. If not, then I recommend heading back to whichever settlement you're storing your power arm at, and suiting up. Go ahead and then fast travel to your nearest location to the quest waypoint, and beginning travelling across the Glowing Sea.
Once inside Sentinel Site, begin to work your way through the location. As you head into the first room on your left from the entrance, be sure to grab the copy of Astoundingly Awesome Tales that's on a terminal desk. Continue working your way down the main silo, and then into the tunnels that snake away from it. Ultimately you'll get to a room that provides a way up and out via a service elevator, and a way forward that has you meet Brother Henri, a child of atom member protecting the bombs. If you pass a relatively easy speech check, he'll hand over the terminal password needed for access to the nukes. However, if you anger him, you'll have to take both him and an Assaultron down. Once in the warehouse of nukes, all you need to do is place the Signal Pulser, and head back to Proctor Ingram. Watch out though, as you'll be greeted by a glowing one as you call down the service elevator.

Once you're back at Boston Airport, Ingram and Li will do final checks, and then give you the honors of powering up Liberty Prime. After a short sequence, Ingram will address you again and the quest will wrap up. Blind Betrayal will now begin, but do not proceed with it at this time . Instead, we're going to head back to the Institute.
(Institute) Synth Retention
Find Father in the Institute, and he'll ask you to join a Courser who is heading out to reclaim a rogue synth that has joined a gang of raiders. Fast travel over to Nahant Sheriff's Department to meet X6-88. You'll be tasked with assaulting the floating raider settlement (known as Libertalia) at the end of the peninsula, with your goal being the "building" atop the cargo ship. Work your way across the boards and from boat to boat as you get closer. There is a little pulley system that can transport you over to the cargo ship, or you can just get as close as possible and then jump in the water. A sniper rifle can be good here to pick off enemies from a distance, but once you're on the cargo ship be prepared for some close quarters fighting, if you've not cleared it in advance.
As you work your way up the building, look out on the 3rd or 4th floor for a chair overlooking the water, which will have a copy of the U.S. Covert Operations Manual that you can grab. On the top floor you'll enter the Captain's Cabin, where X6-88 will give you the reset code for the rogue synth, Gabriel. Head on up through a hatch to find Gabriel on the roof with a couple of lackies. You can immediately state the reset code, or converse a little before potentially breaking out in some quick combat. Once Gabriel is deactivated, X6-88 will whisk him back to the Institute, leaving you to clean up. At this point you can also head back to Father and debrief. Before the quest wraps up though, Father will let you know that they've assigned you personal quarters at the Institute. Head over there quickly to check out your new digs, and then X6-88 will tell you to head back to Father. This will wrap up the quest, and trigger the next one.
(Institute) The Battle for Bunker Hill
Father wants you to recover several synths that are being protected by the Railroad at Bunker Hill. After your conversation, you'll see on the quest log that you have several optional objectives; one to warn the Railroad, and one to warn the Brotherhood. It's really important that we go ahead and warn the Railroad, as this is how we keep all factions happy. So head over to Railroad HQ and speak to Desdemona. She will plot an ambush with you to wipe out the Institute attackers, and ensure you're the only one who makes it back to the Institute alive.
Head on to Bunker Hill and liaise with the Courser waiting outside. He'll seem to have an idea that your attack may not be as stealthy as originally planned, and will call in reinforcements. As you begin your assault, take out the Courser as quickly as possible, and then get away from Bunker Hill. The Railroad and Synth attackers are so preoccupied that you shouldn't have any problems. After taking out the Courser, you'll have a quest objective to report back to Father, who you will find in the C.I.T. Ruins (not at the Institute itself). Head to the ruins, and go inside. Branch off to the right and then head up to the roof to find Father outside surveying the Commonwealth. There'll be a lengthy dialogue, that delves into your relationship, but eventually he'll ask about Bunker Hill. Make sure to claim there was an ambush, and while Father won't sound convinced, it'll be enough to wrap up the quest and keep everyone friendly for now (be careful with this conversation as it's not difficult to get expelled from the Institute if you pick the wrong options. Might be worth quicksaving first). Father will head off to a meeting with the Directorate, and invite you along, triggering the next quest.
(Institute) Mankind Redefined
Head down to the meeting, back inside the Institute. Sit down among the Institute leaders to hear Father speak. They'll begin discussing Phase Three, a plan to source unlimited power for the Institute from a nuclear reactor. There will be some concern among the other Directors that you shouldn't be involved in the conversation, but Father dismisses this. The reason becomes apparent very quickly, when Father begins discussing his deteriorating health and informs the Directorate that he'll be handing power over to you. There are unhappy responses from the table, but just go with the conversation for now. After the Directorate is dismissed, talk to Father for another brief conversation, and eventually the quest will wrap up awarding you:
Complete "Mankind-Redefined"
Before we head on to the next quest, you may see a message pop on screen that X6-88 is now available as a companion. If you're still after the achievement, Never Go Alone , head over to the Synth Retention Bureau, and have him join as a companion briefly.
As Mankind Redefined wrapped up, the next quest, Mass Fusion , will have launched.
** CRITICAL SAVE MOMENT **
This is the moment where we make a save and begin our path towards the end of the game. It is critical that you make a save now before going any further with Mass Fusion or any other faction quest, otherwise you may not be able to achieve all story related achievements in this playthrough. If you'd rather, you can go off and complete any non-faction side quests now, just be sure to make this crucial save before continuing the story.
At this point, you have two routes to the end of the game that will net you the remaining story achievements. Both have to be played to gain all achievements though. Assuming you will continue with one of these saves through the rest of the game and the DLC, I recommend you pick the faction ending you don't want first. Then you can reload, and play out the other ending and remain in a Commonwealth with the faction(s) of your choosing. Also, try not to get sidetracked during these endings, especially if you plan to reload your previous save. If you do get sidetracked, you'll lose any progress or collectibles found as soon as you jump back to the previous save file. Your options are:
Side with the Institute
Side with the Brotherhood of Steel
Bear in mind, either ending results in the destruction of the other faction, as well as turning hostile towards the Railroad. The Minutemen will remain friendly either way, despite your best wishes for the demise of Preston Garvey. If you aren't keen on either of these endings, I will also flag when to make optional saves that you can return to so as to complete the story with the Railroad or the Minutemen. These are not as important right now though, as they do not provide any additional achievements.
Go ahead and select page 6 or 7 depending on which ending you want to do first. We're on the home stretch!
- World of Warcraft
- Baldur's Gate
- League of Legends
- Counter-Strike
- Ethics Policy
- Ownership Policy
- Fact Checking Policy
- Corrections Policy
- Affiliate Policy

Fallout 4 Underground Undercover quest guide – How to initiate the Synth rebellion
Underground Undercover is a main quest in the Railroad faction storyline in Fallout 4 , and it involves helping the Synths within the Institute stage a rebellion and escape.
There are a lot of steps to this quest, so we will be looking at what you need to do to complete this Fallout 4 mission and claim your reward.
Underground Undercover Fallout 4 quest guide
1) speak to desdemona before you teleport to the institute, 2) upload the holotape , 3) meet up with patriot, 4) file your mission report on p.a.m.’s terminal, 5) go to cambridge polymer labs, 6) complete the research project, 7) return to railroad hq, 8) go to the institute, 9) kill the guards, 10) keep helping father, 11) speak with z1-14 for the last time, 12) warn the railroad.

The quest begins when you have done all the work necessary to create the teleporting device to enter the Institute. Desdemona will tell you about Patriot , the Railroad’s person inside the Institute who has been helping the Railroad get Synths out of the organization.
Talk to Tinker Tom , and he’ll give you an encoded holotape that can be uploaded to any terminal in the Institute to contact Patriot. Once you have obtained it, step onto the teleporter pedestal to transport to the Institute.

Interact with any Institute terminal and load in the holotape called “Network Scanner.” You’ll then receive a message from Patriot and a marker on your Pip-Boy will direct you to an in-person meeting with Patriot in the maintenance room in the Advanced Systems area .

Patriot’s real name is Liam Binet . He’ll lead you to his Synth accomplice, Z1-14 . They will formulate a plan to rescue 13 Synths , but you’ll need a Pre-War username and password to bypass the security. Liam asks you to discuss the issue with the Railroad; you can then leave the Institute and return to the Railroad HQ.

At Railroad HQ, speak to Desdemona. She’ll direct you to the modified Assaultron P.A.M. and her terminal to input a report . P.A.M will then direct you to Cambridge Polymer Labs and the login details of a worker there, Wilfred Bergman .

To start your search for Bergman’s login credentials, go to the Cambridge Polymer Labs laboratory area. The terminal you need is on the second floor . The room is locked with an Expert-level terminal . If you can, hack it (you can use Nick Valentine if he’s your current companion).
If you don’t have Nick or can’t hack Expert terminals, go into the opposite room on the second floor where you’ll find a collapsed ceiling that acts as a ramp, allowing you to get into a space in the roof. Walk through the roof space until you can go no further and jump down through a hole beneath you.

You’ll need to complete a research project side quest in the labs if you want to get out of the building, as a robot called Molly has locked the exits.
In the main work area of the labs, there’s a terminal with two slots on one side and one slot on the other side. You’ll need to find the correct two chemical agents and one isotope. You need lithium hydride (sample 3111) and gold (sample 611). The chemical agents aren’t too hard to spot, as they are in silver canisters.
The gold sample can be found in the same room as Bergman’s terminal, whereas the other sample is on the floor below. The isotope you need— U-238 — is in an irradiated area that needs to be unlocked with a terminal. The Isotope Containment terminal is on the same floor as sample 3111, in the room next door. When this is done, head into the irradiated area to pick up the U-238 (the room is found to the right of the stairs you initially went up). Pop some Rad-X and have RadAway to hand before you head in.
Go to the terminal and insert the collected canisters on the left and the isotope on the right. You’ll earn the Piezonucleic Power Armor Chest, and Molly will let you out of the Clean Room so you can exit the building.
Head back to Railroad HQ and speak with Desdemona. She’s concocting a bigger plan: She wants to try and free every Synth in the Institute . Desdemona wants you to cut Liam loose once you give him the password and work solely with his Synth accomplice Z1-14.

Fast travel back to the Institute and give Liam the password or speak to Z1-14. You need to do both, so order doesn’t matter. Z1-14 will agree to Desdemona’s plan, but he needs time to organize the Synths. You’ll be instructed to wait for 24 hours before speaking to him again. Choose a seat and press the prompted button to wait .
Once you have waited, speak to Z1-14 again, and he will confirm enough Synths are willing to get in on the plan. The main issue now is the group is unarmed . Z1-14 has a plan to take out some Institute guards and stage the deaths so the Synths can take their weapons. Since the Synths are yet to be armed, you’ll need to go down to the tunnels and take out the guards.
You can also go to the room opposite where you met Liam and transfer any weapons you want into a locke r to aid with the Synth rebellion.

Follow the Pip-Boy marker to find the elevator to take you down to the tunnels. Take out the guards and return to Z1-14.

Z1-14 will tell you to keep helping Father so suspicions aren’t raised. You’ll need to complete the Institute quest line up to the “Powering Up” quest ; the final Institute mission. When you get to this mission, you’ll be tasked by Father to eliminate the Railroad.
You’ll be prompted to speak with Z1-14 a final time, and he’ll tell you the Brotherhood of Steel has found the Railroad and is planning an attack. He asks you to warn the Railroad (it’s not a timed task, so don’t worry if you want to finish other missions first), so head to the HQ and speak to Desdemona .
When you have warned the Railroad, the final quest of the game will begin, and you’ll have locked in your allegiance with the Railroad . The Underground Undercover quest will be complete, and you’ll be rewarded with the Railway rifle weapon.

Fallout 4: The Lies Behind the Cambridge Polymer Labs Project

Your changes have been saved
Email Is sent
Please verify your email address.
You’ve reached your account maximum for followed topics.
Fallout: London Will Be Released on Major PC Gaming Store
Fallout 4: best play order for the dlcs, fallout 4 player points out bizarre preserved pie detail.
The Cambridge Polymer Labs is a location in Fallout 4 that triggers a quest which involves completing an experiment to acquire a special piece of power armor. While the armor is no doubt useful for surviving in the wasteland, there’s a reason why this project remained unfinished.
Terminal entries and notes within the building reveal the tragic story of the Cambridge Polymer Labs project - as well as the deception that ultimately led to the working scientists’ demise. Taken together, it makes the Cambridge Polymer Labs and its brief quest one of the darkest that players can find in Fallout 4 .
RELATED: Fallout: The History of Vault-Tec
The Lab Before the Events of Fallout 4
The Cambridge Polymer Labs was founded in 2074 by three graduate students from the Commonwealth Institute of Technology: Jon Elwood, Ericka Woolum, and Wilfred Bergman. The year prior, they had been researching nucleostrictive and piezoelectric polymers, which got the attention of Colonel George Kemp of the US armed forces. Upon opening the company, the students were given a sizable grant by the Defense Experimental Research Project Initiative.
Jon took the role of Director, focusing on communication and public relations matters with the company’s clients. Meanwhile, Ericka and Wilfred worked as scientists and were more hands-on with contracts. It’s also worth noting that, at some point, Jon and Ericka got married, so Ericka changed her name to Ericka Elwood-Woolum.
From its foundation, the company fostered a strong relationship with the military and took on many of its contracts. One of the most notable projects involved the creation of a number of components that were used to build Liberty Prime. Meanwhile, its most recent contract was ordered by Kemp for the team to manufacture piezonucleic lining to be used in power armor .
The Advent of the Great War
Power armor with piezonucleic lining is meant to harvest radiation and then convert it into usable energy. According to Ericka’s terminal entries, initial testing with a prototype was successful, but it also caused an unwanted chemical reaction wherein the armor material steadily acquired a buildup of thermal waste. This caused the armor to break down after extended use - in this case, a matter of days. The team amended their approach by thinning the armor material to allow for more heat dispersal and this seemed to work, effectively increased the armor’s lifespan from a matter of days to years.
However, Kemp was not pleased with the team’s output. The thinner material made the armor more susceptible to shredding under duress. As such, the weave was unsuitable for power armor, even with its ability to absorb radioactive energy. Following this, the colonel threatened to pull the company’s funding if he didn’t see results, so Ericka and the rest of the team went back to testing.
RELATED: Starfield Should Borrow Fallout 4's Settlement Building
The Failure of the Nucleostrictive Lining Project
Sometime after, Kemp would contact Jon to ask about the status of the project. In Jon’s terminal entries , he notes that the colonel didn’t seem angry, Kemp simply said that the team needed to continue working on the project and contact him once it was complete. Jon would later realize this was a warning.
At the time, the Commonwealth was hit by a nuclear strike , rendering the outside world unsafe. Jon, wanting to keep his team safe, lied. He announced that everyone was required to undertake mandatory overtime, keeping the entire workforce within the facility. He also lied to cover up the carnage that was going on outside, saying there were military training exercises going on and that the sounds of tanks or gunfire were nothing to be worried about. Finally, in an act of desperation, Jon used his terminal access to lock the scientists - including his wife - within the facility.
Jon still opted to send a message to Ericka, telling her the truth about the situation. In his email to her, he reveals that Kemp has the resources needed to escort the team to safety, but that it won’t happen unless they finish the project. Ericka is distraught by the revelation, but after learning about the circumstances she decides to continue working.
Wilfred, one of the co-founders of the company, disregarded the project altogether and began to plot an escape. He first tried to burrow his way out of the inner facility but couldn’t get past its thick outer wall. Abandoning this, he tried hacking into the system to find a way of overriding Jon’s control. By this time, bombs had compromised the facility’s Isotope Containment chamber where the team kept the radioactive elements of their research, meaning that the entire team was slowly being poisoned. All the while, Jon was going in and out to gather supplies. On one occasion, he caught a stray bullet to the shoulder and later died from sepsis. However, he already had a radio prepared that the team could use to request military extraction.
Meanwhile, Ericka was still hard at work, oblivious to the fact that her husband was dead. In one of her last emails to Jon, she reveals that they’re close to a breakthrough, but that Wilfred has barricaded himself in the lab, keeping the team from the samples that they need to test the prototype. She resorted to opening a crawl space and using it to try and get to Wilfred. Yet Wilfred had gotten hold of the facility’s automated defense systems and intended to trigger a security breach. While this would open all the doors and allow everyone to escape, it would also release a wave of hostile robots that killed all the scientists within the facility.
In Fallout 4, hundreds of years after the scientists’ death, the player can make their way through the derelict and ghoul-infested facility to gather the necessary components that finish what the team started. As it turns out, Ericka’s new method would have yielded a sturdy prototype, putting a bittersweet end to the Cambridge Polymer Labs project.
Fallout 4 is available on PC, PS4, and Xbox One.
MORE: Fallout 4: The Story Behind the Cabot Family
- GR Originals
- Create account
- Armor case (Wastelanders)
- BOS camo paint
- Drone (Mothership Zeta)
- Raider scavenger
- Amateur inventor's paint
- Beggar's mat

- Cambridge Polymer Labs
Cambridge Polymer Labs or Cambridge Polymer Labs, LLC is a location in the Commonwealth in Fallout 4 .
- 1.1 Great War
- 1.2 Publications
- 2 Initiatives
- 3.1 Main lobby
- 3.2 Research area
- 4 Employees
- 6 Related quests
- 8 Appearances
- 11 References
The pre- War company contracted with the United States military and specialized in robotics . [1] [Pub 1] Employment benefits included "competitive salary, health coverage, accidental death coverage, and two weeks paid vacation." [2]
It was founded by Jon Elwood , Ericka Elwood-Woolum , and Wilfred Bergman in 2074 to research experimental smart materials that could be used to enhance the functionality of existing suits of power armor . [3] This endeavor was made possible by a grant from Defense Experimental Research Project Initiative , managed by Col. George Kemp . [3] Research conducted in the labs resulted in several components used in the Liberty Prime project that led to the successful defense of Anchorage . [3]
During the Great War , the laboratory building was not bombed. Elwood issued an e-mail to the team, stating that if the project was successful, the military would extract them. He had not spoken to his military contacts, as all external connections were destroyed by the electromagnetic pulse . [4] [5] [6]
The team continued their attempts to produce a working prototype, but a combination of various factors, including Elwood's injuries and the deteriorating mental state of Wilfred Bergman resulted in the project's abandonment. On January 16, 2078 at 4:17 AM, Bergman triggered the automated defenses, causing the deaths of lab personnel. [7] [8] [9]
Publications
Perhaps you heard the radio advertising new and exciting opportunities in this field of research?
Initiatives
- Liberty Prime components [3]
- Nucleostrictive/ Piezonucleic Lining Project [10] [11]
- Nucleostrictive Plating Project [12]
When first entering the polymer labs, directly to the left is the orientation room, where Molly briefs visitors on a job acquired in the quest Cambridge Polymer Labs . Before entering the orientation room, the restrooms are located to the right, and to the right lies a passage that leads to the clean room and allows access to the rest of the facility. Behind the desk is a storage area, and a door to the right leads upstairs to additional storage areas and offices. In the center of the second floor is the director's office, including a terminal providing exposition on what happened directly before and during the Great War .
Research area
The Piezonucleic Power Armor is created by combining "U-238" with "Sample 611 Gold" and "Sample 3111 Lithium hydride." On the first floor and second floor of the research labs, several numbered chemical sample containers can be found. A glowing one is located behind a quarantine door, which must be overridden before it can be accessed for the sample of U-238 stored inside. Immediately upon proceeding past the decontamination room is the primary lab where the "polymer coating applicator" is discovered, which is used to combine the various polymers and isotopes found throughout the other labs.
From room C1, a passageway provides access to the ventilation pipes leading to the other side of the research area and to the locked room C3 where the radioactive containment password is stored. At the end of the ventilation system, skeletal remains are discovered. [13]
- Jon Elwood (director)
- Wilfred Bergman (co-owner)
- Ericka Elwood-Woolum
- Mary Goodman
- Tom Franklin
- Massachusetts Surgical Journal issue #15 - In the director's office (Master locked door) on the second floor, next to a computer terminal, in which the key to the room can be obtained from Molly.
- Vault-Tec Lunchbox - When entering the building, head straight back to the wall and on the right, it can be found on the counter.
- Piezonucleic power armor - Reward for completing the experiment.
- Hazmat suit - In the southwestern-most room, left of room C4.
- Fusion Core - In the west corner of the director's office, second floor within a display case.
- Research Samples.
- Unidentified sample 49 - Second floor, room C1 on the east catwalk, on the desk with the skeleton.
- Unidentified sample 611 - Second floor, near west catwalk, on the desk next to the active computer terminal.
- Unidentified sample 11317 - In the first room of the research area on the polymer coating applicator machine.
- Unknown sample 3111 - In the same room as the hazmat suit (just south of room C4).
- Unidentified sample 413 - In the first-floor room (room C4) directly across from the room with the polymer coating applicator.
- Unidentified sample 65 - In the northwestern-most first-floor room, accessible through the room with unidentified sample 413.
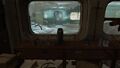
- U-238 can be found in the isotope containment chamber, which can be unlocked via the terminal in C5 (which can be accessed via room C4). The isotope containment chamber is the room immediately to the left of room C2, or rather it's the room immediately to the right of the staircase if facing the said staircase. Across the radioactive waste there is a shelf that contains a single test tube in a rack which is the U-238 sample.
- Suicide note - Next to a skeleton on the second floor in the research area.
- Radioactive containment password - A holotape on the counter in room C3, which gives access to the isotope containment terminal in the room below it, C5.
Related quests
- Cambridge Polymer Labs : The Sole Survivor gets trapped and has to find a way to escape the laboratory in one piece.
- Underground Undercover : After the Sole Survivor gets into the Institute, the Railroad wants them to make contact with an anonymous person inside, nicknamed Patriot, who has been helping synths escape.
- Pest Control : Dr. Binet of the Institute 's Robotics division asks the Sole Survivor to eliminate some feral ghouls that are causing problems for a synth scavenger team.
- Depending on the answers given in Molly's hiring interview, different items will be received respective to the job given in response. The janitor will receive a jumpsuit and a mop, sales will receive a dirty tan suit and a pen, research personnel will receive a lab coat and battered clipboard, and security personnel will receive dirty army fatigues, patrolman sunglasses, and a baton. If the speech check is failed, the lab assistant position will be given, offering a lab coat and a battered clipboard in return.
- During random encounters, eyebots can be met outside of the facility by playing recordings of recruitment ads for the labs.
Appearances
Cambridge Polymer Labs appear in Fallout 4 .
Director's office

Polymer coating application machine
Massachusetts Surgical Journal magazine
Suicide note and unidentified sample 49

Radioactive containment password in room C3
U-238 in the containment chamber
Unidentified sample 611 and Bergman's Password on the terminal
Unidentified Sample 3111
Unidentified Sample 11317
Unidentified sample 413
Unidentified sample 65
- ↑ P.A.M. : " Preliminary analysis complete. " Desdemona : " Anything we need to move on? " P.A.M.: " Affirmative. Code name Patriot requires admin credentials for Code Defender security software. Cross-indexing CIT Security Administrators with 2077 Commonwealth Census Records. Filtering by surviving structures. One match found. Bergman, Wilfred. Bergman, Wilfred registered as co-owner of Cambridge Polymer Labs. Estimated 81% chance of login credentials being located at this facility. " Sole Survivor : "What's at Cambridge Polymer?" P.A.M.: " Cambridge Polymer Labs, LLC had several active military contracts. Specializing in robotics. The region is currently classified as "Extremely Dangerous". " Desdemona: " After you get the password report back here. With any luck, we'll have a game plan by then. " ( PAM.txt , Desdemona/Dialogue )
- ↑ Molly : "Employment benefits include competitive salary, health coverage, accidental death coverage, and two weeks paid vacation." ( Molly (Fallout 4)/Dialogue )
- ↑ 3.0 3.1 3.2 3.3 Molly : "The genesis of Cambridge Polymer Labs lies in the research of a group brilliant graduate students. Jon Elwood, Ericka Woolum, and Wilfred Bergman met during their time together at CIT. This slide shows them at their graduation. Their research into nucleostrictive and piezoelectric polymers caught the attention of Col. George Kemp in the fall of 2073. In the spring of 2074 the company was founded, with a generous grant provided by the Defense Experimental Research Project Initiative. The research produced here has resulted in several of components used in the Liberty Prime project that led to the successful defense of Anchorage. The company enjoys a strong relationship with the military and welcomes your addition to the research team that helps build a better America." ( Molly (Fallout 4)/Dialogue )
- ↑ Cambridge Polymer Labs terminal entries; Director's terminal, It was a warning
- ↑ Cambridge Polymer Labs terminal entries; Bergman's terminal, [J.Elwood] - Mandatory Overtime
- ↑ Cambridge Polymer Labs terminal entries; Ericka's terminal, [J.Elwood] - Confidential
- ↑ Cambridge Polymer Labs terminal entries; Director's terminal, Ericka, please read
- ↑ Cambridge Polymer Labs terminal entries; Director's terminal, [E.ElwoodWoolum] - Are you there?
- ↑ Cambridge Polymer Labs terminal entries; Ericka's terminal, [W.Bergman] - I'm getting us out
- ↑ Cambridge Polymer Labs terminal entries; J. Elwood - Mandatory Overtime
- ↑ Molly : "Have you completed the research on the Piezonucleic Lining Project? " ( Molly (Fallout 4)/Dialogue )
- ↑ Molly : "Sir, wonderful news. The Nucleostrictive Plating Project has finally produced a working prototype. " ( Molly (Fallout 4)/Dialogue )
- ↑ Suicide note
- ↑ Fallout 4 Vault Dweller's Survival Guide p. 407: "This laboratory was a research facility looking into the development of Smart Materials to convert radiation. It appears to have suffered a catastrophic failure after the bombs fell."
- Fallout 4 locations
- Pre-War Businesses
- Cambridge primary locations
- What links here
- Related changes
- Special pages
- Printable version
- Permanent link
- Page information
- Transclusion list
- Browse properties
- Cite this page
Report this post

Fallout 4: Secret Side Quests Everyone Missed & How To Start Them
In addition to an extensive main questline with multiple endings, and the different quests associated with each of the game's many factions, Fallout 4 also features hundreds of side quests and miscellaneous tasks for players to complete. As a result, it is easy to see how players can pour hundreds of hours into its open world, constantly uncovering more stories as they go. While some quests may be obvious and placed in plain sight, others will require a little more exploration, often providing worthy rewards for doing so.
Fallout 4 Guide Hub: Weapons, Armor, Quest Walkthroughs, Tips, & More
Game Rant's guide hub for Fallout 4 has tons of information to help players on their journey, including quest walkthroughs, weapon locations, etc.
The following quests are some of the less obvious side quests in the game, but each will provide players with unique rewards and memorable encounters. The addition of the Nuka World and Far Harbor DLCs have also given players two entirely new areas to explore alongside the Commonwealth.
Updated on May 17, 2024 by Andrew McLarney: With the resurgence in popularity of the Fallout series thanks to the live-action TV series, many players are either returning or approaching Fallout 4 for the first time. For both sets of players, the mysteries of the Commonwealth are out there to be uncovered, and some quests will require players to stumble upon them all by themselves. Not every quest is brought directly to the player or obvious to access, and many will come about purely as a result of exploration.
This Wild Faction May Be Easy To Miss, But They Can Reward The Player With Some Unique Looks
- How To Start: Find the Atom Cats' Garage, located to the north of the Quincy ruins in the south-western corner of the map. Once there, speak to Zeke.
- Quest Rewards: Atom Cats Power Armor Paint, Zekes Jacket & Jeans, Atom Cats faction membership, +150XP
The Atom Cats are a faction obsessed with Power Armo r and for good reason because Power Armor’s awesome. It turns out the members of the Atom Cats are a bunch of softies and want the player to do something nice for a neighbor.
If you complete this important task and manage to rescue the Atom Cats from a Gunner attack you’ll be rewarded with a unique outfit. It’s honestly not that helpful in terms of gameplay, but it does look cool. You’ll also be on the good side of Fallout 4’s equivalent of a biker gang, so there’s that.
Trouble Brewin'
Players may miss out on this quest without thoroughly exploring goodneighbour.
- How To Start: Speak to Rufus Rubins at the Hotel Rexford in Goodneighbour, or find Buddy the Protectron at Shamrock Taphouse.
- Quest Rewards: Buddy The Protectron Companion, 200-400 caps, +200XP
There are tons of quests that players can miss hidden throughout Fallout 4 if they don't enter specific buildings or engage certain NPCs in conversation. Trouble Brewin' is a great example, as it's a quest that can only be started by speaking to an NPC at the Hotel Rexford, or finding a certain Protectron in a location called Shamrock Taphouse. Once players begin the quest, they'll be tasked with locating a Protectron named Buddy (unless they stumble upon him prior to speaking to the NPC at Hotel Rexford).
The quest is fairly straightforward, it's the reward that's pretty special. Players can opt to keep their hands on Buddy, a special drink-mixing robot that can then be sent to any of the settlements that a player has liberated, where he will remain and mix drinks (depending on what recipes the player finds).
Mystery Meat
This hidden quest sheds light on some of the desperate practises of wastelanders in the commonwealth.
- How To Start: Speak with Theodore at Longneck Lukowski's Cannery on the eastern edge of the map near the Kingsport Lighthouse.
- Quest Rewards: 50 caps, +200XP
Speaking of terrible things, players can encounter this quest at the Longneck Lukowski’s Cannery. Two entrepreneurs will be arguing over the viability of a product they’re trying to sell that’s making people sick. At first, everything seems on the up and up as you clear out a nest of Molerats that are causing the problem.
Fallout 4: 15 Quality Of Life Mods We Can't Live Without
Some of Fallout 4's gameplay and interfaces can get clunky luckily, these quality-of-life mods are there to smooth out the rough edges.
Exploring the area will reveal there’s something else going on and investigating the source of the food poisoning will reveal something truly disturbing. No, it’s not the same situation as Soylent Green but it’s just as bad.
Find The Treasures Of Jamaica Plain
This sunken village holds many secrets, including one of the game's strongest melee weapons.
- How To Start: Either find Hadrians corpse (random Commonwealth encounter), Read the Jamaica Plain Flyer found in the infro desk at the Boston Airport or head directly to the basement in the Town Hall of Jamaice Plain.
- Quest Rewards: 2076 World Series Baseball Bat, Unique Pre-War Items (optional), 200-400 caps.
This is perhaps the most interesting hidden side quest as many players will assume it was a worthless endeavor while others will see it as one of the greatest quests and rewards in the entire game. There are a number of ways to kick off the quest and all take players to the treasure hoard said to be underneath the town hall in Jamaica Plain .
If you can survive the swarms of feral ghouls in the town itself, navigate the traps, turrets, and Protectron’s in the basement then you’ll discover the treasure waiting for there. Before you get frustrated at what you find, take a look at the unique baseball bat in the display and give it a few swings.
Last Voyage Of The USS Constitution
A flying galleon crewed by talking robots - what's not to love.
- How To Start: Speak to the Lookout (Mr Handy robot) roaming the streets of Charlestown near the USS Constitution
- Quest Rewards: If player sides with Ironsides - Broadside (unique handheld cannon), Lieutenants Hat, Captain's Quarters personal room, 500 caps +450XP. If player sides with the Scavengers - 1,000 caps, +450XP.
This massive ship is visible right from the beginning but many players are unaware that they can actually go inside and explore it. Those that do discover its accessibility are often turned away by the number of tough enemies it takes to reach it and forget it ever existed.
Those who persevere are introduced to a fun quest given by a bot named Ironsides, who wishes to see the ship return to the ocean where it came from. For players wanting to do something a little outside the ordinary, this is the quest for them.
Pickman's Gift
This secret quest requires players to decode a series of paintings.
- How To Start: Listen to the "Message to Jack" holotape found on a raider's corpse in the Pickman Gallery.
- Quest Rewards: Pickman's Blade, Pickman's Key, +150XP.
Upon entering Pickman's Gallery, which is located just to the east of Cabot House, players will overhear some raiders who are searching for Pickman. Players will have to defeat the raiders in order to recover the holotape and begin the quest. Players will have to trace various clues in Pickman's paintings in order to locate him.
Fallout 4: 15 Pro-Tips For Gathering Scrap & Building Materials
Fallout 4 puts a lot of emphasis on rebuilding rather than character interaction. These are some pro-tips to getting more scrap and materials!
When found, players will have to confront more raiders including a boss named Slab. Even if Pickman is killed during the gunfight, players can still complete the quest by retrieving the key from his body. Overall, it is a unique quest and one that is worth seeking out.
Special Delivery
A family of mad scientists, an insane asylum and a mysterious serum set the backdrop for this side quest.
- How To Start: Approach Cabot House or wait for Edward Deegan to approach the player at Bunker Hill, Goodneighbour or Diamond City.
- Quest Rewards: 150 Caps, +200XP, Cabot Family Questline
"Special Delivery" is the first in a series of quests pertaining to the Cabot family . Players may stumble upon Cabot House in the North-Eastern portion of the Boston ruins, which is guarded by a large Sentry Bot and has an intercom outside. Interacting with the intercom and convincing the occupants to open will trigger the quest, but if not, players will eventually be approached by their ghoul assistant, Edward Deegan, to begin the quest.
While "Special Delivery" itself is not a particularly remarkable quest, the unfolding mystery of the Cabot family over the three quests is one of the most interesting in the game, and will take players to the Parson's State Insane Asylum, a very unique location in the game.
The Great Hunt
The mariner is one of far harbour's toughest residents, and she has one more job for the sole survivor.
- How To Start: Complete Hull Breach Parts 1-3 (Far Harbour DLC) and speak to the Mariner again.
- Quest Rewards: Legend of the Harbour outfit, +300XP
In the Far Harbor DLC, players can encounter the Mariner who is obsessed with a mysterious cryptid said to be destroying any and all boats entering and leaving Far Harbor. The locals think she’s crazy but if players agree to assist her quest they’ll discover there really is a mysterious beast haunting Red Death Island, it’s just not what anyone was expecting.
After successfully vanquishing this monster you'll be presented with an interesting moral dilemma. Tell the truth and bring shame upon the Mariner or lie and see the townsfolk praise her as a hero.
Shipbreaker
A mysterious radio signal will lead players to this epic boss battle.
- How To Start: "Shipbreaker's radio frequency" will trigger randomly while exploring The Island (Far Harbour DLC)
- Quest Rewards: Skipper's Last Stand (unique harpoon gun), 275XP.
In addition to the various NPCs, items and locations players can interact with, a number of interesting quests will also arise in the form of radio frequencies. By turning to the Radio tab of the pip-boy, players can find a list of radio signals and stations, some of which are purely for entertainment, and others which will begin quests.
The Darkest Things You Can Do In Fallout 4
Staying true to the Fallout pedigree, Fallout 4 allows players to make some truly evil choices. These are the darkest of them.
Shipbreaker is a relatively straight forward but rewarding quest . When the signal has been picked up, the Shipbreaker, a unique fog crawler, will spawn in either Britney's Bait and Tackle or the Oceanarium. Once the beast has been defeated, players will be prompted to speak to Old Longfellow, who will grant the player the powerful harpoon gun Skipper's Last Stand.
The Lost Patrol
This brotherhood of steel faction quest is easily missed among the faction's other duties.
- How To Start: Speak to either Paladin Danse or Lancer Captain Kells after completing the mission "Call To Arms".
- Quest Rewards: Fusion Core, Steadfast BOS Combat Armor Chest Piece, Survivor's Special (unique laser rifle), +350XP.
"The Lost Patrol" is a side quest for the Brotherhood of Steel faction in which players must track down a missing squadron of operatives. Players will need to track down distress signals in three different locations in order to recover holotapes explaining what has happened to the team. Along the way, they will encounter high numbers of feral ghouls and super mutants.
Having done this, players will be led to a bunker where a lone survivor, Paladin Brandis, is holding out. Players have several ways they can approach resolving the quest, but to attain the maximum reward it is best to return the holotags to Brandis and try to convince him to rejoin the Brotherhood (if players are, themselves, a member).
The Silver Shroud
This quest will give players a reason to revisit the memory den outside of the main questline.
- How To Start: Listen to the Silver Shroud Radio frequency, or speak to Kent Connolly at the Memory Den in Goodneighbour.
- Quest Rewards: Silver Shroud Costume, 750-1820 caps, +450XP
In this movie-themed quest, players will have to acquire the costume of the character "The Silver Shroud" from the Hubris Comics building. Players will need to deal with quite a large number of feral ghouls inside, and can also recover additional memorabilia items such as the Silver Shroud Photo, Silver Shroud Script and Silver Submachinegun Prop.
Overall, it is an interesting quest which provides insights into the pre-war culture of the Fallout universe. Players can also get a unique and cool-looking mobster outfit, along with a very high amount of caps and XP for a side quest.
A Hidden Vault Houses A Dramatic Murder Secret
- How To Start: Head to the Cliff's Edge Hotel on The Island (Far Harbour DLC)
- Quest Rewards: 200-1270 Pre-War Money, +400XP (Part One), +300XP (Part Two)
Players that have access to the Far Harbor DLC will find a new area teeming with all sorts of quests, but some of them manage to stand out compared to others. Brain Dead is one of the better quests that the add-on offers, even if the rewards are a bit lackluster for most players. The real reward is the quest itself, which begins in a rather strange way and ends up culminating in a twist ending that's pretty eye-opening.
Where to Find All Fallout 4 Vaults (Fallout 4 Vault Locations)
All of the Fallout 4 vaults have their own disturbing backstories, not to mention a ton of great loot for the Soul Survivor to add to their inventory.
Players will need to use their detective skills for this one, as they'll be attempting to solve an actual "murder mystery." It's a lot of fun and a good way to break up the monotony of fetch quests and hunts.
Hole In The Wall
Revisiting vault 81 after completing its initial quests can be one of the best decisions players make.
- How To Start: Return to Vault 81 one day after completing "Here Kitty, Kitty".
- Quest Rewards: Syringer Rifle, Vault 81 Room, Curie as a Companion.
Vault 81 is one of the few remaining vaults that hasn’t been subjected to some horrific backstory where the inhabitants were killed, mutated, or transformed. But that doesn’t mean there aren’t dark secrets to be found.
After completing a few quests players can return to the Vault and discover a young boy who has fallen ill after getting bitten by a molerat. They must then explore a hole in the wall that leads to a nest of molerats, the Vault’s dark secret, and an incurable illness that may haunt the player for the rest of the game.
The Devils Due
Among the game's creepier settings, the museum of witchcraft houses many secrets.
- How To Start: Visit the Museum of Witchcraft and listen to Private Hart's holotape.
- Quest Rewards: If the player delivers the egg - 200 caps, Deathclaw Wellingham recipe, +400XP. If the player returns the egg to its mother - Deathclaw Gauntlet, +400XP.
When the guard of a major city informs you of shady goings-on at a place known as the Museum of Witchcraft you know you’re in for a wild quest. Players will encounter a slain team of Gunners and a ferocious beast in the museum.
Then you're introduced to an interesting ethical dilemma straight out of Jurassic Park 3 . If players fulfill the Gunner’s quest they’ll be given a useful recipe. If they refuse and deliver the valuable object they’ll receive a bizarre weapon from an unlikely source.
Trip To The Stars
A chance encounter will lead players on this interesting journey.
- How To Start: Speak with Dara Dubbell in the Hubologist's camp (Nuka World DLC)
- Quest Rewards: Hub's Alien Blaster, 10x Alien Blaster Rounds (if the player kills the Hubologists), 100x Alien Blaster Rounds (if the player doesn't kill the Hubologists), +450XP
In the Nuka-World expansion players have the chance to encounter a group of cultists known as the Hubologists, so named after the founder Dara Hubbell. This subtle jab at Scientology, which was founded by L. Ron Hubbard, presents an interesting questline with some neat rewards.
9 Best Open-World Post-Apocalyptic Games, Ranked
Many open-world games set themselves after some sort of apocalyptic event. These titles, however, are easily the best ones available.
The quest involves clearing out a group of robots, securing three fusion cores , and helping the Hubologists activate what they believe to be a genuine spaceship. Before you go calling this group of insane cultists crazy, keep in mind one of their rewards is ammo for the Alien Blaster obtained from a genuine extraterrestrial.
Kid In A Fridge
Perhaps one of the best-hidden side quests in the game.
- How To Start: Find the refrigerator near the ruined houses south of University Point. Players may hear the kid calling out for help which will start the quest.
- Quest Rewards: If the player escorts Billy home - 500 caps, 250 caps (if the player saves the family from the Bullets), +150XP. If the player sells Billy to the Bullets - 350 caps, +150XP.
This unfortunate situation has a lot of terrifying implications as players can encounter a young boy shouting from inside a fridge. It turns out he hid in there during the initial blast, got locked inside, turned into a ghoul, and has been stuck inside for the last 200 years.
Players are given the option of taking him home or selling him to the local Gunners. It’s hard to imagine anyone taking this boy that’s been trapped inside a fridge for 200 years and delivering him to a local gang to become a slave, but players have done a lot worse for less in this game.
Here There Be Monsters
Set on a submarine, it is easy to see why many players missed this the first time.
- How To Start: Speak with Donny Kowalski at the docks near the Shamrock Taphouse, or swim in the water nearby and encounter the Eye Stalk.
- Quest Rewards: Three Homing Beacons to launch tactical nukes from the submarine, 4x Pre-War money, 200 caps, Zao's Sword, +200XP
This is one of the more interesting quests in the game as few fans consider the moral implications of it. On the docks near Shamrock Taphouse, players will find a young boy who’s babbling about a monster in the ocean. If they investigate they’ll soon discover it’s not a monster, but an old nuclear submarine from the pre-war days known as the Yangtze.
A ghoul on board, also pre-war, called Captain Zao informs the player he’s trying to get the submarine seaworthy to travel back to China after successfully completing his mission 200 years ago. It shouldn’t take much for players to put together what a nuclear submarine from China was doing in the port of Boston 200 years ago, and you are then presented with an option on how to handle this information.
Platform(s) Xbox Series S, Xbox Series X, PS5, PS4, PC, Xbox One
Released November 10, 2015
Developer(s) Bethesda
Genre(s) Action, RPG

IMAGES
VIDEO
COMMENTS
Cambridge Polymer Labs is a side quest in Fallout 4. The objective is to find chemical samples in the abandoned Cambridge Polymer Labs and complete a 200 year old science experiment. Upon entering the Cambridge Polymer Labs, the Sole Survivor is greeted by a Miss Nanny robot named Molly. She asks if they have come to fill a job position. By answering yes, Molly will give the player character a ...
Grab the sample and return to the main area with the Polymer Coating Applicator terminal and Chemical Reagent slots and Isotope Sample slot. Place the U-238 in the Isotope Sample slot on the far ...
Click onto the computer and select the option to identify the samples. Exit the computer, retrieve the samples and place other two containers there. Keep repeating the action until you have identified all of the samples. With all of the samples identified, slide Lythium Hydride and Gold into the slots on the left.
About Press Copyright Contact us Creators Advertise Developers Terms Privacy Policy & Safety How YouTube works Test new features NFL Sunday Ticket Press Copyright ...
Sub Here!: http://www.youtube.com/subscription_center?add_user=Attlas93 TIMESTAMPS BELOW!00:10 Hang around any of the wandering eyebots in the commonwealth t...
This is how you finish the Research Project at Cambridge Polymer Labs and get the Piezonucleic Power Armor.Additionally when wearing: Radiation exposure incr...
Take all three ingredients and place them on the console; hydrate in the left reagent space, gold in the right reagent space, and isotope in the far right space. Use the terminal the start the ...
Layout. The building has a number of rooms that lead to deadends. When first entering the labs, a robot named Molly will greet and invite you to an interview. From here, you can either follow her ...
Walkthrough. This quest becomes available during The Railroad quest Underground Undercover. After taking the orientation tour given by the robot Molly and entering the clean room you are sealed in the lab. On the way to escaping the lab you can complete the research project that has been started. Take the mystery sample on the terminal in the ...
Examine Bergman's terminal. If you selected to override the security, all robots, including Molly will become hostile. If you destroyed Molly, don't forget to loot the CPL key from her wreckage. Also, the quest will be tagged as "Completed" but the main objective which is to "Complete the Research Project" will still remain active.
Cambridge Polymer Labs (quest) is a quest that can be obtained in the Commonwealth in Fallout 4. In order to explore the deepest parts of the Cambridge Polymer Labs facility, the Survivor has to accept a provisional position as Sales Associate at the laboratories. What the robot doesn't say is that it also means that they are stuck inside the labs if they choose to pass the clean room. The ...
Head to the southern side of the Institute , into the door to the right of the stairwell. Head through the next room, then enter the elevator on your left. Exit the elevator and you'll find the ...
Welcome to Act 2 of the Fallout 4 main story. ... Molly's directive is to keep the lab secure until a 200+ year old research project has been completed. You can complete the research yourself to ...
1) Speak to Desdemona before you teleport to the Institute. 2) Upload the holotape. 3) Meet up with Patriot. 4) File your mission report on P.A.M.'s terminal. 5) Go to Cambridge Polymer Labs. 6 ...
Fallout 4 walkthrough by an experienced player! Here's how to 'complete the research' in the Cambridge Polymer Labs quest in order to earn the unique Piezonu...
6 Tom Franklin's Suicide Note. Working conditions inside of the labs became so bad that some scientists decided to take their own lives. One of these scientists was Tom Franklin. The radiation ...
The Cambridge Polymer Labs Research Project. I have to combine 'unknown samples' in order to create Gold and Clorium Hydrate. I managed to find 6 different samples throughout the facility. One of the samples disappeared when I ran the scan that came up with Gold, one of the two things I have to find. I have combined all the others in every ...
Published Feb 4, 2022. The Cambridge Polymer Labs is a location in Fallout 4 that triggers a quest which involves completing an experiment to acquire a special piece of power armor. While the ...
The team continued their attempts to produce a working prototype, but a combination of various factors, including Elwood's injuries and the deteriorating mental state of Wilfred Bergman resulted in the project's abandonment. On January 16, 2078 at 4:17 AM, Bergman triggered the automated defenses, causing the deaths of lab personnel.
I have successfully completed the Research Project, but still have the Quest showing "FAILED: Complete the Research Project." I have made and grabbed the power armor chest. I've been unable to figure out the Quest ID to manually force quest progression, so I've been stuck for awhile now. I have tried commands like "sqt" in the console to find the Quest ID but without success. I hope you can ...
Fallout 4 - How To Get PIEZONUCLEIC POWER ARMOR CHEST (Cambridge Polymer Labs) Full Walkthrough / Build Piezonucleic Power Armor Chest at Cambridge Polymer L...
Once you complete the above quest, you will gain access to the ability to create Zetan capacitors for your Gatling Laser, Laser Gun, Laser Musket, and even the Alien Blaster. ... Go here if you don't know how: Enable Modding for Fallout 4 To uninstall, delete the Research Projects.esp, though you will want to clean up the files in the Meshes ...
How To Start: Find the refrigerator near the ruined houses south of University Point. Players may hear the kid calling out for help which will start the quest. Quest Rewards: If the player escorts ...
IGN's complete Fallout 4 Wiki Guide and Walkthrough will lead you through every Quest, Location, and Secret in Bethesda's newest post-apocalyptic adventure on PC, PS4, and Xbox One. See the list ...