Tutorial: Save your PowerPoint as a Video
It pays to know how to save PowerPoint as video. Whether you are preparing a PowerPoint presentation for work, school , non-profit, staff training or investor relations. Content marketing is one of the biggest trends of the past couple of years and knowing how to distribute your content via various media is critical to business success. This article will guide and show you, step by step, how to save your PowerPoint presentation in video format. Next, we discuss the advantages of PowerPoint to video conversion and how you can put a single presentation to greater use. This guide is written by 24Slides’ Powerpoint experts and includes instruction on using PowerPoint for Mac.


6 Reasons to save PowerPoint as video
So you are considering saving your PowerPoint presentation as video? Before we show you how to do it, let’s talk about why it’s a great idea to convert your PowerPoint to video.
- You can show your presentation to a wider audience by sharing the video on YouTube and other video platforms.
- Your audience do not need to have a copy of Microsoft PowerPoint to view your presentation.
- Burn your presentation video on CD or DVD and giveaway as promotional material to clients or potential customers.
- Leverage your presentation and increase the return on investment (ROI) of your presentations by distributing them as video.
- The technical ability of your audience will not become a barrier to delivering your message. Your video becomes easy to access without the knowledge and understanding of powerpoint.
- Your audience will see your presentation exactly as you have intended it to be seen. Unlike sharing it as a presentation, some slides may get deleted or changed.
Now that you know why you’re on the right track by learning how to save PowerPoint presentations as video, let’s get into the process of exactly how to do it.
How to save PowerPoint 2010 as a video
If you are still using PowerPoint 2010 to create your presentations, you’ll be pleased to know you can still convert your PowerPoint to video. The process is som simple that you’ll wonder why you haven’t been doing this all along.
Whether your presentation contains just text or is a multimedia presentation with sound narration, transitions and video, you will be able to convert it into video. Microsoft PowerPoint allows you to save PowerPoint as video in Windows Media Video (.wmv) file format. If you plan for sharing your presentation as a video before creating it, you can decide whether to record the narration before creating the presentation.
Here are the steps you need to follow:
- Create your PowerPoint presentation as normal and save it.
- If you’re using narration for your presentation, record the narration and add timings to the slideshow.
- Select the File menu and click on Save & Send .

- Under the Save & Send menu, find and click on Create a Video .

- Click on the Computer & HD Displays option to customise the video size and quality (small, medium and large size & quality).

- Click the Don’t Use Recorded Timings and Narrations to select if you’re using timings and narrations.

- Click Create Video and another dialogue box opens.

- Enter appropriate filename and saving location to save your newly created video.
Once your presentation to video conversion is complete, the video is ready to share via Facebook, Youtube, Vimeo or email.
How to save a PowerPoint 2007 presentation as video
There are many users still running Microsoft Office 2007, hence PowerPoint 2007 on their computers. If you are one of them, don’t worry, there are ways to convert your PowerPoint to video using a bundled Microsoft product, Windows Movie Maker.
If you want to convert a PowerPoint 2007 presentation to video and you are running a newer version of the program, you can open the file within PowerPoint 2013. You can then use the Create a Video feature to convert your PowerPoint to video.
Alternatively, if you only have access to PowerPoint 2007 and have a copy of Windows Movie Maker installed, you can save your presentation as image files (.jpg). Once you’ve saved each slide, fire up Windows Movie Maker and start a new project.

Next, import all the slides you saved as images into the new project and create your video.

Note: You can include transitions in Windows Movie Maker. However, animations will not convert when you save the slides as image (.jpg) files. Make sure you modify your slides to remove any animations and ensure you do not lose vital parts of your message before saving as images.
If your presentation has narration, you can import the the sound file directly into Windows Movie Maker. If you do not have the source audio file, you can save the presentation as a web page (a separate .wav file is created). You can then import the .wav file into your Windows Movie Maker video.
How to convert your PowerPoint to video in PowerPoint 2013 in 7 Steps
Turning your PowerPoint 2013 presentation slides into a video is easier than you think. In seven simple steps, you can turn your presentation into a video you can share with viewers wherever they are. Here’s how you do it.
- Access Powerpoint’s Backstage View by clicking on File.

- Select Export and click on Create a Video to access the video export menu.

- Click on the Create a Video option and expand the Computer and HD Displays option to select output video size and quality settings.

- Click on the drop down arrow to expand the Use Recorded Timings and Narrations menu. Use this to select whether you’re using recorded timings or not. If not using recorded timings and narrations, set the duration of each slide using the timings option at the bottom.

- Click the Create Video button to show the Save As dialogue box.

- Select the location where you want to save your video and choose a suitable filename for the video file. Also choose the video file type.

- Click Save and PowerPoint will begin converting your presentation to video. This may take a couple of seconds or a few minutes depending on the size of your presentation.

When the video creation is complete, the video is ready to view, upload to your website, Facebook, YouTube or sharing by email.

How to save a presentation as a movie file in PowerPoint For Mac
If you have an Apple computer running a Mac version of PowerPoint, you can convert your presentation into a movie for easier and wider distribution. The process is similar to Windows system with the inevitable differences between the operating systems. In just a few simple steps, you will be able to turn your powerful presentation into a movie file. The following limitations apply:
- The output is a .mov file compatible with only the Quicktime player or 3rd party converting programs.
- You will lose transitions and animations within the presentation and so make sure you modify your presentation prior to converting it.
- You will also lose narration during the conversion process, you may wish to add the narration as an audio soundtrack to the movie.
The steps are as follows:
- Click on File and choose Save as Movie .

- Click Movie Options to add a background soundtrack (music or your narration) or credits.

- Click Movie Settings to adjust the output quality and video size settings. You can also choose the slide durations, to create a looping video and slide transitions under this option.

- Click OK to close the Movie Options dialogue box.

- Click Save to start creating your video. The process will take a couple of seconds or longer depending on the size and quality options you select.
Once the process is complete, your movie is ready for playback or to convert into other file formats and share via Social Media or other outlets. If you’re using PowerPoint for Mac 2008 and 2011, these steps will work for either.
How to create a video from PowerPoint 2016
You can create a full-fidelity video from your presentation in PowerPoint 2016 in MPEG-4 (.mp4) or Windows Media Video (.wmv) format. In just six steps, you can turn your presentation into a video you can share and distribute on Facebook, YouTube, burn to DVD or via email. Here’s how you go about it:
- Click on the File tab to show file options.

- Scroll down and select Export and navigate to Create a Video.

- Select your video settings preference (video quality, timings and narration, video size).

- Click on Create a Video.

- Choose a filename, saving location and video type (.mp4 or .wmv).

- Click on Save to start video creation process.
This article has shown you how to convert and save PowerPoint as video. Once you’ve delivered a powerful presentation to an audience, making it available afterwards is always a great idea, especially for training presentations. To maintain the presentation in its entirety, saving it as a video and distributing it is the best option. By converting a presentation to video, you are able to reach a wider audience through YouTube, Facebook and other video hosting and sharing sites. We hope you’ve gained some useful insights on how you can achieve that following the simple, step by step guides for the version of PowerPoint you are running.

Did you know?
At 24slides, we provide stunning Powerpoint presentation services and are able to help you and your team have an incredible presentation to film. Take a look at some examples of our work and let’s get in touch . Alternatively, feel free to browse and download hundreds of free Powerpoint templates from our library.
You might also find this interesting: How to Create Social Media Videos With PowerPoint
Create professional presentations online
Other people also read

How To Convert Google Slides To PowerPoint and Vice Versa

How To Add Animations To PowerPoint

How To Create The Best PowerPoint Presentation Background
How to video record yourself presenting a PowerPoint

What type of content do you primarily create?

Recording yourself presenting a PowerPoint can be challenging, especially getting the technical aspects right. You need to capture your screen, webcam, and audio seamlessly while delivering your content naturally and avoiding awkward transitions between slides.
Finding a tool that integrates all these components can seem daunting. However, recording yourself presenting a PowerPoint doesn't have to be reserved for the tech-savvy or professional speakers.
Whether you're a teacher creating online lessons, a marketer producing a product demo, or someone looking to improve their presentation skills, this guide will walk you through user-friendly tools and strategies that will teach you how to video record yourself presenting a PowerPoint.
- Recording yourself presenting a PowerPoint can be challenging, but it doesn't have to be reserved for experts.
- Video recording offers unlimited reach, repurposing opportunities, and a more engaging experience.
- Use PowerPoint's built-in recording feature or tools like Descript for a polished presentation.
- Other tools like Zoom, Loom, OBS Studio, Clipchamp, and Quick Time Player can also be used for recording.
- Tips include practicing your script, using slide notes, ensuring high-quality audio and lighting, and incorporating storytelling techniques.
Why video record yourself presenting a PowerPoint?
Video recording your PowerPoint presentations offers several advantages:
- Unlimited reach : Unlike in-person presentations confined to a specific time and location, recorded videos allow your message to reach audiences globally at their convenience.
- Repurposing opportunities: Recorded presentations can be repurposed as evergreen content across multiple platforms, such as social media, online courses, webinars, and internal training materials, maximizing their value.
- Personal and engaging : Recording yourself narrating a presentation adds a personal touch and dynamic element that static slides alone cannot replicate. Your viewers can see and hear you deliver the content, creating a more immersive and engaging experience.
How to record your presentation with the PowerPoint app
Built-in recording feature in powerpoint.
1. Open the PowerPoint slide you want to record.
2. Click on the Record tab of the top toolbar.
3. Click on the Record button and choose from any of the following options:
- From Current Slide
- From Beginning
4. You'll see the PowerPoint screen recording window.
5. Select the microphone and camera from the icon on the top-right.
6. Click the Stop and Replay buttons to end or replay your recording.
7. To export your presentation's recording, click Export to Video within the Recording tab.
Benefits : Easy to use, no external tools needed
Limitations : Limited editing capabilities.
How to make a more polished recording of your presentation with Descript
While PowerPoint's built-in recording features are helpful, they may not produce the refined result you want for your presentation. That's where Descript comes in handy.
It’s a whole production studio at your fingertips, with video recording, transcription, and editing capabilities, ready to transform dull PowerPoint slides into an engaging experience for your audience. Descript also has a built-in screen recorder.
You can use Descript on Windows, Mac, or even straight from your web browser.
Here's step-by-step guide to recording your PowerPoint presentation with Descript.
Set up your screen recording
1. Install and open Descript. At the top of the editor, click and open the Record panel.
2. Select Screen.
3. Set Recorder settings:
Adjust the default recording settings to your liking, including the transcription language, the maximum recording resolution, and more.
4. Set recording options. Choose which audio and video sources to record (e.g., microphone, computer audio, camera). Remember to turn the camera on to capture your talking head video alongside your PowerPoint presentation.
5. Click the Additional Settings icon for
- Studio Sound (Optional): Enhance audio quality with noise reduction and background removal
- Transcription (Optional): Enable automatic transcription for easier editing
- Recording separate audio tracks
6. Add (optional) Speaker labels for each audio track (e.g., "Narrator," "Expert") by typing them in the text box next to your audio inputs.
Capture your screen recording
1. Select the right recording option:
- Recording into script : Choose this if you haven’t recorded anything yet.
- Replace selection : Choose this if you already have a script and want to replace a specific section with a new recording.
- Record new layer : Pick this for recording your video as a new layer on top of an existing recording.
2. Click Record at the bottom of the Record panel.
3. Drag over the area of your screen you wish to record. Click Start Recording. Press Space to start recording the full screen.
4. Click Stop to finish recording
Bonus: Descript creates separate tracks for camera, microphone, and computer audio. You can edit each track individually for more precise control.
- Do a short test recording to ensure everything is set up correctly.
- Set your recording to transibe for easier editing.
Editing and polishing your PowerPoint recording in Descript
Descript's AI video editing tool makes it a breeze to trim, cut, and splice your video footage, ensuring a seamless flow from start to finish. You can add smooth transitions and other visual effects to make your presentation pop.
Here’s a glimpse of how to edit and polish your PowerPoint recording in Descript:
Edit your recording like a doc
Did you make a mistake during a slide transition? No problem. Just delete those sections in the text transcript (created automatically by Descript) and the video will adjust to match.
Remove filler words
Sound smoother and more confident by easily removing filler words like "um" and "uh" from the transcript.
Fix voiceover mistakes by typing
Didn't nail your delivery on a specific slide? No need to start from scratch! Descript's Overdub feature lets you simply type in the correct narration and replace the audio on that slide with AI voice cloning.
Boost video quality and engagement :
- Crisp up audio quality by reducing background noise and room reverb with the AI-powered Studio Sound feature.
- Replace your background completely with the Green Screen Video Editor —look like you're presenting in a sleek studio or broadcasting from a beach.
- Enable Eye Contact simulation with AI, so it appears you're making direct eye contact with viewers, even if you’re looking or reading something off-camera.
Other ways to video record yourself presenting a PowerPoint
Use Zoom’s meeting recording feature to record yourself giving a PowerPoint presentation. Start a Zoom meeting with yourself, share your PowerPoint window, and enable recording
Loom is a handy screen recording tool that also offers a webcam overlay. Launch the Loom app or Chrome extension and set it to record your screen and webcam. Expect high-quality recordings but no advanced editing features. The free plan offers only five minutes of recording at a stretch.
3. OBS Studio
OBS Studio is a free, open-source screen recorder/streaming software with a steeper learning curve. It’s popular among advanced or tech-savvy users who need granular customization and control.
To record your presentation, add a "Screen Capture" source to capture your PowerPoint window and a "Video Capture Device" source for your webcam.
4. Clipchamp: Recording natively in Windows
You can use Microsoft’s Clipchamp , the built-in screen recorder and video editor for Windows, to simultaneously capture your computer screen, webcam, and audio for recording your PowerPoint presentation. It’s also available as a browser-based app. You can record up to 30 minutes on screen and webcam recordings.
Users can also adjust the screen and webcam recordings in the editing timeline separately.
5. Quick Time Player Recording natively in Mac
Use Mac’s Quick Time Player to record your PowerPoint presentation. It’s not as straightforward as the other options on this list, so here’s a quick guide to help you out:
- Launch Quick Time Player.
- Select File and go to New Movie Recording.
- You'll be recording your entire screen in addition to recording your face, so adjust the size and location of the recording window so that it's in a nonintrusive corner of your PowerPoint.
- Go to View and select Float on Top .
- Next, go to File and select New Screen Recording.
- On the menu that appears, select Record Selected Portion and drag a border around your PowerPoint and the webcam recording window.
- Press Record and start presenting.
- You can adjust the video quality and the audio source in the webcam recording window.
How to turn your PowerPoint presentation slides into a video
Did you know PowerPoint lets you save your presentation as a video, too?
Here's a breakdown of the two ways you can do so—keeping all the presentation elements (narration, animation, pointer movements, timings, and so on) intact in the presentation itself.
Save your PowerPoint presentation as a video
This creates a separate video file (MP4 or WMV) that anyone can play, even without PowerPoint.
Follow these steps:
- Save your presentation
- Go to File > Export > Create a Video
- Ultra HD (4K): Best for large screens (if you have Windows 10+)
- Full HD (1080p): Great for computers and TVs
- HD (720p): Good for streaming online or on DVDs
- Standard (480p): Smallest size, good for phones
4. Decide on narration
- If you haven't recorded yourself talking, choose "Don't Use Recorded Timings and Narrations" from the dropdown menu
- If you have a recording, choose "Use Recorded Timings and Narrations." You can also set how long each slide shows for (default is 5 seconds)
5. Click Create Video
6. Name your video, pick a folder to save it in, and choose a file type (MPEG-4 or Windows Media Video)
Creating the video might take a while, especially for longer presentations. You can even leave it running overnight. Once done, find your video in the chosen folder and double-click to play it.
Save your PowerPoint presentation as a slideshow
This saves your presentation as a special file (PPSX) that starts playing automatically on full screen when opened. It only works with PowerPoint.
Here’s how it works:
- Make sure your presentation is saved (regular PowerPoint file)
- Go to File > Save As .
- Pick a folder to save the slideshow in.
- Under Save as type, choose PowerPoint Show (*.ppsx) .
- Click Save .
Now when someone opens the file, it will automatically play the slideshow.
Pro tips for making better video PowerPoint presentations
Practice your script.
Recording a flawless PowerPoint video rarely happens in one take. The key is practice.
Record practice run-throughs and watch them back. Make notes on areas that need improvement or parts lacking clarity. The more you drill your script, the more confident and natural you'll sound in the final recording.
Take advantage of PowerPoint's built-in Speaker Coach . The feature shows you whether your pace is too fast or slow, your use of filler words like "um," and suggestions to improve your voice modulation.
Use slide notes for coherent delivery
Wouldn’t a personal teleprompter make presentations so much easier? That’s what slide notes are for.
Having your thoughts and talking points organized within your PowerPoint file lets you have all crucial information and prompts readily available when recording.
Go ahead and add detailed notes or even a full script for each slide. This will help you stay on track and provide a handy transcript reference if you need to do any editing or voiceover work in post-production.
Use high-quality audio equipment or turn on Studio Sound
Poor audio recording quality is a surefire way to make even the most visually polished video feel amateurish. Do your presentation justice by investing in a decent external or Bluetooth microphone and audio interface to capture clear voiceover audio.
If you must use a built-in mic, record in a quiet environment to minimize background noise pickup. Or better yet, pair up with an AI-powered audio enhancement tool like Descript's Studio Sound , which reduces background noise , reverb, and other artifacts.
Ensure a clean background and even lighting
Ditch cluttered backgrounds. You want people to focus on the content of your PowerPoint and not be distracted by the funny shapes and colors in your video.
Your video lighting and framing matters, too. Position yourself facing a natural light source or bring supplemental video lighting to eliminate weird shadows and squinting-level glare.
Look directly into the camera or turn on Eye Contact
Looking directly into the camera is essential to create a sense of connection with the audience. Position your webcam or camera at eye level and imagine you're talking to a friend. If you're using Descript, enable the Eye Contact feature to auto-adjust your gaze towards the camera.
- Dress professionally and maintain a good posture to project confidence and authority.
- Use visuals, animations, and multimedia elements to enhance your presentation and keep your audience engaged.
- Consider adding closed captions or subtitles to your video for better accessibility and engagement, especially for those watching without sound.
- Speak clearly and at a moderate pace, using vocal variety to emphasize key points and maintain interest.
- Incorporate storytelling techniques, real-life examples, or personal anecdotes to make your video presentation more relatable and memorable .
Take your PowerPoint presentations from amateur to amazing
Recording yourself virtually presenting a PowerPoint allows you to distribute your message using the most engaging type of content: video. And there are many screen recording tools out there that can capture your screen and web camera footage with just a few clicks.
But how do you stand out?
By focusing on the presentation's depth, your delivery, and the video's quality. The first two are the bare minimum to communicate your message effectively.
But the right screen capture software and all-in-one video creation tool like Descript can help you with third. Use the tool to improve the quality of your recorded PPT presentations.
With Descript, it's easier than ever to record your screen, polish up the audio, and create stunning visuals all in one place. So why wait?
Sign up for Descript today and simplify your workflow while creating a PowerPoint presentation video that sticks with your audience in the long term.
How do you make a presentation video with your face?
To create a presentation video with your face, follow these steps:
- Open your presentation in PowerPoint.
- Go to the Slide Show tab.
- Click on Record and choose From Current Slide or From Beginning .
- Choose your microphone and camera by clicking on a sound icon on the top-right.
- Start recording by clicking on the record button.
- Speak into your microphone to narrate the presentation.
- Your webcam will capture your face during the recording.
- Click Stop when you finish recording.
- Export your recorded presentation by clicking on File> Export>Create a video.
How do you present yourself in PowerPoint?
To present yourself effectively in PowerPoint, follow these steps:
- Determine the key information to include in your presentation.
- Design and prepare your PowerPoint slides with a cohesive theme.
- Craft a compelling introduction to engage your audience.
- Tailor your presentation to different time constraints for flexibility.
- Capture the audience's attention before you begin speaking.
Related articles
Featured articles:
10 excellent Loom alternatives to record your screen
Looking for the best ways to record your screen without Loom? Find out 10 Loom alternatives, their features, and pricing.

How to record a YouTube video: A guide for all devices
If you want to record a YouTube video for personal use or fair-use repurposing, here are the steps to get started.

For Business
Social media video marketing: Everything you need to know
Learn how to win over potential customers (and the algorithms) with the right social media video marketing tools, strategy, and optimizations.

How to record a podcast on Zoom: A beginner’s guide
Follow this step-by-step guide on how to record a podcast on Zoom, then learn about why it may not be your best recording option.

How to record a Microsoft Teams meeting: 5 easy ways
Learn how to record a Microsoft Teams meeting on any device and get answers to common problems.

10 effective how-to videos to engage your audience
How-to videos are a great way to educate your audience. Whether you’re recording a software demo or training instructions, here’s how to create a how-to video.

Articles you might find interesting
How They Made It
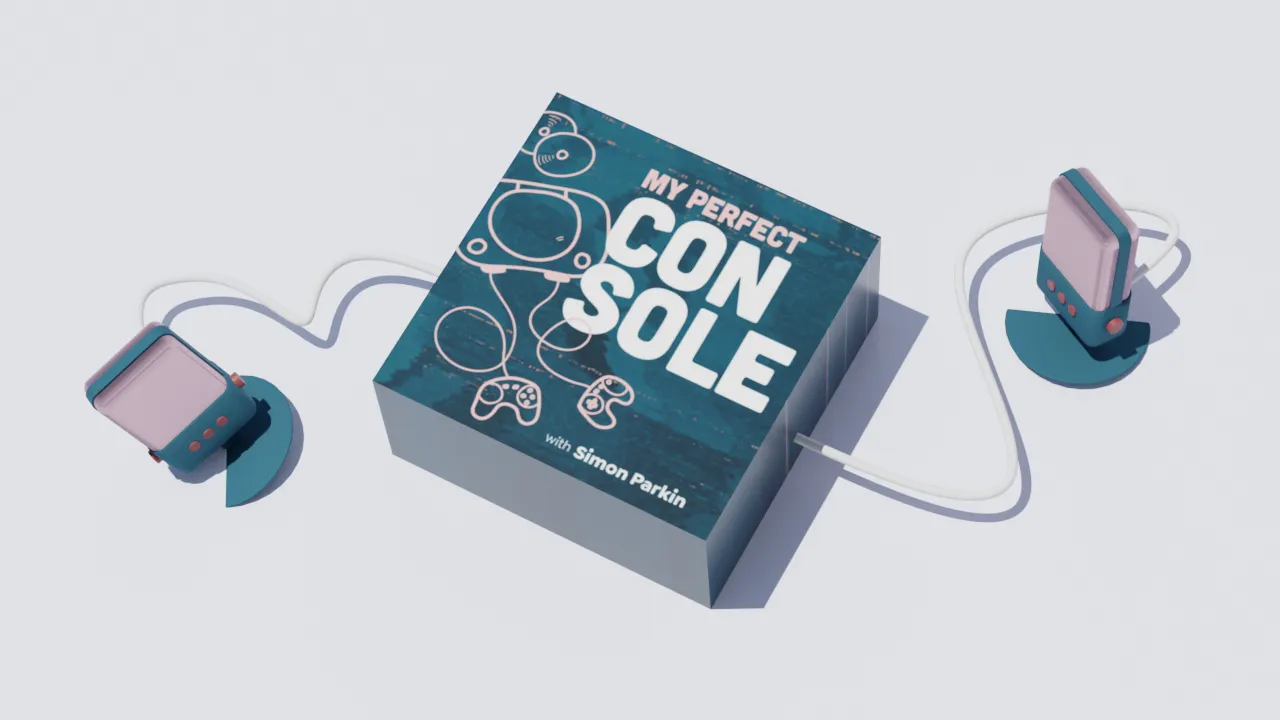
My Perfect Console’s Simon Parkin on how to make your interview podcast stand out
Simon Parkin didn't set out to make an indie podcast, but that's what he did. He shares how a sharp format helps his interview show stand out and how to stay creative with a day job.
%20(1).JPG)
Corporate video production: A complete guide for beginners
Craft memorable videos to elevate your brand with expert corporate video production tips that streamline your workflow and save you time.

How Studio Sound can liberate your workflow
Finding the right tone of voice ought to be simple: speak naturally, sound like yourself, and ignore anyone who gives you grief about it (they probably will, especially if you’re a female creator).But for whatever reason it’s not simple at all for a lot of us. Here are a few tips and tricks from creators who have mastered tone of voice.

AI for Creators
The ultimate list of AI tools for creators (2024)
Here's a list of tools for all flavors of creator, from podcasters to visual artists, so you can work faster and be more creative.

Ross Sutherland of Imaginary Advice on podcasting's parallels with poetry
We spoke with Ross about how poetry led him to podcasting, how budget constraints led to his signature style, and why pursuing your passion as a full-time job may not be your best option.

3 unique ways to grow an interview podcast
If you have an interview podcast and you’re looking to grow your audience, congratulations: you already have built-in growth potential. Here's how to take advantage of that potential.

Join millions of creators who already have a head start.
Get free recording and editing tips, and resources delivered to your inbox.
Related articles:
Share this article
How-To Geek
How to add a video to a microsoft powerpoint presentation.

Your changes have been saved
Email Is sent
Please verify your email address.
You’ve reached your account maximum for followed topics.
7 Reasons Why Windows Users Avoid Linux (Which Aren’t True Anymore)
If you’ve never used the iphone shortcuts app, here’s the best way to get started, i spent $200 to replace my perfectly good headphones just for these two features, quick links, embedding videos versus linking to videos, supported video formats in powerpoint, how to insert a video into a powerpoint presentation, manage an embedded video's playback in powerpoint.
Videos can make presentations even more interesting or exciting. If you're looking to add a video to your Microsoft PowerPoint presentation, it's easy to do so. We'll show you how.
In PowerPoint, you can either embed a video or link to a video from your presentation. If you embed a video, your video becomes part of the presentation, which increases the overall size of the presentation file.
Related: How to Send PowerPoint Presentations With an Embedded Video
If you link to a video, PowerPoint only adds a reference to that video in your presentation. The downside of this method is that you need to send the video file separately if you share your presentation with someone. We have written a guide on how to send PowerPoint presentations with videos , so check that out.
In this guide, we'll focus on embedding a video in your presentation so you don't have to worry about sending separate files. And, if you're looking to add a YouTube video to your presentation , there's a way to do that, too.
Related: How to Embed a YouTube Video in PowerPoint
PowerPoint supports multiple video formats, including ASF, AVI, MP4, M4V, MOV, MPG, MPEG, and WMV. If your video is already in one of these formats, you can quickly add that to your presentation.
If your video is in another format, you can convert it to a supported format and then add it to your presentation.
Related: How to Use Handbrake to Convert Any Video File to Any Format
First, make sure the video you want to add to your presentation is saved on your Windows or Mac computer. Then, open your presentation with PowerPoint on your computer.
On the PowerPoint window, in the left sidebar, click the slide in which you want to add a video.

At the top of the PowerPoint window, click the "Insert" tab.

In the "Insert" tab, under the "Media" section (which is to the extreme right side of the interface), click "Video."

You'll now see an "Insert Video From" menu. Here, select "This Device."

Your computer's standard "open" window will open. In this window, access the folder that has your video file. Then double-click your video file to add it to your presentation.

You'll see your selected video in your presentation. To resize this video, click it and use the handles around the video to change its size. Then drag the video to place it at its desired location in your slide.

If you'd like to test the video, at the bottom-left corner of the video, click the play icon.

And you're all set.
Now that you have added a video to your presentation, you might want to change how it plays in your slides. In PowerPoint, you have multiple ways to change your video's playback.
To access these playback options, first, click your video in your presentation. Then, at the top of the PowerPoint window, click "Playback."

In the "Playback" tab, under the "Video Options" section, you will find various options to manage your video's playback.

For example, to change how your video starts to play in your presentation, click the "Start" drop-down menu and select one of these options:
- In Click Sequence : This plays your video in the click sequence. This means if you press the button for the next slide, your video will play.
- Automatically : This option automatically plays your video when the slide with your video opens.
- When Clicked On : Select this option to play your video only when you click it.

The other options are "Play Full Screen," which opens your video in full screen, and "Loop Until Stopped" that plays your video over and over again until you manually stop it.
Before you close PowerPoint, make sure you save your presentation so that your embedded video is saved with it. Do this by clicking File > Save in PowerPoint's menu bar.

And that's how you make your PowerPoint presentations even more engaging by including videos in them. Exciting!
If you don't want to add a video but you do want audio, you can add music to your presentations . This also helps enhance your presentation quality.
Related: How to Add Music to Your PowerPoint Presentation
- Microsoft Office
- Microsoft PowerPoint
- PRO Courses Guides New Tech Help Pro Expert Videos About wikiHow Pro Upgrade Sign In
- EDIT Edit this Article
- EXPLORE Tech Help Pro About Us Random Article Quizzes Request a New Article Community Dashboard This Or That Game Popular Categories Arts and Entertainment Artwork Books Movies Computers and Electronics Computers Phone Skills Technology Hacks Health Men's Health Mental Health Women's Health Relationships Dating Love Relationship Issues Hobbies and Crafts Crafts Drawing Games Education & Communication Communication Skills Personal Development Studying Personal Care and Style Fashion Hair Care Personal Hygiene Youth Personal Care School Stuff Dating All Categories Arts and Entertainment Finance and Business Home and Garden Relationship Quizzes Cars & Other Vehicles Food and Entertaining Personal Care and Style Sports and Fitness Computers and Electronics Health Pets and Animals Travel Education & Communication Hobbies and Crafts Philosophy and Religion Work World Family Life Holidays and Traditions Relationships Youth
- Browse Articles
- Learn Something New
- Quizzes Hot
- This Or That Game
- Train Your Brain
- Explore More
- Support wikiHow
- About wikiHow
- Log in / Sign up
- Computers and Electronics
- Presentation Software
- PowerPoint Insertions
5 Ways to Embed a Video File in Microsoft PowerPoint
Last Updated: June 14, 2024 Fact Checked
Embedding a Web Video
Embedding a video file, embedding a stock video, using android, linking movie files (powerpoint 2007).
This article was co-authored by Mitch Harris and by wikiHow staff writer, Rain Kengly . Mitch Harris is a Consumer Technology Expert based in the San Francisco Bay Area. Mitch runs his own IT Consulting company called Mitch the Geek, helping individuals and businesses with home office technology, data security, remote support, and cybersecurity compliance. Mitch earned a BS in Psychology, English, and Physics and graduated Cum Laude from Northern Arizona University. This article has been fact-checked, ensuring the accuracy of any cited facts and confirming the authority of its sources. This article has been viewed 1,136,442 times.
If you want to spruce up your PowerPoint presentations, you can add a video to your slides. If you have a video file on your computer, you can easily embed it into your presentation. You can also embed YouTube videos, use looping stock videos, or, on older versions of PowerPoint, link to the videos. This wikiHow will show you how to add a video to Microsoft PowerPoint using your Windows, Mac, or Android device.
The Best Ways to Embed a Video in PowerPoint
- Copy a YouTube URL. In PowerPoint, click "Insert' → "Video" → "Online Videos/Movie". Paste the URL and click "Insert".
- To embed a video file, click "Insert" → "Video" → "This Device" → select a file → "Insert".
- To use a stock video, click "Insert" → "Video" → "Stock Videos" → select a video → "Insert".

- You must have a subscription to use Office 365 . [1] X Trustworthy Source Microsoft Support Technical support and product information from Microsoft. Go to source
- Adding a video to your PowerPoint can help you make a great presentation .

- You can insert a video from supported websites such as: YouTube, SlideShare, Vimeo, Microsoft Stream, and Flip.

- On Mac, this will look like Online Movie .

- You'll see a preview of the video.

- To adjust when the video plays, click the drop-down menu next to Start: . Select In Click Sequence , Automatically , or When Clicked On .
- Check the boxes to apply any of the following: Play Full Screen , Hide While Not Playing , Loop until Stopped , and/or Rewind after Playing .
- Click Volume to adjust the video's volume. Select Low , Medium , High , or Mute .

- Select the web video and click the Video Format tab.
- Click Poster Frame on the left of the toolbar.
- Click Image from File… .
- Select From a File , Stock Images , Online Pictures , or From Icons .
- Select the image source from the chosen method, and then click Insert .

- Stock videos work best as a background graphic to your PowerPoint text, since these videos loop seamlessly

- The stock video will be added to your slide. By default, it will cover the entire slide.

- PowerPoint is available for Android in the Google Play Store .

- The menu will open.

- If you want to take a video using your camera, tap Open Camera instead.
- The video file will be added to your PowerPoint.

- Videos can only be "embedded" (included in the presentation file itself) in PowerPoint 2010 or newer.

- Click the Office button and select "Publish."
- Select "Package for CD" and then select your presentation.
- Ensure that "Linked files" is selected in the "Options" menu.
Community Q&A
Tips from our Readers
- In the newest version of PowerPoint, to embed a YouTube video, all you have to do is go to insert, video, online video and then paste the link for the video.
You Might Also Like

- ↑ https://support.microsoft.com/en-us/office/insert-a-video-from-youtube-or-another-site-8340ec69-4cee-4fe1-ab96-4849154bc6db#OfficeVersion=Windows
- ↑ https://support.microsoft.com/en-us/office/insert-audio-or-video-in-powerpoint-for-android-95e0a2af-35fb-405a-8536-cdcd934f659a
- ↑ https://support.office.com/en-us/article/My-movie-doesn-t-play-190cf574-183d-4b7f-b627-3783a14b7b07?ui=en-US&rs=en-US&ad=US
- ↑ https://support.office.com/en-us/article/Add-and-play-a-movie-in-a-presentation-f3fcbd3e-5f86-4320-8aea-31bff480ed02
About This Article

1. Open the slide. 2. Click Insert . 3. Click Movie . 4. Click Movie from File or Video on my PC . 5. Select the video and click OK . 6. Click Playback . 7. Choose how to play the video. 8. Save your presentation. Did this summary help you? Yes No
- Send fan mail to authors
Reader Success Stories
Rjan Berglund
May 26, 2017
Is this article up to date?
Jun 20, 2017
Nov 7, 2016
Jul 27, 2016

Featured Articles

Trending Articles

Watch Articles

- Terms of Use
- Privacy Policy
- Do Not Sell or Share My Info
- Not Selling Info
wikiHow Tech Help Pro:
Level up your tech skills and stay ahead of the curve
How to video record yourself presenting a PowerPoint
Heads up! This content is relevant for Clipchamp for personal accounts. Try this link If you're looking for information about Clipchamp for work accounts.
On this page
Method 1: How to record your webcam in PowerPoint
Method 2: how to record your webcam and powerpoint in clipchamp, resize your video presentation for any platform, tips to setup your video presentation recordings, editing tips to make your video presentations better.

Creating an engaging and professional video presentation requires more than just delivering information—it's about connecting with your audience. Whether you're crafting a presentation for a business, sales, school, or onboarding , adding a video of yourself can transform your PowerPoint slides into a dynamic (and personal!) storytelling tool.
This guide covers two ways to video record yourself into a PowerPoint: recording your presentation directly in PowerPoint and using the free online video editor, Clipchamp , to elevate your videos. Learn how to elevate your video presentations in this step-by-step guide.
Step 1. Open Microsoft PowerPoint and navigate to the record tab
Head over to the PowerPoint application to start your webcam recording in PowerPoint. Next, click on the record tab to launch recording options.

Step 2. Select the cameo option to enable your webcam
Click the cameo button on the record toolbar.

A blue placeholder circle will appear to preview the placement of your webcam recording overlay. If desired, you can customize the shape and add a border to your webcam recording. If you haven’t used the cameo feature before, make sure to enable the webcam and microphone permissions and select your mic and camera source.

Step 3. Record your presentation video
Click on the record button in the top right corner to start recording. Here, you will record your PowerPoint presentation slides, teleprompter, and webcam. A three-second countdown will appear. To stop recording, click on the stop recording button. You can preview your video before saving it.

Step 4. Save and share your presentation video
Preview your PowerPoint video before saving. When you’re done recording, click on the export button then click on export video.

For more help, take a look at the record a presentation help article .
Now that you've mastered the basics, so let's move on to another workflow that will make your PowerPoint presentations even more compelling.
To level up your presentation, we'll explore how to video record yourself presenting a PowerPoint with Microsoft Clipchamp and edit your video with beginner-friendly features. Using the screen and camera recorder, you can record your webcam and PowerPoint presentation without leaving your browser. Your webcam recording automatically saves as a picture-in-picture overlay , making your video easy to edit and customize to your liking.
Follow the steps below to learn how to record your webcam and video presentation in Clipchamp .
Click on the record & create tab on the toolbar.
Click on the screen and camera option .
Select a camera and mic to use.
Click on the record button to select a tab, window, or entire screen with your PowerPoint presentation shown.
Save your recording when you’re finished presenting.
Trim away mistakes or excess footage on the timeline with the trim tool .
Save your video presentation in 1080p video resolution.

For more help, check out the screen and camera tutorial . You can also save your PowerPoint presentation as an MP4 or MOV file , then import your video onto the timeline to start editing.
If you’re sharing your video presentation to multiple different platforms, such as YouTube or Stream , it might require different aspect ratios for video posts. Instead of creating a new video for each platform, just resize your PowerPoint video using the aspect ratio presets .
Follow the steps below to resize your presentation video using the presets quickly.
Import and add your video to the timeline.
Click on the 16:9 aspect ratio button .
Hover over each preset to preview the aspect ratio.
Click on a new aspect ratio that suits your platform to resize your video.
Use the fit or fill buttons in the floating toolbar to remove black borders or bars .
Save your video by clicking on the export button and selecting 1080p video resolution.

In order to produce high-quality recordings, it's important to pay attention to a few key factors: a stable internet connection, a quiet recording environment, and good lighting. Once these are sorted, consider setting up your technical tools correctly.
Here's how to configure your recording setup when using PowerPoint or Clipchamp.
How to setup PowerPoint’s recording features
As mentioned above, PowerPoint allows you to record your slides as well as your camera. Take a look at some considerations to record without errors.
Video source setup : Navigate to the recording tab in PowerPoint. Here, you can select your video source—usually your computer’s built-in webcam or an external camera connected to your computer. Ensure the camera is correctly selected and positioned.
Audio source setup : Select your audio input source in the same recording tab. This could be your laptop’s internal microphone, an external microphone, or another connected audio device. Choose the best-quality microphone available and record audio to check for clarity and volume. Adjust the microphone settings to reduce background noise and ensure your voice is clear and audible.
Preview and testing : Before starting the actual recording, do a test run to see and hear how you appear and sound in the recording. This test will help you adjust the camera position, audio settings, and move to another location if the lighting or background noise are distracting.
How to setup screen and webcam recording in Clipchamp
Configure your recording settings in Clipchamp to optimize video and audio quality.
Choose a presentation size: A standard 16:9 aspect ratio is suitable for most presentations.
Set up your screen and camera recording permissions : Go to the record & create tab on the toolbar. Next, click on the screen tool or screen and camera tool. A popup window will appear requesting permissions. Allow Clipchamp access to your camera and microphone if you haven't used our webcam recorder before. Click allow when ready to proceed.
Choose screen source : Either record your browser tab, window, or entire screen through the popup window.
Choose webcam and audio source: Select your microphone source, camera source and select speaker coach if desired through the popup window.
Trim away mistakes
Use the intuitive trimming tool in Clipchamp to remove unnecessary segments of your screen recording, webcam video or audio voiceover in a few clicks. This helps maintain the engagement in your presentation. Learn how in this tutorial video .
Use captions to create accessible videos
Generate real-time captions for your video presentation to make it easier to understand on mute with the autocaptions feature . Just turn on autocaptions to automatically create a video transcript which consists of an index of timestamps to help you navigate your video better.
Add annotation stickers to enhance messages
Draw attention to specific elements within your PowerPoint presentation by overlaying sticker annotations. In the content library tab on the toolbar, search through an endless range of shapes and annotations like arrows, squares, circles, stars, graphics, and more.
Speed up and slow down videos
If your presentation is too slow or too fast, easily edit your video’s speed with the beginner friendly speed selector . Just remember to make your presentation speed easy to understand and not too fast.
Add text animations for clarity
This can help reinforce your messages and ensure they resonate with your audience. Provide more context for viewers with text animations . Choose from a wide range of professional titles like multiline, lower third, bouncing, mirror and more. Customize titles to suit your presentation theme with different fonts, colors, sizes, and positions .
Use ASL stickers to enhance videos
Make your PowerPoint videos more accessible for work, school, or social media with the help of popular American Sign Language video stickers . Just place an ASL sticker side by side with your video content or as a standalone clip to convey meaning to the deaf and hard of hearing community.
Adjust your webcam footage
Make your webcam videos appear more vibrant and professional-looking with the color correction tools . These tools allow you to adjust brightness, contrast, and saturation simply.
Learn more about recording a presentation video using Windows 10 and explore how to create engaging video presentations .
Edit videos today with Clipchamp for free or download the Clipchamp Windows app .
More from the Clipchamp blog

How to make an image transparent

How to change image background color
How to make a logo transparent
Start creating free videos with clipchamp.
- Audio/Video Creation
- Last Updated: August 21, 2022
How To Video Record Yourself Presenting A PowerPoint (with 4 Pro Tips)

Our content is reader supported, which means when you buy from links you click on, we may earn a commission.
An estimated 35 million PowerPoint presentations are given every single day . From corporate boardrooms to high school classrooms, a PowerPoint presentation is among the most popular mediums for sharing content that can engage your viewers and help them get a better understanding of various concepts.
Due to convenience, more and more people now prefer online courses over the traditional, offline mode of learning. Online course providers might need to stream or record their lectures into videos so that their students can watch them on their own time. In the absence of a blackboard, an online PowerPoint presentation is a much better alternative for creating online courses and lessons.
Why Should Course Creators Video Record Themselves When Presenting a Slide Show?
In many cases, a screen recording showing PowerPoint slides on their own just doesn’t do enough to convey the information well. Hence, many course creators have tried the following:
- Recorded narration over the PowerPoint slides.
- Used a screen recorder to capture slides and voice-over.
- Use an online chat tool to record the slides as they are being presented.
Although these methods are a step above the plain and regular PowerPoint presentation, they are not able to engage viewers as completely as a course creator presenting in front of them would. The most effective type of PowerPoint presentation is one where the learners are shown both the slide show as well as the presenter.

Because of the face-to-face contact and body language, learners feel more like they are in an actual classroom. This will help them remain focused on the topic, improve comprehension, and make them retain the subject matter for a longer period.
Hence, when it comes to class lectures, online skill-sharing, and organizational training, using PowerPoint presentations in conjunction with video is the best way to share information.
Here are some reasons course creators prefer a PowerPoint presentation where you record yourself presenting the slide show rather than lifeless slides:
Greater Power of Persuasions:
Video presentations have higher persuasion ability through video-audio communication and involve the sight, sounds, and emotions that trigger engagement.
Better Retention:
According to statistics, viewers retain approximately 95% of the message when watching a video recording as compared to just 10% when viewing only text.
Available at Your Fingertips:
About 75% of all audio and video are played on smartphones, tablets, and other mobile devices. This means accessing and viewing videos are now easier than ever. This provides course creators a big opportunity to ensure more and more people watch their content.
Time-Saving:
Video presentations allow course creators to break big blocks of information into bite-sized pieces. This makes it easier for the learners to process the information.
Overview: Steps to Create Video PowerPoint Presentations
Almost everyone who has ever used a computer has a basic idea of how a PowerPoint presentation works. Initially, the slide show was created for overhead projector transparencies, which was the most favored medium for many instructors before video projectors.
However, thanks to advancements in digital technology, creators can now enjoy various interactive elements like animated transitions in between slides and audio and video embeds in their presentation to make it more engrossing.
Creating PowerPoint Slides
Every PowerPoint presentation starts with the same basic template. Your slides can be fully customizable or you can choose from pre-made templates to expedite the design process of the slides.

To make a simple PowerPoint presentation, you need to add text, bullet points, and images. You can use the standard layout or select the content themes from the top ribbon.
PowerPoint now also comes with a gallery of stock images. In addition, the application also recommends design ideas based on your layout so that your slide looks more professional. This is a useful feature if you do not have a lot of time customizing the slide design.
Once you are satisfied with the general look of your slides, you will need to add the audio and video content to the presentation. You can then export the entire presentation and share it with your learners.
Recording Audio on PowerPoint
Do you know that PowerPoint software itself allows you to record your audio onto the presentation? This summary you a quick run-down of how to use this feature.
Before you start the audio recording, it is a good idea to use the “Rehearse Timings” option to see how your script fits your slides. This will open up a test screen, which will show how long you played the slide show and how much time you took on a single slide.
You can use the “Pause” and “Reset” buttons to make changes and use the “Notes” section to document the changes you made to your script.
To add your voice recording, go to the “Slide Show” tab on the top ribbon. Go to the “Record Slide Show” option and start recording the audio. You can also use the audio on and off toggle video options at the top of the record screen to record only the audio.
Although you can record your audio through the built-in microphone on your laptop or phone, it is a good idea to invest in a good-quality mic for better quality audio.
PowerPoint allows you to record the full slide show in a single take. You can also click through the slides to trigger the added animations or to make progress through the presentation.
Once you are done, you should review the recording, which will be saved on a slide-by-slide basis, so you do not need to record the presentation again to fix any errors.
PowerPoint audio is not recorded during slide transition, so make sure you finish speaking before you skip to the next slide to avoid cutting off your conversation.
Creating a Video of Yourself
To add yourself to the PowerPoint presentation, switch on the video option located on the Record Slide Show screen. By default, PowerPoint will show the video picked by your camera at the bottom right of the presentation during the recording.
Once your video has been recorded, you should return to the editing screen. You will find your video recording shown at the bottom right of the slide.
Resizing and Repositioning the Clip:
You can drag your recording from the default place to anywhere on the slide. You can also blow it up to fit the slide frame or remove the recording by selecting it and pressing the delete option.
Making Video Presentations with a Screen Recorder
Although PowerPoint presentations allow you to make a perfectly good screen recording, you can also find a lot of powerful and robust third-party tools that can take your video presentation to the next level. Making your video presentation appear more professional and sleek will help you stand out from the crowd and will help you establish trust and authority with your learners.
Screen recorders or screencasting software offers a more comprehensive range of editing and post-production options, including closed captioning , professional transitions, and the ability to add interactive elements. They also come with an added bonus of directly sharing your online lesson to video-sharing sites like YouTube and Vimeo and allow you to save your presentation in alternative formats, including .mpeg2, .avi, and .mov.
Let’s take a look at how you can video record a PowerPoint presentation with Camtasia .
Using Camtasia to Record PowerPoint Presentations
Camtasia is an industry leader in video editing and screen recording. The software allows you to capture videos via your webcam, add sound effects from the royalty-free music library, record sections from your screen, capture content from iPhone, integrate animations, set up customized video themes, add device themes, and allow course creators to benefit from a whole lot of other features.
If you have Camtasia on your computer, you can import your PowerPoint slides into the software and edit them through Camtasia. Just click on the “Import Media” option and select your PowerPoint file. This will turn your slides into PNG format. PNG files are not editable so you will not be able to change the content in your slide, it will give you better control over the presentation design and style since you will be able to adjust your slides to fit in with your video and audio overlay easily.

For online course creators, Camtasia offers real benefits since it allows you to export your finished file as a SCORM package. This means it can be downloaded to any SCORM-compliant LMS and will enable the LMS to track learning activities, like quiz performances and time spent on a course.
This is not possible if you are making your presentation using only PowerPoint software.
Recording the Screen
To start the screen recording, you need to click the “Record” button at the top of the toolbar. This will open up the Camtasia recorder which is default set to capture everything that is happening on your screen.
Customize Recording
You can either choose to record the full screen or click on the arrow to “select area to record.” You can also choose to record other elements on the screen, including the webcam, mic audio, and system audio. Click on the down arrow button or the double arrows next to the options to choose a specific webcam (if you have one) or mic. This way you can record yourself presenting a PowerPoint. Click on the “Start Recording” button to begin.
Record Yourself Presenting the PowerPoint Presentation
As mentioned, you can use the tools within Camtasia to record your screen which consists of your PowerPoint slides. Then you can use the recorder to choose a specific webcam. However, you can also use a different device to record yourself presenting a PowerPoint.
For instance, if you have a video camera or a Smartphone, you can set that up to record yourself as you go through the presentation. Then you can import that video file into Camtasia later on.
Finish Recording
Depending on whether you are using Windows or Mac computers, you will need to follow slightly different to finish recording on Camtasia. If you use Windows, click the Camtasia recorder icon located on the taskbar and press the “Stop” button. To re-record, delete the recording and then start over. Alternatively, you can also press “F9” to pause and resume the recording and “F10” to stop the recording.
If you use a Mac, click the Camtasia icon on the Apple menu bar and press the “Stop Recording” button. To re-record, click on the “Start Over” button. Alternatively, you can also press “CMD+SHIFT+2” to pause or resume a recording, and “CMD+OPTION+2” to stop a recording.
Import the Audio and Video into Your Camtasia Project
Camtasia works with projects. Once you’re done with your presentation recording and you end the recording, a new project should open. You’ll want to import any additional audio and video into that project.

That means if you recorded yourself separately on your Smartphone, you’ll need to upload that to the project. Then you can organize both your Camtasia recording and the video of you presenting a PowerPoint on the timeline.
Trimming the Video
To remove the extra content that is often found at the start of a video, drag the end of the clip “in” on the timeline. If you remove too much material from the recording, drag it back out to restore the video. A great thing about this is that any edits you make on the timeline will not change the original recording saved in the media bin.
Cutting Out the Video
To cut out a certain section on the video, drag the red or green handle on the video playhead to select a specific area on the timeline. Then, click on the “Cut” button to remove that section. The program will add a stitched line on the timeline to show where the cut was made. In addition, if you want to bring the playhead together, double-click on the playhead.
Adding Titles and Annotations
Make your video more professional by adding titles, annotations, and effects to the content. You can easily add an annotation by clicking and dragging the relevant option from the tool panels to your video timeline or the canvas.
Double click the annotation to change the test. You can change the background color, font, and other elements in the properties panel. To change the position, rotation, and size of the annotation, click and drag the handles.
Adding Effects
Camtasia also offers you “Shapes” and “Blur” options as effects you can add to your Powerpoint presentation. You can add a shape by clicking and dragging one from the tool panel to the timeline or the canvas. If you want to hide sensitive or copyright information, use the “Blur” option. In addition, you can also adjust the size, position, and intensity of the blur in the properties panel.
Exporting the Video:
Click on the “Export” button to see all the export options that Camtasia provides. The first option downloads the video file on the computer. Other options allow you to upload your file to web services. This requires you to sign in to an account. You can then invite your learners to review the video presentation.
Using a Zipped Project
You should export your file in zip format. This way, all the original media used in the video presentation will be placed in one file. This allows you convenient access to all files in the project. To zip your files, go to “File” and select “Import Zipped Project.” This will import the zipped files into a new project.
Pro Tips for Making Better Video PowerPoint Presentations
To make your PowerPoint videos even better, you should consider the following tips:
1. Make it Short, Sweet, and Simple:
Your video clips should just be long enough to captivate your audience, not bore them to tears. Depending on what course you are offering, the length of your video will vary. However, make sure you do some research to find out how long is too long for your students.
2. Focus on the Point:
Before starting on the core subject, make sure you inform your learners about the goals and objectives of the course. Once you start the presentation, do not deviate from the core message. Your text, audio, and graphics should all be relevant to the subject matter. They should not detract your learners from your main lesson.
3. Know Your Audience:
The tone of your PowerPoint video presentation should match the content of your course. For example, if you are offering a makeup tutorial, your words should be simple. If, however, you are teaching an advanced course on physics or engineering, your language will be technical since your course covers a technical topic.
4. Adding Engagement:
You can turn up the engagement of your videos by adding more interesting elements to the content. For example, you can add YouTube videos, music, and interactive quizzes to ensure your course has the learner’s full attention.
A Meaningful Ending:
When ending your presentation, make sure you leave your learners with a resource that they can take away from the lesson. It could be a simple link to your website, a short ebook as a freebie, or just a few links. This provides a lot of value and creates a lasting impression on your customers.
Frequently Asked Questions on Recording Video
How can i record video online.
There are a few different ways to record videos online. One option is to use a screen-recording program like Camtasia or Snagit. These programs allow you to record your screen and create professional-looking videos.
Another option is to use a webcam to record yourself. This is a good option if you want to record a tutorial or how-to video.
Finally, you can use your smartphone. This is a good option if you’re recording something impromptu or if you want to record video in a format that’s easy to share online.
How can I record video for free?
One free option for recording video is to use a smartphone or tablet. Most devices come with a built-in camera, and there are also many apps available that can be used for recording video. If you already have a smartphone, then you may not need anything else to start recording for free.
How can I record audio and video online?
There are a few different ways you can record audio and video online. One option is to use a screen recording program like Screencast-O-Matic, Camtasia, or Snagit. These programs allow you to record your screen, along with any audio coming in through a microphone. You can then save the recording as a video file and share it online.
Another option is to use a webcam. Most computers come with a built-in webcam, or you can purchase an external webcam that plugs into your computer’s USB port.
Once you have a webcam set up, you can use it to record video by using a program like Skype or Zoom. You can set a webcam up to record audio through a microphone (if you want higher quality audio).
You can record audio separately (or with your video) by using a program like Audacity, Camtasia, or GarageBand. Once you’ve recorded your audio or video, you can save it as a .MPG file and share it online.
What is the best free online video recorder?
There are a number of free online video recorders available. These mostly cater to people using webcams and include Movavi’s Webcam Recorder , Webcamera.io , and Screen Capture .
While you’re looking for the best free online video recorder, consider the following factors:
- Ease of use: Look for a recorder with a user-friendly interface that won’t take hours to learn.
- Quality: The video recorder should produce high-quality recordings. Look for a recorder that offers various quality settings so you can adjust them according to your needs.
- File format: Look for a recorder that can export to different file formats so you can view your recordings on any device.
- Storage: Look for a recorder that offers cloud storage or that can save recordings directly to your hard drive.
How can I record my screen with audio online?
The first thing you’ll need to do is choose a screen recorder or screencast software. There are many options available, but some of the most popular include Screencast-O-Matic, Snagit, and Camtasia .
Nearly all screen recorders will connect up to an external microphone (if you have one) which will make the voice-over higher quality than using the built-in mic on your device.
Once you’ve selected a screen recorder, simply follow the instructions to record your screen. Often, it’s as simple as pressing a ‘record’ button!
Typically, you can record both your screen and your voice-over at the same time. When you’re finished, save your recording and share it online.
Final Words
PowerPoint presentations have come a long way from simple bullet points and stock images. Now, you can benefit from a plethora of impressive designing and editing options that allow you to create even more engaging and informative content for your online courses, tutorials, or webinars. In addition, there are plenty of tools available that allow you to record these presentations so that they are accessed and viewed anywhere, at any time.
Making excellent video PowerPoint presentations is now more important than ever. There is an increasing number of reasons to believe that more and more courses, classes, conferences, and events will be hosted through virtual content in the future.
As video presentations grow in popularity, learners will demand a higher quality of content. Hence, it is now more important than ever to produce sleek, professional quality, captivating PowerPoint presentations to establish yourself as an industry leader in the world of online courses.

Lisa Parmley
Lisa Parmley is the founder of coursemethod.com. After gaining a Master's degree, she worked in research for about seven years. She started a training company in 2001, offering a course helping people pass a professional exam. That course has earned multiple 7 figures. She created SEO and authority site building training around 2007 which went on to earn well into the 6-figure mark.
She has 22+ years of experience in the trenches creating and selling online courses. Get help starting and growing your online course business here .
Grow faster with free step-by-step training for online course founders.
Access Course Method Pro progress tracking and Strategic Planners + gain inspiration from successful course creators in weekly emails .
Unsubscribe at any time.
How to Create Pro-level PowerPoint Videos with Audio
Senior Marketing Manager at Loom

The power of a presentation lies in its ability to educate and inspire.
But why limit access to inspiring ideas because of the time slot in which they were presented? Microsoft PowerPoint, Google Slides, and Keynote slides have become the go-to formats for delivering supporting content to help audiences from classrooms to boardrooms engage with ideas. But once the content is complete, what happens to it?
Getting used to the sound of your own voice can take some time, but the benefits of using Loom to record PowerPoint presentations are worth it.
Depending on the content and intended audience, a few will be published, stored, or made available on a marketplace. However, many will be lost, all your hard work never to be seen again. PowerPoint slides that aren't accompanied by a presentation are incomplete and don't do a sufficient job of expressing the author's ideas.
If you want to get ahead of the curve and preserve the integrity of your hard work, learn how to record a presentation by recording your screen .
Loom is one of the most popular choices for recording a video presentation—and for a good reason. The user interface is straightforward and easy to use. Mastering it requires little effort.
The benefits of presenting a PowerPoint in video
There are several reasons someone would want to learn how to record a PowerPoint presentation. Whether they’re explaining the quarterly statistics in a sales meeting , creating a webinar as a marketing tool , or recording training sessions for onboarding new hires, communicating ideas clearly and succinctly via video becomes more crucial every day.
With Loom, you can engage directly with your audience, allowing you to interact with a large group of people in a small, intimate environment. Let's look at some advantages of knowing how to record slide show presentations and the procedure for doing so.
Scheduled attendance is not guaranteed
Unless your presentation is a mandatory work meeting or you're teaching a paid course, many individuals will drop out before or during the presentation. However, by providing a presentation recording for them, you can still interact with those people, and they’ll feel supported by your accessibility.
Provides on-demand access to your presentation
Using Loom's video recording capabilities, you provide access to your material long after you've presented it. Giving your audience access to resources is one of the best ways to build trust and support.
Enhances your search engine optimization (SEO)
If you don't want to make your recorded presentations available on-demand but want to reap the benefits of SEO-driven traffic, you may post all or part of it on YouTube as a free resource in the future to attract new prospects.
Practice makes perfect
Another reason to learn how to record a presentation is that you can review your work before showing it to a live audience. By recording yourself before a meeting or lecture, you can review the footage to ensure you cover every aspect of the topic, make improvements, and eliminate those pre-performance jitters.
Tips for video recording yourself presenting a PowerPoint
While technology and practice are your two best allies in confidently presenting PowerPoint video presentations, a few extra tips can make yours even more effective and professional. Consider following these best practices:
Choose the right equipment
Video communications technology has flourished in the last few years. There are more options than ever to record presentations and deliver them digitally to a worldwide audience. A tool like Loom makes it easy to record webcam videos, screen captures, and recorded narration quickly and easily. This lets you present your PowerPoint or any other content to a digital audience without extensive and time-consuming video editing.
Include direct-to-camera (DTC) content
Personalization is the heart of every good video—nothing builds a personalized experience like a friendly face. Use a simultaneous webcam and screen capture to record yourself explaining the slides and information on the screen. Adding picture-in-picture DTC elements creates rapport and trust with your audience and ensures they stay engaged with your presentation.
Slide text: Less is more
Text is great for outlining the major themes of a presentation and adding context to discussions, but with a PowerPoint presentation, treat text as the seasoning in a recipe. Use what you need to enhance the experience, but don’t overwhelm.
Build your slides as an outline for each discussion topic and a home for visual elements like charts, infographics, and embedded video clips. But you, as the presenter, should do most of the talking. Building your presentation this way keeps viewers focused and engaged instead of hurrying to keep up with the reading.
Structure your presentation
Well-structured content is vital to the flow and digestibility of your presentation. When building your slides and video script, organize your information similarly to a blog post or an ebook. Start with an introduction to share your personal info and a general topical overview. Create segments that logically lay out each point or step in the process. Wrap things up with a conclusion and (if needed) a call to action that invites the viewer to take the next step—booking a call, downloading a resource, or signing up for a service.
Keep videos concise and skimmable
Digital fatigue is real. With so many videos and messages competing for our attention, creating a streamlined presentation results in longer view duration . The average view duration of a YouTube video may be as short as 40 seconds, with the median watch time averaging just over a minute and a half .
Another trick to increase viewability is to make it easy for viewers to skim. A well-structured presentation offers natural segments to help viewers zero in on the information they need. YouTube offers a Chapters feature that lets you insert a linkable outline so viewers can easily skip to specific timestamps.
Basic recording in PowerPoint
Microsoft offers basic tools to start recording your PowerPoint presentation. Here’s a quick step-by-step guide to recording a simple presentation:
Step 1: From PowerPoint, open the slide with which you want to start your presentation.
Step 2: Select Record from the upper right hand corner of the PowerPoint window.
Step 3: Make sure your recording and voice settings are set properly, then click the round Record button. Begin your presentation.
Step 4: Click through your slide presentation and record your audio. Be sure to pause during slide transitions, as PowerPoint will not record audio during slide changes.
Step 5: Save your finished PowerPoint video to your local device and share it through email or upload it to sharing platforms like Vimeo, YouTube, etc.
An important note: PowerPoint’s native recording features offer some editing and highlight features. You’ll need a screen recorder app like Loom to film direct-to-camera or make substantial edits.
How to use Loom’s presentation recording software
It's simple to record yourself and your screen presentation side-by-side using only your laptop, a built-in camera, a mic, and Loom. Using Loom to record presentations on a computer is a fantastic way to save time and guarantee that your presentation goes precisely as planned. Loom's basic version is free to use and provides users with different options to meet their unique needs best. You may record the material on your screen and even take a video of yourself presenting alongside your screen capture.
Loom is available as a PC screen recorder , Mac screen recorder , iOS screen recorder , and Android screen recorder . The two primary methods are through the Desktop Client or the Chrome Screen Recorder . The desktop versions offer a higher recording resolution (4k compared to 1080p in the Chrome extension) and additional features like camera frames and backgrounds.
In either case, learning to record a presentation is simple with Loom’s easy-to-use presentation recorder. Here’s some information to help you get started.
You can create a Loom account using a variety of methods. Users may log in with their Google account information, or connect their Slack account information, email address, password, and name. You must first complete the registration process to have access to the program.
What is the Loom desktop client, and how can I use it?
Search for Loom in the Windows search box or click the red pinwheel Loom logo to launch the Loom Desktop Client. After you've opened it, choose the type of video recording you wish to make. Cam Only, Screen Only, and Screen + Cam are the three possibilities for the basic Loom version. As their names suggest, Cam Only and Screen Only allow you to record the material on your screen or yourself through a camera. Screen + Cam will enable you to make a presentation recording with both yourself and the information in real time, allowing others to watch your reactions to the material and connect with you as the presenter.
If you wish to record your screen, the presentation recorder has three options for defining the parameters of your video: Full Screen, Window, and Custom Size.
Full Screen captures everything on your monitor or display, allowing others to watch and follow along.
You may use the Window option to record a single computer application if you want to construct a more restricted lesson without interruptions.
Custom Size is exclusively available to Pro account holders, allowing users to build custom windows to capture particular areas of their screen.
To record your Loom videos, use the built-in webcam and microphone on your smartphone or computer or additional devices as needed. Loom recommends using high-quality microphones for better audio.
Using the Loom Google Chrome Extension to capture videos
First, download and install the Loom Google Chrome Extension from the Chrome Web Store. Then launch the extension's user interface by clicking on the red pinwheel Loom logo in the browser's top right corner. You can choose Cam Only, Screen Only, and Screen + Cam, the same as the desktop client. Unfortunately, users of the Google Chrome Extension can only record their entire screen or the contents of a single tab.
The Video Control menu differs from the desktop extension, appearing in the bottom left corner of the browser window. Users may only utilize three buttons: Start/End Recording, Pause Recording, and Delete Recording.
Using the Loom desktop client to record videos
Each option lets you use Loom's camera bubble , which allows you to see and record yourself as well as a video. There is no set limit on the duration of the video, but Loom will provide you alerts to ensure you don't keep recording by accident. Once you've decided on your selections, go to the four-button Video Control menu on the left side of your screen. To start your video, press the Recording button at the top of the menu. This button has two purposes: When the button is red, it indicates that you’re currently recording, and it stops the recording when clicked a second time.
The Pause button is located beneath the Recording button and is used to pause your video. However, depending on your computer, you may alternatively use Alt + Shift + P or Option + Shift + P . The Delete option is represented by a garbage can icon, which pauses the recording and completely deletes the video once you confirm your decision via a dialog box.
How to use the speaker notes feature
Loom makes presentations easier with speaker notes , an on-screen cue card feature visible only to you. Speaker notes are bullet points or full scripts written by you and activated during recording. These prompts allow you to deliver your message with confidence, without the need to remember your whole script or utilize physical note cards.
From the desktop app, open Loom and click Speaker Notes. Use the pop-up window to type in your notes, then resize the notes window to suit your needs before recording. Speaker notes are always presented on top, so there’s no need to switch windows during your presentation.
How AI-generated chapters work
Want your viewers to be able to skip to the most useful portion of a presentation? The AI-generated chapter feature allows viewers to select important topics within your presentation and navigate to them easily. These time-stamped chapters also allow users to link and respond to content.
How to use the drawing tool
Finally, the drawing tool , symbolized by a pen icon and available with the Pro subscription, can assist you in focusing on certain facts and numbers. Using this button, which includes picking a preset color, lets you make graphics that will draw your viewer's attention to key information.
Preserve your ideas with Loom’s Presentation Recorder
If you’re just starting out, learning to record a presentation with Loom is an excellent tool for creating quality content. As the world continues to move towards remote work environments, the ability to give an online presentation (and record it for posterity) becomes more essential every day.
Loom is free, so don’t wait to see how you can enhance your video presentation with video capture software.
Jan 8, 2024
Featured In:
Share this article:.
Jeong Lee works in Marketing at Loom.

How to Make an Eye-catching Video Presentation in Minutes | InVideo
- video presentation

Video is now the undisputed king of mediums in business communication. HubSpot reports that 85% of companies use videos in their marketing efforts. From webinars to demos, from sales presentations to investor pitches, and from welcome videos to online tutorials, videos are the go-to channel. Clearly, video marketing is on the surge.
And video presentations are among the most widely used formats for video marketing. But how exactly can you create winning video presentations, to begin with?
Simply by signing up to InVideo for business where you get tailor-made template and video editing services on demand so you can spend your time running your business. Sign up for a free demo here.
Video Presentations Q&A
Before we get into the meat of our guide, let’s quickly answer a few commonly asked questions.
1. What is a Video Presentation?
A video presentation is a form of communicating with an audience with the aid of a video or completely using a video. The video could be made of PowerPoint slides , still images, animation, or actual video footage.
2. Why Should I use Video Presentations?
Common reasons for using videos as presentation aids include:
- Overcoming space/time limitations - Using video as a visual aide to drive your point home - Video enables you to compress a lot of information into a digestible size
3. How do I make a Video Presentation?
Thanks to the advancements in technology, making video presentations has become very easy. It has also become more affordable than it was a couple of years ago. While different video makers have different steps to take when making a video , here are the basic steps to follow:
- Come up with a concept for your presentation. - Craft an engaging script . - Decide on the visual assets (and format) you’ll use. - Use a professional video editing app to bring it all together. - Promote the video.
Pro tip: To make things even easier, you could sign up to InVideo for business and get presentations made for your brand using the editing-on-demand services. Sign up for a free demo here .
4. How do you begin a Presentation?
You can open your presentation in 7 ways:
1. Share an anecdote or short personal story. 2. Kick-off with a provocative statement. 3. Present a startling statistic or data. 4. Tell a good clean joke that suits the audience. 5. Ask a loaded rhetorical question. 6. Show the audience a compelling visual. 7. Hook people with a fascinating quotation.
5. How do you Make a Video Presentation with PowerPoint?
Turning a PowerPoint presentation into a video is easy. Just follow these steps:
Step 1: On the File menu, select Save to make sure you have saved all your recent work in PowerPoint presentation format (.pptx).
Step 2: On the File menu, select Save As .
Step 3: Select the folder location where you want to store your PowerPoint Show file.
Step 4: In the Save as type box, choose PowerPoint Show (*.ppsx) .

Step 5: Select Save . That’s it.
Now that we’ve answered a few basic questions, let’s dig deeper into why videos are so powerful.
What Makes Video Presentations so Effective?
Why do they increase the impact of your message?
Well, it’s simple, really – people are visual creatures. This means we take in more information by watching than by reading. Remember the saying, “a picture is worth a thousand words”? Besides that, here are 4 other reasons video is so effective:
1. Conveys emotions better
No other communication channel conveys emotions better than video. That’s because video caters to the brain’s visual and auditory systems, helping the viewer pick up on cues like body language, facial expressions, imagery, and music.
2. Cements information better
According to research , people remember 10% of what they hear and 20% of what they read. However, they remember a staggering 80% of what they experienced. In short, visuals are easier to remember than text or audio because they help your audience “experience” your message. It makes video an essential part of creating presentations your audience will remember for a long time.
3. Makes it easier to digest information
Especially when explaining complicated concepts, video is a great way to present information in an easy-to-understand way. Not only is the format easy to take in, but it also makes breaking down concepts easier.
4. Builds relationships fast
I’m sure you know the marketing mantra: people buy from people they know, like, and trust. Nothing beats video in making prospects or your audience know, like, and trust you… fast. Video is an instant relationship builder. It’s the next best thing to live face-to-face communication.
A video is a great tool that has made it easier to communicate thoughts and ideas with people – not just in a room, but even across the globe.
6 Types of Video Presentations You Need to Know
Video presentations come in different flavors, depending on their purpose.

1. Educational Presentations
These are mainly used in teaching and learning sets online or in a classroom setting. These make it easier for the teacher to convey information and the students to grasp the concepts.
Use this template
2. Sales Presentations
The field of sales has evolved tremendously in the past decade. With customers being savvier, sales reps must play the game well if they’re to bag sales. One way they can do that is by creating story-based sales video presentations.
Sell more with pro video presentations
Use 5000+ InVideo templates to get started

3. Investor Pitches
Need to woo an investor? One of the best ways to do that is by using a video pitch. This will help you present your business plan in a visually appealing way so they can easily grasp your business concept.
4. Promotional Videos
Whether you’re promoting an existing product or a new one, video is your best bet for getting eyeballs on your product (or cause). People relate better to what they can see, making video the best medium for presenting your promotions (like product reviews, for example).
5. Employee Training and Onboarding
Video presentations are great for conducting employee training and onboarding. One of the main reasons for this is that video helps reduce the resources spent on these 2 important aspects of employee relationship management.
6. Informational Videos
As the name suggests, the informational/how-to type of presentation serves to pass on important information. Why video in this case? Because it’s more engaging and can pack a lot of information in a short clip.
Pro tip: You can get tailor-made templates to create any kind of presentation for your brand or business using InVideo for business . Sign up for a free demo here .
How to create killer Video Presentations – 4 Tips
Now you know why video presentations are important and which scenarios to use them in. Now to the fun part – tips on creating killer video presentations. Let’s get to it, shall we?
Tip #1 - Know your Audience

The most important aspect of creating a stellar presentation is to know and understand your audience. Even if you use the best video presentation maker , if you don’t target a specific, clearly defined audience, your presentation will flop. Understanding your audience will help you:
A. Communicate effectively
Effective communication involves knowing the language and examples that resonate with your audience.
B. Choose the right visuals
Certain visuals are more impactful when used on a particular audience. Study those that your audience will easily understand and relate to.
C. Connect on an emotional level
No matter the type of presentation, it’s crucial to connect with your audience on an emotional level. And to do that, you need to understand the emotional triggers to push in your video presentation.
Invest in adequate audience research. While it may be time-consuming (and a bit costly), it will pay off in the end.
Idea #2 - Brainstorm video content ideas

Now that you have gathered enough audience data, it’s time to brainstorm some content ideas. Whether you’re creating your talk solo or as a team, 3 crucial questions will lay the foundation of your brainstorming session:
1. What do you want the video to achieve? 2. Which emotions do you want the video to evoke? 3. What will visual elements help your video achieve its goal?
The answers to these questions will help guide your ideas. They are key to creating a killer video that your audience will love.
Tip #3 - Craft engaging scripts

Audience research? Check.
Great idea? Check.
Now we get to another interesting stage of creating great video presentations – crafting an engaging script. Whether it’s a live presentation, a webinar, or even a product review, you’ll need a great script to ensure you keep your audience engaged.
Even if you love creating impromptu videos, having a script for your video presentations is important. And no, you need not be Quentin Tarantino to produce a great video script (although it won’t hurt to learn how to become a good copywriter). Here are 3 reasons a good video script is a must:
1) Helps structure your video
To ensure your video has a smooth and progressive flow, you’ll need a good script.
2) Eliminates “dead spots”
Dead spots, or moments of inactivity, are a great turn-off in a video. They reek of unprofessionalism and can lead to your audience disengaging. The best way to eliminate dead spots is to craft a solid video script .
3) Keeps you on track
It’s very easy to get sidetracked when creating a video . However, with a script, you minimize the instances of going off-topic.
Creating scripts for your videos is a best practice that shouldn’t be overlooked. If anything, invest more in your script than the visuals as a good script can save a video with poor visuals.
Pro-tip: Once you’re confident about your script, it is time to make things even more clear. A storyboard will allow you to break down your video visually, scene by scene, describing what is happening in it.
Tip #4 - Invest in the Right Tools

With video, one thing you should never skimp on is the tools you use, particularly your video editing software. While there is a gazillion free video editing software on the market, it’s highly recommended that you use a professional video editor . And that means going the paid route.
Why should you spend on a video editor when there are countless free options available? Here’s why:
A. Get more (professional) features
Creating professional-looking videos requires a lot of resources and features. Most free video editors lack the features that will enable you to create professional videos.
B. Avoid branding and ads
With video editing software, free is never free. That’s because you pay through being forced to include the video editors brand in your work. In other words, you pay by advertising for them. Besides branding, some free video editors may subject you to irritating in-app ads.
If there’s one thing that’s inevitable when it comes to software, it’s that one time or another you’ll encounter glitches. This is where paid video editors have a great advantage over their free counterparts – you’ll have access to customer support.
From hardware (like cameras) to software (like video editing software), the tools you use will determine the quality of your videos. Invest in professional tools, and your presentations will sweep your audience off their feet because they’ll be more polished.
Pro tip: If you don't have the time or bandwidth to find your way around an editing tool, simply sign up to InVideo for business and get presentations created using tailor-made templates and on-demand editing services. Sign up for a free demo here .
Tip #5 - Adopt Video Presentation Best Practices
There’s no need to reinvent the wheel when creating presentations . Most winning video presentations are based on common fundamental principles that work. Here are some you need to know:
1) Create impactful intros (and outros)
Your intro is the most important part of your presentation as it sets the tone for the rest of the talk. If you can’t engage your audience with your intro, you probably won’t get another chance to engage them.
2) Keep it short, sharp, and sweet
No matter how engaging your video is, always remember it’s not a movie. The point is to keep your audience engaged enough to pass on your information, no more no less.
3) Be professional
Don’t throw out your professional etiquette just because you’re on (or using) video. Maintain professionalism in your video presentations by, for example, using clean language and maintaining a good posture.
4) Use quality sound
Sound plays an integral part in presentations. Whether it’s music or speech, make sure it’s crisp, clear, and audible.
By following these (and other) video presentation best practices, success is inevitable. Remember, the presentation is not about you; it’s about your audience. So, ensure that your presentations provide a good user experience for your audience.
Make video presentations in minutes
With customizable InVideo templates

Looking for a great Video Presentation Template? Here’s what you should consider

Templates are lifesavers. They help you create a decent presentation in a snap, even if you are a newbie.
Here are 3 simple questions to help you determine if a template is good:
1) Is it editable? – Are you able to change things like playback speed, effects, or text, so you produce something you like? Stay away from rigid templates that don’t give you the freedom to create with ease.
2) Is it customizable? – Can you design brand-specific clips using your company’s colors, fonts, and styling? Good templates give you wiggle room to include your brand’s specific needs.
3) Is it campaign-specific? – Different videos fit different scenarios. Ideally, you want templates tailored to your current campaign. That way, you have less tweaking to do because the templates are close to what you want.
Pro Tip: Get more tailor-made templates for your video presentations by signing up to InVideo for business . Sign up for a free demo here .
5 Awesome Video Presentation ideas to bring The House Down
Presentation is both an art and science. Get the balance right, and you have the audience eating out of the palm of your hand. Here are some ideas to help you do just that.
Idea #1 - Tickle them with humor
Humor is a powerful learning tool.
According to studies by Physiology Org humor leads to learning because of it:
- Attracts and sustains attention. - Relieves tension and produces a relaxed atmosphere. - Enhances participation. - Increases retention and motivation. - Bonds the student and the teacher.
However, to reap all these benefits, the humor must be appropriate and on-topic. So spice up your presentation with a joke or two. The result? Your audience will laugh and learn.
Idea #2 - Use Relevant Examples
Effective presenters use timely, powerful illustrations.
The word illustration comes from the Latin term ‘illustration,’ which means illumination. So practical examples are like windows of your presentation. They let light in. They help people see or understand the material better.
Here are 5 questions to ask about your illustrations:
1. Are they relevant to the topic? 2. Are they suited to the audience? 3. Are they suited to the time limit? 4. Are they enlightening? 5. Are they well told?
Grab compelling examples from books, movies, TV shows, history, children, current events, and captivating real-life incidents. Use good illustrations ram your points home.
Idea #3 - Wield Questions like a Ninja
Questions are an integral part of learning.
Sharp questions aid learning. Plus, they keep listeners highly engaged.
Ask questions:
- At the beginning of your presentation to draw your audience in. - In the middle of the presentation to revive waning audience interest. - At the end of the talk, so the audience reflects on the material.
Also, allow the audience to ask questions. When your audience asks questions, they switch from passive spectators to active participants.
Idea #4 - Be Minimal
Have you ever sat through a presentation and felt:
- Dazed? - Confused? - Strained?
More than likely, the reason is the presenter drowned you in a blaze of inessential stuff. There was too much going on you couldn’t cope with.
Minimalism is removing all unnecessary material, leaving only the bare minimum needed to put your points across. It means using just enough text, visuals, scenes, or slides to make the point and no more. A minimal presentation is clean and uncluttered.
Simple yet intriguing. Plain but profound. Basic but punchy.
Most importantly, it makes learning easy and enjoyable.
Idea #5 - Connect emotionally with a story
Stories are speakers’ most powerful weapons. That’s because stories play a dual purpose –
- Engage intellectually - Connect Emotionally
And an emotional connection is key to bringing the house down with your presentation. Why?
An emotional connection:
- Endears you to your audience - Makes your presentation memorable - Inspires your audience to take action
By using a relevant story in your video presentation, you’ll ensure that your audience walks the entire journey with you from intro to outro.
6 PowerPoint Presentation tips to wow your audience

No business video guide is complete without PowerPoint, the staple software for business presentations.
Here are 6 golden rules to help you nail your next PowerPoint presentation and leave your audience crying for more:
1. Keep Things Simple
Legendary artist Leonardo da Vinci once said something profound:
"Simplicity is the ultimate sophistication".
With the plethora of apps and templates at your disposal, you will be tempted to complicate things. Don’t. Keep things simple.
Simple design. Simple colors. Simple story.
People get swamped and confused by complicated stuff but easily absorb and appreciate straightforward material.
2. Good visual contrast
What use is your blockbuster presentation if the audience can’t see it?
You want people to enjoy your presentation, not endure it. If you use dark fonts on dark backgrounds or light fonts on light backgrounds, you’ll strain your audience’s eyes. They’ll struggle to see your lovely slides.
Classic black-on-white color contrast does just fine. You can use colors like red, blue, or yellow for headings and images. If you don’t like black and white, you can use other colors you prefer as long as the contrast of your combination is bold and strong.
3. Use a few words and animations
It’s easy to go overboard with fancy animations and a gushing stream of words. Only use as many words as it takes to get your point across and no more.
Too many words cause the audience to read rather than listen. Remember, your slides are there to compliment your talk, not substitute it. Also, a lot of words will fill up many slides that wear your audience down.
Ruthlessly cut out senseless animations that don’t add value to your talk.
4. Use excellent images
Images are to a presentation, what water is to fish. Without them, your presentation becomes bland. It lacks the needed fizz to keep your audience hooked. But only include relevant images.
Not only that. Above all, make sure all pictures are of high quality. Amateur-looking clip art causes the audience not to take you seriously.
Pro-tip: Get access to millions of stock assets and tailor-made templates with InVideo for business . Sign up for a free demo here .
5. Smooth and fast transitions
While PowerPoint transitions can make your presentation engaging, don’t overdo them, especially the advanced ones. Not only do they quickly drain power on weaker machines, but they also distract the audience. Stick to simpler and faster transitions like wipe or slide.
6. Avoid overloading your slides
In presentations, less is more.
Having a lot going on your screen confuses and overwhelms listeners.
Cramming too much info into your slides is a big no-no. Clutter is your enemy. Strip your slides down to essential words and images. Your audience will love you for it and leave you with many takeaways.
Pro looking Video Presentations – No longer an option
With Industry 4.0 fast coming into its own, going digital is no longer an option for businesses and speakers.
And one of the most important communication mediums in the digital age is video. That’s why you can’t afford to ignore video any more. Whether you’re speaking before a live audience or seeking to disseminate information to a global audience, video presentations are the way to go.
Need a great tool to create stunning video presentations? Then make sure to schedule a demo and see just how much you can do with InVideo for business.
Let’s create superb videos
17 PowerPoint Presentation Tips From Pro Presenters [+ Templates]
Published: April 26, 2024
PowerPoint presentations can be professional, attractive, and really help your audience remember your message.

If you don’t have much experience, that’s okay — I’m going to arm you with PowerPoint design tips from pro presenters, the steps you need to build an engaging deck, and templates to help you nail great slide design.
![→ Free Download: 10 PowerPoint Presentation Templates [Access Now]](https://no-cache.hubspot.com/cta/default/53/2d0b5298-2daa-4812-b2d4-fa65cd354a8e.png "how to make a video of your powerpoint presentation")
Download Now
Buckle up for a variety of step-by-step explanations as well as tips and tricks to help you start mastering this program. There are additional resources woven in, and you’ll find expert perspectives from other HubSpotters along the way.
Table of Contents
How to Make a PowerPoint Presentation
Powerpoint presentation tips.
Microsoft PowerPoint is like a test of basic professional skills, and each PowerPoint is basically a presentation made of multiple slides.
Successful PowerPoints depend on three main factors: your command of PowerPoint's design tools, your attention to presentation processes, and being consistent with your style.
Keep those in mind as we jump into PowerPoint's capabilities.
Getting Started
1. open powerpoint and click ‘new.’.
A page with templates will usually open automatically, but if not, go to the top left pane of your screen and click New . If you’ve already created a presentation, select Open and then double-click the icon to open the existing file.

10 Free PowerPoint Templates
Download ten free PowerPoint templates for a better presentation.
- Creative templates.
- Data-driven templates.
- Professional templates.
Download Free
All fields are required.
You're all set!
Click this link to access this resource at any time.
Creating PowerPoint Slides
3. insert a slide..
Insert a new slide by clicking on the Home tab and then the New Slide button. Consider what content you want to put on the slide, including heading, text, and imagery.

- Finally, PowerPoint Live is a new tool that enables you to do more seamless presentations during video calls and may be a better overall match for doing presentations remotely. Check out this video:
11. Try Using GIFs.

12 Free Customizable Resume Templates
Fill out this form to access your free professionally-designed templates, available on:
- Microsoft Word
- Google Docs
- Microsoft PowerPoint
- Google Slides
15. Embed multimedia.
PowerPoint allows you to either link to video/audio files externally or to embed the media directly in your presentation. For PCs, two great reasons for embedding are:
- Embedding allows you to play media directly in your presentation. It will look much more professional than switching between windows.
- Embedding also means that the file stays within the PowerPoint presentation, so it should play normally without extra work (except on a Mac).
If you use PowerPoint for Mac it gets a bit complicated, but it can be done:
- Always bring the video and/or audio file with you in the same folder as the PowerPoint presentation.
- Only insert video or audio files once the presentation and the containing folder have been saved on a portable drive in their permanent folder.
- If the presentation will be played on a Windows computer, then Mac users need to make sure their multimedia files are in WMV format.
- Consider using the same operating system for designing and presenting, no matter what.
16. Bring your own hardware.
Between operating systems, PowerPoint is still a bit jumpy. Even between differing PPT versions, things can change. The easiest fix? Just bring along your own laptop when you're presenting.
The next easiest fix is to upload your PowerPoint presentation into Google Slides as a backup option — just make sure there is a good internet connection and a browser available where you plan to present.
Google Slides is a cloud-based presentation software that will show up the same way on all operating systems.
To import your PowerPoint presentation into Google Slides:
- Navigate to slides.google.com . Make sure you’re signed in to a Google account (preferably your own).
- Under Start a new presentation , click the empty box with a plus sign. This will open up a blank presentation.
- Go to File , then Import slides .
- A dialog box will come up. Tap Upload.
- Click Select a file from your device .
- Select your presentation and click Open .
- Select the slides you’d like to import. If you want to import all of them, click All in the upper right-hand corner of the dialog box.
- Click Import slides.
When I tested this out, Google Slides imported everything perfectly, including a shape whose points I had manipulated. This is a good backup option to have if you’ll be presenting across different operating systems.
17. Use Presenter View.
In most presentation situations, there will be both a presenter’s screen and the main projected display for your presentation.
PowerPoint has a great tool called Presenter View, which can be found in the Slide Show tab of PowerPoint. Included in the Presenter View is an area for notes, a timer/clock, and a presentation display.
For many presenters, this tool can help unify their spoken presentation and their visual aid. You never want to make the PowerPoint seem like a stack of notes that you’re reading off of.
Use the Presenter View option to help create a more natural presentation.
Pro Tip: At the start of the presentation, you should also hit CTRL + H to make the cursor disappear. Hitting the “A” key will bring it back if you need it.
Your Next Great PowerPoint Presentation Starts Here
Now that you have these style, design, and presentation tips under your belt, you should feel confident to create your PowerPoint presentation.
But if you can explore other resources to make sure your content hits the mark. After all, you need a strong presentation to land your point and make an impression.
With several templates to choose from — both in PowerPoint and available for free download — you can swiftly be on your way to creating presentations that wow your audiences.
Editor's note: This post was originally published in September 2013 and has been updated for comprehensiveness.
![Blog - Beautiful PowerPoint Presentation Template [List-Based]](https://no-cache.hubspot.com/cta/default/53/013286c0-2cc2-45f8-a6db-c71dad0835b8.png "how to make a video of your powerpoint presentation")
Don't forget to share this post!
Related articles.
![How to Create the Best PowerPoint Presentations [Examples & Templates]](https://blog.hubspot.com/hubfs/powerpoint.webp "how to make a video of your powerpoint presentation")
How to Create the Best PowerPoint Presentations [Examples & Templates]
![How to Write an Ecommerce Business Plan [Examples & Template]](https://blog.hubspot.com/hubfs/ecommerce%20business%20plan.png "how to make a video of your powerpoint presentation")
How to Write an Ecommerce Business Plan [Examples & Template]
![How to Create an Infographic in Under an Hour — the 2024 Guide [+ Free Templates]](https://blog.hubspot.com/hubfs/Make-infographic-hero%20%28598%20%C3%97%20398%20px%29.jpg "how to make a video of your powerpoint presentation")
How to Create an Infographic in Under an Hour — the 2024 Guide [+ Free Templates]
![20 Great Examples of PowerPoint Presentation Design [+ Templates]](https://blog.hubspot.com/hubfs/powerpoint-presentation-examples.webp "how to make a video of your powerpoint presentation")
20 Great Examples of PowerPoint Presentation Design [+ Templates]

Get Buyers to Do What You Want: The Power of Temptation Bundling in Sales

How to Create an Engaging 5-Minute Presentation
![How to Start a Presentation [+ Examples]](https://blog.hubspot.com/hubfs/how-to-start-presenting.webp "how to make a video of your powerpoint presentation")
How to Start a Presentation [+ Examples]

120 Presentation Topic Ideas Help You Hook Your Audience

The Presenter's Guide to Nailing Your Next PowerPoint
![How to Create a Stunning Presentation Cover Page [+ Examples]](https://blog.hubspot.com/hubfs/presentation-cover-page_3.webp "how to make a video of your powerpoint presentation")
How to Create a Stunning Presentation Cover Page [+ Examples]
Marketing software that helps you drive revenue, save time and resources, and measure and optimize your investments — all on one easy-to-use platform
Critical PowerPoint Shortcuts – Claim Your FREE Training Module and Get Your Time Back!
How to Make a PowerPoint Presentation (Step-by-Step)
- PowerPoint Tutorials
- Presentation Design
- January 22, 2024
In this beginner’s guide, you will learn step-by-step how to make a PowerPoint presentation from scratch.
While PowerPoint is designed to be intuitive and accessible, it can be overwhelming if you’ve never gotten any training on it before. As you progress through this guide, you’ll will learn how to move from blank slides to PowerPoint slides that look like these.

Table of Contents
Additionally, as you create your presentation, you’ll also learn tricks for working more efficiently in PowerPoint, including how to:
- Change the slide order
- Reset your layout
- Change the slide dimensions
- Use PowerPoint Designer
- Format text
- Format objects
- Play a presentation (slide show)
With this knowledge under your belt, you’ll be ready to start creating PowerPoint presentations. Moreover, you’ll have taken your skills from beginner to proficient in no time at all. I will also include links to more advanced PowerPoint topics.
Ready to start learning how to make a PowerPoint presentation?
Take your PPT skills to the next level
Start with a blank presentation.
Note: Before you open PowerPoint and start creating your presentation, make sure you’ve collected your thoughts. If you’re going to make your slides compelling, you need to spend some time brainstorming.
For help with this, see our article with tips for nailing your business presentation here .
The first thing you’ll need to do is to open PowerPoint. When you do, you are shown the Start Menu , with the Home tab open.
This is where you can choose either a blank theme (1) or a pre-built theme (2). You can also choose to open an existing presentation (3).
For now, go ahead and click on the Blank Presentation (1) thumbnail.

Doing so launches a brand new and blank presentation for you to work with. Before you start adding content to your presentation, let’s first familiarize ourselves with the PowerPoint interface.
The PowerPoint interface

Here is how the program is laid out:
- The Application Header
- The Ribbon (including the Ribbon tabs)
- The Quick Access Toolbar (either above or below the Ribbon)
- The Slides Pane (slide thumbnails)
The Slide Area
The notes pane.
- The Status Bar (including the View Buttons)
Each one of these areas has options for viewing certain parts of the PowerPoint environment and formatting your presentation.
Below are the important things to know about certain elements of the PowerPoint interface.
The PowerPoint Ribbon

The Ribbon is contextual. That means that it will adapt to what you’re doing in the program.
For example, the Font, Paragraph and Drawing options are greyed out until you select something that has text in it, as in the example below (A).

Furthermore, if you start manipulating certain objects, the Ribbon will display additional tabs, as seen above (B), with more commands and features to help you work with those objects. The following objects have their own additional tabs in the Ribbon which are hidden until you select them:
- Online Pictures
- Screenshots
- Screen Recording
The Slides Pane

This is where you can preview and rearrange all the slides in your presentation.
Right-clicking on a slide in the pane gives you additional options on the slide level that you won’t find on the Ribbon, such as Duplicate Slide , Delete Slide , and Hide Slide .

In addition, you can add sections to your presentation by right-clicking anywhere in this Pane and selecting Add Section . Sections are extremely helpful in large presentations, as they allow you to organize your slides into chunks that you can then rearrange, print or display differently from other slides.

The Slide Area (A) is where you will build out your slides. Anything within the bounds of this area will be visible when you present or print your presentation.
Anything outside of this area (B) will be hidden from view. This means that you can place things here, such as instructions for each slide, without worrying about them being shown to your audience.

The Notes Pane is the space beneath the Slide Area where you can type in the speaker notes for each slide. It’s designed as a fast way to add and edit your slides’ talking points.
To expand your knowledge and learn more about adding, printing, and exporting your PowerPoint speaker notes, read our guide here .
Your speaker notes are visible when you print your slides using the Notes Pages option and when you use the Presenter View . To expand your knowledge and learn the ins and outs of using the Presenter View , read our guide here .

You can resize the Notes Pane by clicking on its edge and dragging it up or down (A). You can also minimize or reopen it by clicking on the Notes button in the Status Bar (B).
Note: Not all text formatting displays in the Notes Pane, even though it will show up when printing your speaker notes. To learn more about printing PowerPoint with notes, read our guide here .
Now that you have a basic grasp of the PowerPoint interface at your disposal, it’s time to make your presentation.
Adding Content to Your PowerPoint Presentation
Notice that in the Slide Area , there are two rectangles with dotted outlines. These are called Placeholders and they’re set on the template in the Slide Master View .
To expand your knowledge and learn how to create a PowerPoint template of your own (which is no small task), read our guide here .

As the prompt text suggests, you can click into each placeholder and start typing text. These types of placeholder prompts are customizable too. That means that if you are using a company template, it might say something different, but the functionality is the same.

Note: For the purposes of this example, I will create a presentation based on the content in the Starbucks 2018 Global Social Impact Report, which is available to the public on their website.
If you type in more text than there is room for, PowerPoint will automatically reduce its font size. You can stop this behavior by clicking on the Autofit Options icon to the left of the placeholder and selecting Stop Fitting Text to this Placeholder .
Next, you can make formatting adjustments to your text by selecting the commands in the Font area and the Paragraph area of the Home tab of the Ribbon.

The Reset Command: If you make any changes to your title and decide you want to go back to how it was originally, you can use the Reset button up in the Home tab .

Insert More Slides into Your Presentation
Now that you have your title slide filled in, it’s time to add more slides. To do that, simply go up to the Home tab and click on New Slide . This inserts a new slide in your presentation right after the one you were on.

You can alternatively hit Ctrl+M on your keyboard to insert a new blank slide in PowerPoint. To learn more about this shortcut, see my guide on using Ctrl+M in PowerPoint .
Instead of clicking the New Slide command, you can also open the New Slide dropdown to see all the slide layouts in your PowerPoint template. Depending on who created your template, your layouts in this dropdown can be radically different.

If you insert a layout and later want to change it to a different layout, you can use the Layout dropdown instead of the New Slide dropdown.
After inserting a few different slide layouts, your presentation might look like the following picture. Don’t worry that it looks blank, next we will start adding content to your presentation.

If you want to follow along exactly with me, your five slides should be as follows:
- Title Slide
- Title and Content
- Section Header
- Two Content
- Picture with Caption
Adding Content to Your Slides
Now let’s go into each slide and start adding our content. You’ll notice some new types of placeholders.

On slide 2 we have a Content Placeholder , which allows you to add any kind of content. That includes:
- A SmartArt graphic,
- A 3D object,
- A picture from the web,
- Or an icon.
To insert text, simply type it in or hit Ctrl+C to Copy and Ctrl+V to Paste from elsewhere. To insert any of the other objects, click on the appropriate icon and follow the steps to insert it.
For my example, I’ll simply type in some text as you can see in the picture below.

Slides 3 and 4 only have text placeholders, so I’ll go ahead and add in my text into each one.

On slide 5 we have a Picture Placeholder . That means that the only elements that can go into it are:
- A picture from the web

To insert a picture into the picture placeholder, simply:
- Click on the Picture icon
- Find a picture on your computer and select it
- Click on Insert
Alternatively, if you already have a picture open somewhere else, you can select the placeholder and paste in (shortcut: Ctrl+V ) the picture. You can also drag the picture in from a file explorer window.

If you do not like the background of the picture you inserted onto your slide, you can remove the background here in PowerPoint. To see how to do this, read my guide here .
Placeholders aren’t the only way to add content to your slides. At any point, you can use the Insert tab to add elements to your slides.
You can use either the Title Only or the Blank slide layout to create slides for content that’s different. For example, a three-layout content slide, or a single picture divider slide, as shown below.

In the first example above, I’ve inserted 6 text boxes, 3 icons, and 3 circles to create this layout. In the second example, I’ve inserted a full-sized picture and then 2 shapes and 2 text boxes.
The Reset Command: Because these slides are built with shapes and text boxes (and not placeholders), hitting the Reset button up in the Home tab won’t do anything.
That is a good thing if you don’t want your layouts to adjust. However, it does mean that it falls on you to make sure everything is aligned and positioned correctly.
For more on how to add and manipulate the different objects in PowerPoint, check out our step-by-step articles here:
- Using graphics in PowerPoint
- Inserting icons onto slides
- Adding pictures to your PowerPoint
- How to embed a video in PowerPoint
- How to add music to your presentation
Using Designer to generate more layouts ideas
If you have Office 365, your version of PowerPoint comes with a new feature called Designer (or Design Ideas). This is a feature that generates slide layout ideas for you. The coolest thing about this feature is that it uses the content you already have.
To use Designer , simply navigate to the Design tab in your Ribbon, and click on Design Ideas .

NOTE: If the PowerPoint Designer is not working for you (it is grey out), see my troubleshooting guide for Designer .
Change the Overall Design (optional)
When you make a PowerPoint presentation, you’ll want to think about the overall design. Now that you have some content in your presentation, you can use the Design tab to change the look and feel of your slides.
For additional help thinking through the design of your presentation, read my guide here .
A. Picking your PowerPoint slide size
If you have PowerPoint 2013 or later, when you create a blank document in PowerPoint, you automatically start with a widescreen layout with a 16:9 ratio. These dimensions are suitable for most presentations as they match the screens of most computers and projectors.
However, you do have the option to change the dimensions.
For example, your presentation might not be presented, but instead converted into a PDF or printed and distributed. In that case, you can easily switch to the standard dimensions with a 4:3 ratio by selecting from the dropdown (A).
You can also choose a custom slide size or change the slide orientation from landscape to portrait in the Custom Slide Size dialog box (B).

To learn all about the different PowerPoint slide sizes, and some of the issues you will face when changing the slide size of a non-blank presentation, read my guide here .
B. Selecting a PowerPoint theme
The next thing you can do is change the theme of your presentation to a pre-built one. For a detailed explanation of what a PowerPoint theme is, and how to best use it, read my article here .
In the beginning of this tutorial, we started with a blank presentation, which uses the default Office theme as you can see in the picture below.

That gives you the most flexibility because it has a blank background and quite simple layouts that work for most presentations. However, it also means that it’s your responsibility to enhance the design.
If you’re comfortable with this, you can stay with the default theme or create your own custom theme ( read my guide here ). But if you would rather not have to think about design, then you can choose a pre-designed theme.
Microsoft provides 46 other pre-built themes, which include slide layouts, color variants and palettes, and fonts. Each one varies quite significantly, so make sure you look through them carefully.
To select a different theme, go to the Design tab in the Ribbon, and click on the dropdown arrow in the Themes section .

For this tutorial, let’s select the Frame theme and then choose the third Variant in the theme. Doing so changes the layout, colors, and fonts of your presentation.

Note: The theme dropdown area is also where you can import or save custom themes. To see my favorite places to find professional PowerPoint templates and themes (and recommendations for why I like them), read my guide here .
C. How to change a slide background in PowerPoint
The next thing to decide is how you want your background to look for the entire presentation. In the Variants area, you can see four background options.

For this example, we want our presentation to have a dark background, so let’s select Style 3. When you do so, you’ll notice that:
- The background color automatically changes across all slides
- The color of the text on most of the slides automatically changes to white so that it’s visible on the dark background
- The colors of the objects on slides #6 and #7 also adjust, in a way we may not want (we’ll likely have to make some manual adjustments to these slides)

Note: If you want to change the slide background for just that one slide, don’t left-click the style. Instead, right-click it and select Apply to Selected Slides .
After you change the background for your entire presentation, you can easily adjust the background for an individual slide.

Inside the Format Background pane, you can see you have the following options:
- Gradient fill
- Picture or texture fill
- Pattern fill
- Hide background
You can explore these options to find the PowerPoint background that best fits your presentation.
D. How to change your color palette in PowerPoint
Another thing you may want to adjust in your presentation, is the color scheme. In the picture below you can see the Theme Colors we are currently using for this presentation.

Each PowerPoint theme comes with its own color palette. By default, the Office theme includes the Office color palette. This affects the colors you are presented with when you format any element within your presentation (text, shapes, SmartArt, etc.).

The good news is that the colors here are easy to change. To switch color palettes, simply:
- Go to the Design tab in the Ribbon
- In the Variants area, click on the dropdown arrow and select Colors
- Select the color palette (or theme colors) you want
You can choose among the pre-built color palettes from Office, or you can customize them to create your own.
As you build your presentation, make sure you use the colors from your theme to format objects. That way, changing the color palette adjusts all the colors in your presentation automatically.
E. How to change your fonts in PowerPoint
Just as we changed the color palette, you can do the same for the fonts.

Each PowerPoint theme comes with its own font combination. By default, the Office theme includes the Office font pairing. This affects the fonts that are automatically assigned to all text in your presentation.

The good news is that the font pairings are easy to change. To switch your Theme Fonts, simply:
- Go to the Design tab in the Ribbon
- Click on the dropdown arrow in the Variants area
- Select Fonts
- Select the font pairing you want
You can choose among the pre-built fonts from Office, or you can customize them to create your own.
If you are working with PowerPoint presentations on both Mac and PC computers, make sure you choose a safe PowerPoint font. To see a list of the safest PowerPoint fonts, read our guide here .
If you receive a PowerPoint presentation and the wrong fonts were used, you can use the Replace Fonts dialog box to change the fonts across your entire presentation. For details, read our guide here .
Adding Animations & Transitions (optional)
The final step to make a PowerPoint presentation compelling, is to consider using animations and transitions. These are by no means necessary to a good presentation, but they may be helpful in your situation.
A. Adding PowerPoint animations
PowerPoint has an incredibly robust animations engine designed to power your creativity. That being said, it’s also easy to get started with basic animations.
Animations are movements that you can apply to individual objects on your slide.

To add a PowerPoint animation to an element of your slide, simply:
- Select the element
- Go to the Animations tab in the Ribbon
- Click on the dropdown arrow to view your options
- Select the animation you want
You can add animations to multiple objects at one time by selecting them all first and then applying the animation.
B. How to preview a PowerPoint animation

There are three ways to preview a PowerPoint animation:
- Click on the Preview button in the Animations tab
- Click on the little star next to the slide
- Play the slide in Slide Show Mode
To learn other ways to run your slide show, see our guide on presenting a PowerPoint slide show with shortcuts .
To adjust the settings of your animations, explore the options in the Effect Options , Advanced Animation and the Timing areas of the Animation tab .

Note: To see how to make objects appear and disappear in your slides by clicking a button, read our guide here .
C. How to manage your animations in PowerPoint

The best way to manage lots of animations on your slide is with the Animation Pane . To open it, simply:
- Navigate to the Animations tab
- Select the Animation Pane
Inside the Animation Pane, you’ll see all of the different animations that have been applied to objects on your slide, with their numbers marked as pictured above.
Note: To see examples of PowerPoint animations that can use in PowerPoint, see our list of PowerPoint animation tutorials here .
D. How to add transitions to your PowerPoint presentation
PowerPoint has an incredibly robust transition engine so that you can dictate how your slides change from one to the other. It is also extremely easy to add transitions to your slides.
In PowerPoint, transitions are the movements (or effects) you see as you move between two slides.

To add a transition to a PowerPoint slide, simply:
- Select the slide
- Go to the Transitions tab in the Ribbon
- In the Transitions to This Slide area, click on the dropdown arrow to view your options
- Select the transition you want
To adjust the settings of the transition, explore the options in the Timing area of the Transitions tab.
You can also add the same transition to multiple slides. To do that, select them in the Slides Pane and apply the transition.
E. How to preview a transition in PowerPoint

There are three ways to preview your PowerPoint transitions (just like your animations):
- Click on the Preview button in the Transitions tab
- Click on the little star beneath the slide number in the thumbnail view
Note: In 2016, PowerPoint added a cool new transition, called Morph. It operates a bit differently from other transitions. For a detailed tutorial on how to use the cool Morph transition, see our step-by-step article here .
Save Your PowerPoint Presentation
After you’ve built your presentation and made all the adjustments to your slides, you’ll want to save your presentation. YOu can do this several different ways.

To save a PowerPoint presentation using your Ribbon, simply:
- Navigate to the File tab
- Select Save As on the left
- Choose where you want to save your presentation
- Name your presentation and/or adjust your file type settings
- Click Save
You can alternatively use the Ctrl+S keyboard shortcut to save your presentation. I recommend using this shortcut frequently as you build your presentation to make sure you don’t lose any of your work.

This is the standard way to save a presentation. However, there may be a situation where you want to save your presentation as a different file type.
To learn how to save your presentation as a PDF, see our guide on converting PowerPoint to a PDF .
How to save your PowerPoint presentation as a template
Once you’ve created a presentation that you like, you may want to turn it into a template. The easiest – but not technically correct – way, is to simply create a copy of your current presentation and then change the content.
But be careful! A PowerPoint template is a special type of document and it has its own parameters and behaviors.
If you’re interested in learning about how to create your own PowerPoint template from scratch, see our guide on how to create a PowerPoint template .
Printing Your PowerPoint Presentation
After finishing your PowerPoint presentation, you may want to print it out on paper. Printing your slides is relatively easy.

To open the Print dialog box, you can either:
- Hit Ctrl+P on your keyboard
- Or go to the Ribbon and click on File and then Print

Inside the Print dialog box, you can choose from the various printing settings:
- Printer: Select a printer to use (or print to PDF or OneNote)
- Slides: Choose which slides you want to print
- Layout: Determine how many slides you want per page (this is where you can print the notes, outline, and handouts)
- Collated or uncollated (learn what collated printing means here )
- Color: Choose to print in color, grayscale or black & white
There are many more options for printing your PowerPoint presentations. Here are links to more in-depth articles:
- How to print multiple slides per page
- How to print your speaker notes in PowerPoint
- How to save PowerPoint as a picture presentation
So that’s how to create a PowerPoint presentation if you are brand new to it. We’ve also included a ton of links to helpful resources to boost your PowerPoint skills further.
When you are creating your presentation, it is critical to first focus on the content (what you are trying to say) before getting lost inserting and playing with elements. The clearer you are on what you want to present, the easier it will be to build it out in PowerPoint.
If you enjoyed this article, you can learn more about our PowerPoint training courses and other presentation resources by visiting us here .
🔒 Unlock the PowerPoint Shortcuts Trusted by Industry Leaders KKR, American Express, HSBC, and More!
Join over 114,880 professionals from diverse fields including consulting, investment banking, advertising, marketing, sales, and business development who have supercharged their PowerPoint game with our proven methods.
✅ Customize compelling presentations effortlessly.
✅ Master time-saving techniques for faster deck creation.
✅ Boost your career prospects with top-notch PowerPoint skills.
Get FREE access to the Critical PowerPoint Shortcuts module of our premium training course by entering your name and email below.
DISCLAIMER: PC Users Only!
We respect your privacy and will keep your info safe and confidential.
About The Author

Popular Tutorials
- How to Strikethrough Text (l̶i̶k̶e̶ ̶t̶h̶i̶s̶) in Word, Excel & PowerPoint
- How to Make Animated Fireworks in PowerPoint (Step-by-Step)
- Strikethrough Shortcut (l̶i̶k̶e̶ ̶t̶h̶i̶s̶) for Word, Excel & PowerPoint
- How to Create a Flash Card Memory Game in PowerPoint (Like Jeopardy)
- Keyboard Shortcuts Not Working: Solved
PowerPoint Tutorial Categories
- Strategies & Opinions
- Shortcuts & Hacks
- Pictures, Icons, Videos, Etc.
- New Features
- Miscellaneous
- Charts & Data Viz
We help busy professionals save hours and gain peace of mind, with corporate workshops, self-paced courses and tutorials for PowerPoint and Word.
Work With Us
- Corporate Training
- Presentation & Template Design
- Courses & Downloads
- PowerPoint Articles
- Word Articles
- Productivity Resources
Find a Tutorial
- Free Training
- For Businesses
We help busy office workers save hours and gain peace of mind, with tips, training and tutorials for Microsoft PowerPoint and Word.
Master Critical PowerPoint Shortcuts – Secure Your FREE Training Module and Save Valuable Time!
⌛ Master time-saving expert techniques.
🔥 Create powerful presentations.
🚀 Propel your career to new heights.
We value your privacy – we keep your info safe.
Discover PowerPoint Hacks Loved by Industry Giants - KKR, AmEx, HSBC!
Over 114,880 professionals in finance, marketing and sales have revolutionized their PPT skills with our proven methods.
Gain FREE access to a full module of our premium PowerPoint training program – Get started today!
We hate spam too and promise to keep your information safe.
You are currently viewing a placeholder content from Facebook . To access the actual content, click the button below. Please note that doing so will share data with third-party providers.
60 Effective PowerPoint Presentation Tips & Tricks (Giant List)
Here's a PowerPoint presentation tips and tricks guide that takes you through how to make a good PowerPoint presentation.

The best PowerPoint presentations shouldn’t be remembered. Instead, they should fall into the background to support you and the message you’re trying to get across.
Unlike good PowerPoint presentations , bad PowerPoint presentations are a distraction. You may remember them, but not in a good way.
You’ve seen them before. They might have millions of lines of text. Or a disjointed flow to the slides. Even worse, some slides feature ugly photos and poor design that detract from the message you’re trying to get across. That can even hurt your credibility as a professional or speaker.

This article will take you from finding your initial topic to learning how to make a great PowerPoint presentation. Our guide covers everything in between so that you learn how to present a PowerPoint like a pro.
These Microsoft PowerPoint presentation tips and guidelines are organized into sections. So cut straight to the advice you need and come back when you’re ready for the next steps.
Guide to Making Great Presentations (Free eBook Download)

Also, download our Free eBook: The Complete Guide to Making Great Presentations . It’s the deepest resource for learning effective presentation skills for a PPT.
This eBook covers the complete presentation process. It takes the PowerPoint tips and tricks you learn in this article further. Learn how to write your presentation, design it like a pro, and prepare it to present powerfully. It’s another great source for presentation design tips.
Master PowerPoint (Free Course): 15 Essential Tips
This article is full of helpful tips so you can build a powerful presentation. You can also find more PowerPoint tips in this video lesson:
To learn even more about how to make a PowerPoint look good, review the huge list of tips below.
What Makes a PowerPoint Presentation Effective?
Knowing how to use PowerPoint and work within it quickly is helpful. But more important is making a good presentation that hits all your goals. A great PowerPoint presentation is:
- Prepared to Win . Research, plan, and prepare your presentation professionally. It helps you deliver an effective message to your target audience.
- Designed Correctly . Your visual points should stand out without overwhelming your audience. A good PowerPoint visual shouldn’t complicate your message.
- Practiced to Perfection . Rehearse your timing and delivery so that your points land as practiced with a live audience.
- Delivered With Poise . Present with a relaxed inner calm and confident outward projection. Give your audience warmth, excitement, and energy.
- Free From Mistakes . Avoid typos, cheesy clip art, and mistakes like reading directly from your slides.
Consider this your all-inclusive guide to how to make a good presentation. We’ll look at preparing your presentation and explore how to design it in PowerPoint. Plus, we’ll cover how to practice and nail your delivery successfully come presentation time.
We’ll also address what not to do in these tips for PowerPoint presentations—so you can sidestep any big mistakes. Now let’s dig into these tips for effective PowerPoint presentations.
Killer Presentation Preparation Tips to Get Started Right
Before even opening PowerPoint, start by addressing these things. These Microsoft PowerPoint tips and tricks will ensure that you’re prepared for your presentation:
1. Know Your Stuff
Your presentation isn’t about your slides alone. It’s about the message you want to get across. Before filling in stats, facts and figures, think about the narrative that’ll be discussed, why, and in what order.
2. Write It Out
Start in a Word or Google doc, and storyboard or script the entire presentation. This will give you an idea of how the information presented will flow and how viewers will see it in sequence. Learn the complete writing process .
3. Highlight What’s Most Important
A presentation covers the most crucial pieces only. Whatever you’ve been working on that led to this—a paper, a work project, a new product design—doesn’t need to be shared in its entirety. Pick key points and put the rest in an “Appendix” to refer to during the Q&A session at the end.
4. Know Your Audience
How you talk to a room full of medical professionals should be different from the way you address a room full of young entrepreneurs. Everything, in fact, is different: your topic selection, the language you use, the examples you give to illustrate points. The little bits of humor you include should be tailored specifically with your target audience in mind.
Understand your audience’s needs to create a successful PowerPoint presentation. Customize your content to meet their specific requirements.
5. Rehearse! (Yes, Already)
It’s never too early to get used to the rhythm of your presentation and take note of points you want to emphasize. While saying it out loud, you’ll start to develop a “feel” for the material. You’ll notice that some things work well, while others don’t and might need to be worked around.
6. Rewrite After You Rehearse
As you’re rehearsing your presentation, you’re bound to stumble over sections that don’t quite flow naturally. Instead of reworking your delivery, it might be time to consider the content and rewrite the areas that served as stumbling blocks.
“Editing is hard. ‘It’s good enough,’ is a phrase wannabes use. Leaders take editing seriously.” – Anthony Trendl
The most important part of creating a great presentation is the writing stage. The second most important stage is rewriting.
7. Share With a Friend
If the stakes are high for your presentation, it’s never too early to get feedback from those that you trust. Here’s an article that helps you collaborate as a team on a PowerPoint presentation. Get PowerPoint design tips from those that you trust when you collaborate.
Simple Tips to Design Your PowerPoint Presentation Better
Second only to you (the information you bring and how you present it) is your PowerPoint slides. If not designed well, a PowerPoint can be disengaging or distracting (regardless of the content quality). Here are some presentation design tips to make sure this doesn’t happen to you:
8. Keep Your Slides Simple
This is one of the most important PowerPoint presentation tips to follow when designing your slides. Keep in mind that less is more (effective.) A cluttered slide is distracting. It causes confusion for an audience: Which part of the slide should I focus on? Should I read the slide or pay attention to the presenter?
A simple, visually appealing slide will engage your audience, keeping them on track with your main points. Here’s an example of a simple slide that serves its purpose perfectly:

Minimalist slide templates like Nook can help you resist the urge to clutter your slides.
9. Limit Words on Your Slides
Piggybacking on the last point, less is more effective. If possible, avoid bullets altogether. Otherwise cut them to just a few simple words. The audience should be listening, not reading.
10. Use High-Quality Photos and Graphics
One of the most important tips for quality PowerPoint presentations is to use high-quality photos and graphics.
Earlier in this tutorial, you saw Envato Elements, an all-you-can-download service with PPT tips inside of templates. Those pre-built designs are a beginner’s best friend. They’re even better when paired with Elements’ unlimited library of stock photos .
People are more likely to take you seriously if your presentation is visually appealing. Users view attractive design as more usable. Similarly, they’ll view a more attractive PowerPoint as more effective.
11. Use Accurate and Relevant Charts and Graphs
Charts and graphs can also be distracting if they’re not used right. Make sure your information design is simple and clean so that the audience doesn’t spend the entire time trying to decipher what your X axis says. Learn more about PPT data presentation .
12. Use High-Quality, Fresh Templates
Have you seen the old PowerPoint template that looks like worn paper and uses ink splashes? Yeah, so has your audience. Templates can be distracting if they’re too basic or if the design feels dated. You need one with great design options.
Costs are always a concern. But when you use Envato Elements, you’ve got everything you need to create a great PowerPoint presentation . That’s thanks to the incredible all-you-can-download subscription package.
The best PowerPoint tips and tricks can hardly compare to the value of using a template while building your presentation.
On Envato Elements, there are thousands of PowerPoint design templates that are ready to use. Instead of designing a presentation from scratch, start with a template! Just add your specifics to the placeholders.

Templates like Galaxi are impressively designed and waiting for your slide specifics.
The best PowerPoint design tips save you time. And there’s no tip more powerful than this one: use a pre-built template . It helps you master how to present a PowerPoint without spending all your time in the app.
13. Choose Appropriate Fonts
Fonts are an important part of engaging your audience. Fonts and typography choices have a subconscious effect on viewers. They can characterize your company’s presentation and brand either positively or negatively. Make sure that you’re choosing fonts that are professional and modern.
14. Choose Color Well
Like font choice, colors cause specific subconscious reactions from viewers. Choosing an outdated color combination for your presentation will render it ineffective.
Below is an example of the Popsicle PowerPoint template , which has a modern presentation color choice:

The Popsicle PowerPoint template highlights how harmonized color palettes can create beautiful slides.
15. Clean + Simple Formatting Makes All the Difference!
We’ve got a full tutorial on how to make a good presentation slide . Give it a read through and review the accompanying video. Just remember, less is more. The focus is you and your message , not your slides.
16. Make Sure All Objects Are Aligned
A simple way to create a well-designed presentation is to make sure all items on a slide are intentionally aligned. To do this, hold down Shift and select all the objects you want to include. Then choose Arrange in the options bar and apply Alignment Type .
17. Limit Punctuation
This isn’t the place for exclamation points. Emphasize your points (while speaking). Don’t enlist punctuation to do this for you. (Leave these at home!!!)
18. Avoid Over-Formatting Your Points
This PowerPoint presentation tip is simple. There’s no need to have every word of every bullet point capitalized, or to have all your bullet points in title case. If possible, drop bullets altogether. Again, the simpler, the better!
Limit your text formatting, including reducing the use of bullets, underline, and other effects. Compare the before example on the left to the revised version on the right.

19. Combine Information With Graphics in PowerPoint
One of the most powerful presentation skills for PPT is using infographics. With the right type of visuals, slides come to life and reduce the text in favor of graphics.
Infographics help combine information with graphics. It’s easier to explain complex ideas when you use visual formats that are intuitive.
Practice Presentation Tips: Rehearse, Rehearse, Rehearse!
Delivery is probably more important than the actual content. Here’s how to become more aware of your own unique ticks, and how to present like a polished pro:
20. I’ll Say It Again, Rehearse!
Just do it. Again and again. Experiment with pauses, gestures, and body language. Practice around one hour for every minute of your speech.
21. Practice With a Timer
Consistency is key to an effective PowerPoint presentation. The timing should be similar (ideally the same) each time you rehearse. This one will especially pay off when it’s time to present in front of your audience.
22. Slow It Down
Many of the best speakers today intentionally speak slowly. You’ll have the chance to emphasize, appear more thoughtful, and make your information easier to digest.
23. Pause More Often
Like the prior tip, pausing more often allows your main points to be emphasized and gives time for information to sink in. You need to let key points breathe a little before rushing into the next section.
24. Record Yourself
Use your phone’s voice recorder. Assess and critique yourself. Consider:
- Are your pauses too short or too long?
- Are you speaking slowly enough? Too slow?
- When you’re nervous, does your voice get high like the mice in Cinderella?

It’s always weird to hear your own voice recorded; don’t stress it. Use this as a time to adjust.
25. Choose Three Focal Points in the Room
If you stare at the same spot (or even creepier, the same person) the entire time, your presentation will be ineffective (and awkward.) People will be distracted by you, wondering what you’re staring at.
Try this: pick three points in the room (typically: left, center, right). Take time to direct your delivery toward each physical focal point in the room. Also, focus on the center when making your primary points.
26. Vary Your Sentence Length
This makes you sound more interesting, and it’s easier for your audience to follow. Think short and punchy. Or go long and complex for dramatic effect.
27. Modulate!
Don’t speak in monotone for your whole presentation. Be conscious of raising and lowering your voice tone. Otherwise, people will tune you out, and you’ll come across like the teacher in Charlie Brown.
28. Practice in Front of a Mirror
What you look like is as important as how you sound. Pretend you’re having a normal conversation, and allow your hands to move with your speech to emphasize your points. Just don’t get carried away! (I’m thinking Brene Brown or President Obama , not your Aunt Jamie after a few gin and tonics.)
29. Use “Present Mode” When Rehearsing
When you finally are ready to hit the Present button in PowerPoint, make sure you use the Present Mode option. This allows you (and only you) to view extra notes about each slide—just in case you forget something!
30. Practice With New Audiences
If possible, try doing a few real live test runs as a webinar or even at a local Toastmasters organization to get some feedback from a live audience.
31. Engage the Audience by Asking Questions
There’s no reason that a presentation should be one-sided. Why not invert the format and ask your audience a question?
To learn how to create a slide that kicks off a Q&A, use this article . These PowerPoint design tips help you create an engaging and exciting discussion.
Helpful Tips to Step Up and Deliver Come Presentation Time
When the actual day arrives, there are only a few last PowerPoint presentation tips and guidelines to keep in mind:
32. Take a Deep Breath
Deep breathing is proven to relieve stress. It’s simple, and it’ll help you remain calm and in the moment, even up to the last minute before starting.
33. Lighten Up Your Mood
Tell yourself a joke or watch a funny video clip. Do this before the presentation, of course. Research concludes that happy people are more productive. More productive is more focused and able to perform better.
34. Remind Yourself to Take It Slow
When we’re stressed or nervous (or both), we tend to speak faster. Consciously, take yet another deep breath and remind yourself to take it slow!
35. Read the Room
Every presentation room has a temperature. It’s your job as a speaker to gauge it and tailor your presentation to it.
Here’s a great example. Layoffs are coming at a company, and you’re asked to speak to an audience. Even if the audience isn’t personally affected by the actions, you’ve got to consider the morale of the workforce.

Skilled speakers have a knack for reading the energy of the room and adjusting their presentation on the fly.
The last thing that group will want to hear is how strong the economy is and why the company is the best place to work. That doesn’t mean that you’ve got to align to their uncertainty, but don’t go too far against the grain while presenting.
Robert Kennedy III is a master of bringing energy and aligning a speech to the audience. Here’s his advice for adjusting:
“It can be hard to wake up a “dead” crowd but go for it. Most of all, don’t take their energy personally. Focus on serving them with every bit of your fiber then leave empty.”
36. Fake It ‘Til You Make It!
Go forward with confidence. If you act confident, you’ll start to feel more confident. Move slowly with grace, speak clearly, smile, wear something nice. You’ll appear confident to all attendees (no matter how you feel internally).
PowerPoint Presentation Tips and Tricks to Help Avoid Mistakes (What Not to Do)
Most importantly, focus on what you can do to make your presentation better. There are a few important things not to do that we’ve got to address. Here are a handful of PowerPoint presentation tips and tricks to help you avoid missteps.
37. Stop With the Sound Effects
Sound effects are distracting and outdated. In most cases, avoid them. Add audio or music to your presentation to inject interest or highlight an important point, but it’s something to take extra care with. If you insert audio, then make sure your use really connects with your audience and has a fresh approach. Otherwise, it’s best to leave it out.
38. Don’t Use Flashy Slide Transitions
Again, this is distracting and outdated. Use transitions and subtle animations in your PowerPoint presentation. But you need to take care and do it right .
39. Beware of Clip Art
This PowerPoint presentation tip shouldn’t even have to be said. But please, please don’t use clip art. Use professional graphics instead.
40. Don’t Be Afraid to Be Afraid
The fear of public speaking is a real one. Many beginners think that if they’re feeling nervous that a presentation won’t go well or succeed. That might lead them to cancel the presentation.
Here’s a tip from expert Sandra Zimmer, who leads The Self-Expression Center on conquering your fears before you take the stage:
“Get out of your head and into your body. I do this through a grounding exercise that really works to calm nerves and bring you present in the moment.”
If you think that public speaking fears aren’t normal, you might never give your award-winning presentation. So don’t be afraid to be afraid, and acknowledge it’s part of the process!
41. Don’t Read Directly During Your PowerPoint Presentation
If you spend your entire presentation looking at the screen or your note cards, you’re sure to lose your audience’s attention. They’ll disengage from what you’re saying, and your presentation will fall flat.
Reading from your paper or screen also makes it look like you’re not prepared. Many people do it, but no one should. As a general rule, only present something you know well and have, at least mostly, memorized the main points of.
42. Don’t Miss Out on PowerPoint Customizations
Many new PowerPoint users often make significant mistakes when using Envato Elements designs.
The best way to see how to make a good presentation PPT is to start with designs from others. That means using a template, but that doesn’t mean you can’t customize them!

Don’t forget that PowerPoint templates are infinitely customizable. Think of them as guides with built-in presentation design tips.
To see more presentation tips that show you what not to do, make sure to check out our guide .
Work in PowerPoint More Effectively (Tips & Tricks to Level Up Your PPT Skills)
These PowerPoint tips will help you get the most out of the application to level up your next presentation. Let’s dive in.
43. Use the Visual Guides
When you’re designing your next PowerPoint presentation, it helps to create a sense of visual rhythm. Slides that have objects aligned and centered are more likely to resonate with an audience.
44. Use a Few Animations (Tastefully)
Animations in effective PowerPoint presentations are a slippery slope. We’ve all sat through presentations where there were so many objects in motion that it was easy to lose focus on the key ideas in the presentation.
But that’s why animations get an unfairly bad reputation. Use animations to create motion and hold an audience’s attention. Use them sparingly and on key elements on your slide, and you’ll capture that attention properly.
45. Stage Key Content With Animations
You just learned that animations should avoid being distracting. But there’s an important principle to using animations properly. It’s called staging content.
Staging content means that the content appears step by step. There’s nothing worse than overwhelming an audience with all your content at once. But when you stage content, bring it on step by step.
Take it from presentation pro Suzannah Baum :
“If you’re sharing a slide with lots of different points on it, using the animation to reveal those points one at a time is a way to keep the presenter’s content flowing smoothly.”
For more animation presentation tips and tricks, follow our guide .
46. Add a Video to Your PowerPoint
When you’re sharing a big idea in your presentation, it helps to share your perspective from a few different angles. Adding a video to supplement your content can do just that. Luckily, it’s easy to add and embed a YouTube video in your next PowerPoint presentation.
47. Add Charts & Graphs
Charts and graphs can help you tell stories with data. It’s easy for an audience to zone out when you throw a big data table or set of statistics at them.
instead, convert those to charts and graphs. Try out our tutorial to learn how to edit those graphs.
48. Build Your Own Infographics With SmartArt
Earlier in this tutorial, we gave you one of my favorite PowerPoint design tips: use infographic templates.
Here’s another. One of my favorite PowerPoint features is SmartArt, which allows you to build infographics right inside the app.
You don’t have to use another graphic design app like Photoshop or Illustrator to add visuals. Instead, try out SmartArt to help you build graphics that are easy to update.
49. Use Presenter View
Remember that when you use the PowerPoint, you’ re the presentation. The slides are just there to reinforce what you’ve got to say and support your speaking points.
That’s why I always recommend using Presenter view. More often than not, you’re going to have several displays. Presenter view shows your content on your screen, while your presentation is displayed on another screen.
50. Track Your PowerPoint Changes
One of my favorite PowerPoint design tips is to collaborate. Those who know you best will suggest compelling changes that are sure to help you succeed.
As you start collaborating on your presentation, it helps to keep track of proposed and included PowerPoint changes. Use this article to track changes made by others.
10 More Advanced PowerPoint Tips & Tricks
Really need to wow an audience with a good PowerPoint presentation? Give these tips a try to make an unforgettable impression:
51. Engage With an Interactive Quiz
A good PowerPoint presentation gets your audience involved. One of the best PowerPoint tricks is to do that with a quiz. By engaging audiences, a quiz makes your slides memorable.

By adding trivia, you’ll see how to present a PowerPoint in a way that people will love. Channel your inner game-show host today. MIDTEST is a good PowerPoint presentation with quiz slides.
52. Illustrate With Custom Image Masks
One of the top PowerPoint tips is to illustrate your slides. But you can go beyond simple, rectangular images on each slide.

The Burte template is full of PowerPoint tricks , including custom image masks. Image masks shape photos into unique works of art. And thanks to premium templates, you can style photos just like this. Masks overlay your photos onto geometric shapes, instantly elevating your style.
53. Print Handouts With Extra Notes
Wonder how to give a good presentation PPT that audiences will remember? Give them a piece of it to take home.
PowerPoint makes it easy to print handouts with room for notes on the page. This way, audiences can keep copies of your slides, along with their own notes. This is the perfect way to ensure everyone engages with and retains your content.
54. Make Bulk Edits With Master Slides
When you think about how to present a PowerPoint, consider your branding. That means keeping your logo front and center in the eyes of an audience. But if you’re working with a lengthy slide deck, this could seem daunting.
That’s where master slides come in. They’re common in premium layouts, and they’re a leading example of presentation skills for PPT. Master slides let you make bulk edits fast.
55. Shrink File Sizes for Sharing
Many of the top presentation tips involve making your slides more accessible. Often, that involves sharing them with audiences online.
You’ll often find that email clients and cloud services limit the size of files that you share. This can be a problem with large PPT slide decks. But there are a few quick steps you can take to reduce PPT file size. Cut graphics, scale down photos, and more.
56. Map Processes With Flowcharts
As you consider how to do a good PowerPoint presentation, think of ease of understanding. After all, you’re trying to explain something to your audience.

The Flowcharts in Infographics template seamlessly illustrates ideas and processes. A flowchart maps out a process in a visual way. Instead of resorting to endless narration, try a quick illustration like this. It saves you time and effort, and your audience is sure to thank you.
57. Use Brand-Specific Colors
Using presentation skills for PPT helps form an association between your message and branding. There’s no better way to do that than with your brand colors.
PowerPoint makes it easy to change color themes, adding your brand colors and logo to each slide. This is one of the top PowerPoint tricks for marketing presentations.
58. Build Social Media Posts in PPT
A good PowerPoint presentation doesn’t have to be shared through a projector. Use the app and templates to build amazing illustrations to use anywhere.

A template like Soffee helps you learn how to present a PowerPoint easily with a pre-built design.
Try using PowerPoint to create social media posts. It helps you engage with your audience, with no need to design custom layouts from scratch.
59. Be Industry-Specific
One of the top presentation tips in 2024 is to be industry-specific. That means avoiding generic layouts and choosing something more customized.
This offers two key advantages. First, you save time by having layouts built for you. Second, you gain design inspiration for your specific topic. Themed templates are truly the best of both worlds.

The Medical and Health template is a good PowerPoint presentation with a set theme.
60. Design for Online (Virtual) Sharing
Last but not least in our list of PowerPoint tips comes virtual presenting. More and more often, slides will be shared with online audiences around the globe.
Why not design your slides for that very purpose? And then learn how to share flawlessly with a global team? It’s one of the top presentation tips for 2024. Embrace it today.
More Great PowerPoint Tutorial Resources
We’ve built a resource for Microsoft PowerPoint that you’re sure to want to try. It includes countless PowerPoint tips and tricks. It’s called How to Use PowerPoint (Ultimate Tutorial Guide) and has all the PowerPoint design tips you need.
Discover More Top PowerPoint Template Designs From Envato Elements for 2024
You’ve just seen our favorite powerful PowerPoint presentation tips and guidelines to help you improve your speaking. We’ve also mentioned Envato Elements, an incredible all-you-can-download source for top PowerPoint designs .
Here are five of the best PowerPoint templates that you can use to create your best presentation yet:
1. Galaxi PowerPoint Template
Blast off to success with the help of this PowerPoint template! Think of the pre-built slide designs as pro PowerPoint design tips. They’re built by professional graphic designers. All the popular and modern slide styles that are perfect for your next presentation. Use Galaxi’s five styles and 30 designs to create a great presentation.
2. Masmax PowerPoint Template

We selected templates for this article that match the PowerPoint tips and tricks provided. Masmax fits the bill perfectly across its 234 unique slide designs. These slide designs are sure to align with the latest in design expectations.
3. STYLE Multipurpose PowerPoint Template V50

Style is subjective, but we can all agree that this template is stunning! The light and airy slide designs are built with fashion-focused designs in mind. But that doesn’t mean that it’s not perfect for most presentations. When learning to present a PowerPoint, remember that templates can be customized to suit your purpose.
4. Peachme Creative PowerPoint Template

Peachme has image-focused slides with splashy designs. The slides are colorful and perfect for a modern presentation. Don’t worry about remembering all the PowerPoint design tips because they’re included in the pre-built slides. Use Peachme’s designs for your presentation today.
5. Buizi Office Building Rent PowerPoint Template

Buizi markets itself as a real estate focused template. It’s ideal for that purpose because of the minimal, image-focused slide designs. But that also makes it a perfect choice for presentations in many fields.
We’ve just scratched the surface of PowerPoint design tips with these five options. Here are many more, bundled inside of the best roundups on Envato Tuts+:
How to Build a Good PowerPoint Presentation Quickly (In 2024)
You’ve already seen effective presentation skills PPT techniques. But you may be wondering exactly how to do a good PowerPoint presentation. It only takes a few clicks. Let’s learn how in just five steps.
For this mini-tutorial, we’ll use the Enjoy PowerPoint Template from Envato Elements. You’ll see that it’s a beautiful template that helps you learn how to present a PowerPoint by giving you every object and layout you need.

Let’s get started:
1. Choose Your Slides
As you can see, a template like Enjoy has dozens of unique slides inside. The key to how to give a good presentation PPT is to choose only the slides that you need.

One of the best PowerPoint tricks is to start by selecting slides you wish to use from your template.
In PowerPoint, scroll through the sidebar on the left to view different slide layouts. Right-click and choose Delete to remove unwanted designs. Plus, you can click and drag slide thumbnails to reorder them in the deck.
2. Add Text
Consider how to do a good PowerPoint presentation without investing a ton of time. That’s where premium templates come in.

One of our top presentation tips when working with a PPT is to lean on the pre-built text boxes for your content.
To add custom text, simply click and select the contents of any text box on your slide. Then, type in your own words. Repeat as needed throughout your slide deck.
3. Customize Fonts
With text selected, it’s easy to customize fonts on each slide. Find the Font section on PowerPoint’s Home tab. From there, you’ve got a variety of dropdown options.

Another of our top tips for presentation tricks is to use a custom font setting in your template.
Click to change the font, font size, and more. You can also use the buttons on the left to add bolds, italics, and more.
Need more custom font styles? As an Envato Elements subscriber, you’ve got instant access to thousands of custom fonts . Use them in your presentation with ease.
4. Insert Images
Slides like this one contain an image placeholder. That’s another advantage found only with premium templates. These make adding images a breeze.

Add images to your PPTX template for more visually interesting slides.
To get started, find an image file stored on your computer. Then, drag and drop it over the placeholder. PowerPoint will import it, sized and scaled for a perfect fit.
5. Change Colors
One of the top effective presentation skills is changing shape colors. This helps you control the look and feel of each slide.

With a shape selected, find the Shape Format tab on PowerPoint’s ribbon. Then, click on the Shape Fill dropdown. You’ll see a color chooser menu appear. Click on any thumbnail to apply it to the shape or browse through the Gradient and Texture options.
Start Putting These PowerPoint Presentation Tips & Tricks Into Use Today!
Learning to write, design, and present a PowerPoint presentation is an invaluable skill, no matter where you use it. If you’re a good communicator of important messages, you’ll never go hungry.
Luckily, improving PowerPoint presentations isn’t as hard as it seems. Follow these tips for PowerPoint presentations to design and deliver with greater confidence.
Remember: Less is more (effective) . Use PowerPoint presentation templates for better design and more effective visual impact. And you can customize a PPT template quickly , with the right workflow.
Related Articles

You’re using an older browser version. Update to the latest version of Google Chrome , Safari , Mozilla Firefox , or Microsoft Edge for the best site experience.
- Corporate Training
- Course Selling
- Academic Learning
- Learning Basics
- Instructional Design
- Online Training Tools
- Manufacturing
- Products iSpring Suite iSpring Learn
- Use Cases Onboarding Compliance Training Induction Training Product Training Channel Partner Training Sales Training Microlearning Mobile Learning
- Company About Us Case Studies Customers Partnership Course Development Contact Us
- Knowledge Hub Knowledge Hub Academy Webinars Articles Guides Experts on iSpring
- Language EN English Français Deutsch Español Italiano Nederlands Português Polski 中文 日本語 العربية Indonesia
- Shopping Cart
How to Create a Video Presentation in PowerPoint

content creator
Helen Colman See full bio →

Have you ever gone on YouTube to watch just one video, only to find yourself stuck there a few hours later? You aren’t the only one. TechJury reports that last year the combined watch count on YouTube was 5 billion views per day.
People love watching videos. According to a report by Forrester Research , videos are 75% better at keeping the audience engaged than documents, articles, and other forms of plain media. This is why more and more companies are using them for video marketing and other business tasks. One of the more popular forms of video is a video presentation.
In this article, we’ll explain what a video presentation is, show you how to create one, and share some helpful video presentation tips. Let’s dive in.
- What Is a Video Presentation
- Why Create a Video Presentation
- How to Create a Video Presentation
The Top 5 Tools for Making Video Presentations
How to turn your powerpoint presentation into a video, tips and best practices for making video presentations.
- FAQ on Video Presentations
What Is a Video Presentation?
A video presentation is a popular format of video content with a duration of several seconds or minutes that shows the benefits of a product, service, or a new idea with the help of relevant images, concise text, and appropriate audio narration.
People use video presentations in various aspects of business to keep their audience engaged. As such, presentation videos can be used in marketing campaigns and sales presentations for new clients, employee training and onboarding, B2B communication, and even to present an enterprise at expos or conventions.
Video presentations can take a variety of formats. They can include fully animated explainer videos, cartoons, invitation videos, screencasts, tutorials, video ads, promo videos, marketing videos, product demos, or a PowerPoint presentation narrated by a talking head. Ultimately, the choice of format is yours.
Why Create a Video Presenation?
Besides being more appealing than a basic cut-and-dry content piece, video presentations are also:
- Persuasive . Video presentations more effectively persuade your target audience through audio-visual design, storytelling, and bringing emotions, ideas, and sounds into the mix.
- Better for information retention . Invisia reports that viewers retain 95% of a message in video form, as compared to 10% when reading it in text. Thus, educators often use video presentations within the framework of the digital storytelling concept or when pre-installing new educational material. Here you will find detailed information about how you can apply digital storytelling in your lessons.
- Accessible anytime, anywhere . Most people like to spend time on their phones and tablets, and they prefer to browse videos on them. Emarketer found that 75% of all videos are played on cell phones and tablets.
- Time-efficient . They say that a picture is worth a thousand words. Video presentations are meant to convey information in smaller chunks that are easy to process. This allows viewers to explore larger amounts of information more quickly and easily.
Video Presentation Examples
Do you need some inspiration for your video presentation? Take a look at some examples of quality video content created for different purposes and audiences.
Product/Sales video presentation
A good video presentation is a winning format if you want to present your product or service to potential customers to drive conversions and sales. You can highlight the key features, benefits, and value propositions of your offerings effectively and easily distribute the presentation via online platforms, such as your company website, social media channels, email newsletters, and video posting sites.
This is a short product presentation of Character Builder, one of iSpring Suite’s flagship features. The video is concise yet clear, explaining the feature and outlining its use in eLearning content creation. In just under 35 seconds, the viewers (aka potential or actual customers) can see how characters look and get an idea of how to create them.

Once the iSpring Narration Editor window appears, you can either record a new video narration or import an existing video file.
How to import a video file
To import an existing video file, click on the Video button in the Import tab.

Find the video file and click on the Open button.
Pro tip : You can insert multiple videos at the same time. To do that, press and hold the Ctrl key while selecting several files.
In the Import Video window, you have the choice of importing your video at the current cursor position or at the beginning of the slide of your choice.

Note: If you choose to import your video at the beginning of a certain slide, you will have the option of selecting the Adjust slide duration option. This will adjust the slide you have selected to the length of your video.

How to record a video in PowerPoint
To film yourself on a webcam, you can use the video narration feature. Click on the Record Video button on the editor’s toolbar.

The Record Video Narration panel will appear.
You can add a video narration for one or several slides at a time. To start recording video for the current slide, mark Process current slide only.

Step 2. Synchronize video with slides
Now it’s time to synchronize your video with your slides and animation effects. The latter are displayed as yellow bars on the Slides timeline. The great thing is that you’ll be able to choose the exact moment when an animation will appear while watching the video. This way, the effects will perfectly correspond to the narration in your video presentation.
Note : This is only applicable if you have animation effects attached to your slides.
The sync process is quite simple to use. Just place the cursor where the sync should begin and click the Sync button on the toolbar.

A Sync panel will appear above the timeline. Click on the Start Sync button to start the process.
The Start Sync button will be replaced with the Next Slide or Next Animation button, depending on the next element in the sequence. Click on those buttons at the appropriate moment. Hit the Next Animation button at the point in the narration where you would like to start the next animation. For example, if you are listing information, you can have each new item appear when the narrator mentions it in the video narration.

Once you have finished, click on Done to quit the Sync mode. Then hit the Save & Close button in the upper-left corner.
Step 3. Switch layouts in Slide Properties
iSpring allows you to publish materials using one of two players: the highly customizable Universal player or the Video Lecture player. The latter displays the video presentation in a 50/50 layout and allows viewers to change the proportion between video and slides at any time.
The Universal player features three layouts for a video presentation:
- The Full layout displays the slide, sidebar, and navigation panel.

The No Sidebar layout displays the slide and the navigation panel only.

The Maximized Video layout displays the video in the center, the slide on the sidebar, and the navigation panel.

Your presentation doesn’t have to have the same layout everywhere. You can highlight key points by changing the proportion between the on-screen information and the video for each slide.
To do that, click on Slide Properties on the toolbar.

In the Layout column, pick the desired layout for a particular slide from the drop-down list.

The layouts for the Video Lecture player can be changed at any time during playback. You can still preset them, and they will work as follows:
- The Full layout displays video and the presentation in equal proportions.

The No Sidebar layout displays the full slide with a miniaturized video.

The Maximized Video layout will show the enlarged video and a smaller slide.

It is recommended that you set slides to advance automatically during the entire presentation. To do that, in Presentation Explorer , select all slides and click on the Auto button .
Step 4. Customize your player template
The built-in presentation player has flexible customization options for creating presentation templates: you can provide your viewers with the presenter’s info, a brand logo, an outline, and more. First, let’s choose which player to use. Click on Player on the product ribbon, and choose whether to use the Universal or Video Lecture player, as shown in the image below.

For this guide on making a video presentation, we’ll use the Universal player. To customize it, click on Templates . There are several player templates to choose from. We’ll use the Online Lecture with Video template as an example.

You can also experiment with the settings, doing things like turning off the outline and notes by clicking on the Layout button on the ribbon. Here’s what our player will look like:

Additionally, you can customize a presentation to match your brand colors by choosing one of the built-in color schemes or creating your own.

When you have finished customizing the player, click on Apply & Close in the upper left corner. Well done! You’ve put the finishing touches on your video presentation.
Step 5. Publish your video presentation
When your video presentation is ready, the last step is to publish it to a web format so it can be easily accessed via a browser.
In the Publish Presentation window, select the My Computer tab from the menu at the left. Enter the presentation title and select a local folder where the presentation will be saved. Under Output Options , choose a format. We’ll be publishing to the HTML5 format to make our video presentation play seamlessly across all platforms and devices. You can learn more about publishing presentations here .

In case you want to know more about other presentation software to create engaging video presentations, there are software solutions available that also come with a shallow learning curve. These apps range from video recording or video editing software to animating your cartoons. Here’s an overview of five of the most powerful yet easy-to-learn video presentation makers.
1. Camtasia
If you want to create a video presentation but don’t have the time to put layouts together, you can use the Camtasia video recorder software. Camtasia offers a library of video presentation templates and assets that users can use to make their own presentation videos. Users can also create their own video templates and save them for future projects.
Like iSpring, Camtasia is a video presentation maker that allows you to record both screen and webcam. You can’t create a slide deck in it, but it’s a good solution if you need to record and show yourself as well as everything you do on your screen.

2. PowToon
Animation is a universal language without limits; it hooks any audience immediately. Promotional cartoons are now available to everyone, thanks to software like PowToon . This service can function as a video presentation maker that has an intuitive user interface and amazing comic-style graphics. You can start from scratch or use ready-made scenes and layouts that are editable with a drag-and-drop feature. The complete animated presentation can then be uploaded to YouTube channels or social media with a single click.

3. Biteable
Biteable is a video presentation maker and video editing software that allows you to make professional-quality video presentations and animated videos online within minutes. It sacrifices the ability to capture video and record voice in favor of the creation of powerful animations. The ingredients are your photos, texts, pre-made templates, and stock video footage. Styles of presentation videos produced vary from animated illustrations to live action. What’s cool about this video presentation maker is its ability to create engaging video infographics.

With Emaze , spectacular video presentations are at your fingertips. With an intuitive creator interface and a number of ready-made templates available, creating a video presentation is no longer time-consuming. If you already have a PowerPoint presentation that you want to enhance, you can import it into Emaze and use its collection of tools to attach photos, GIFs, videos, and 3D images.

Animoto is an online video presentation maker that allows you to create video presentations by simply dragging and dropping your own images and video clips into a pre-built video presentation template. To customize your videos, you can quickly adjust colors, fonts, background music, add your company watermark, and more. No video editing experience is required.

If you’d like to know more about other tools for making video presentations, read our article on the Top 10 Video Presentation Makers for Promotion and Education .
By default, you can make your PowerPoint presentation into a video by saving it as one. This can be a solid choice if you don’t need narration for your video. But if you need to, you’ll still be able to record narrations from that menu without going back to the original PowerPoint presentation.
Here’s what you need to do to download your slides as a video in PowerPoint:

- Click on the Create video tab to start downloading your video.
To make your presentation even better, consider the following tips for creating a successful video presentation:
- Make your videos short and sweet . Keep your video clips long enough to grab the attention of your target audience but short enough to incite curiosity. Your goal is to maintain the viewer’s interest. Remember, the optimal length of a video presentation is no longer than 4-7 minutes.
- Keep to the point . Make your goals and objectives known at the start of the presentation, and don’t stray from the message. Your text and visuals should relate to the subject matter and not detract from the goal of your video presentation.
- Add engaging elements . Enrich your video presentation with useful and interesting content. For example, add background music, colorful infographics, embed YouTube videos, or insert interactive quizzes to engage learners.
- End on a meaningful note . Leave your audience with something they can take away from the presentation. A new idea, a short story, a visual representation of your product, or even a link to your website works to provide the strong ending needed to create a lasting impression.
FAQ on Creating Video Presentations
Here are answers to a few popular questions about making a video presentation.
How do I make an effective video presentation?
First and foremost, think about your target audience before you create video presentations. What are their ages, genders, and occupations? What is their prior knowledge on a topic or their level of proficiency? After you define the audience, choose the way you will be presenting accordingly. You should connect with your audience emotionally and ‘speak their language.’ In this way, you’ll communicate the right message to the viewers.
Second, it will be useful to prepare a script for your video. Of course, the slideshow will support you, and you can base your speech on its content. But if you write an intro, outro, some key points, and transition words in advance, you will present more confidently and reduce rambling or unnecessary pauses. This will help you focus on the effectiveness of your message.
How can I prepare myself for a video presentation?
Make sure you’re physically and technically prepared. When delivering a presentation, prevent your mouth and throat from getting dry. You can use a lip balm and have a glass of water nearby to refresh during pauses. This will make you sound better, and your recording will be clearer. For recording, it’s better to choose a smaller, quieter space to avoid echoes and check your microphone’s sound.
Also read → How To Record PowerPoint Presentation With Audio
What is the best video format for a PowerPoint presentation?
PowerPoint allows you to save your presentation in these video formats: MPEG-4 (or MP4 / .mp4) , Windows Media Video (.wmv), or MOV (if it’s PowerPoint on a Mac). MPEG-4 is the most common video format and is widely supported. Opt for this if you have PowerPoint versions 2013, 2016, or 2019. With PowerPoint 2010, the Windows Media format is preferable.
We hope this post will help you turn static slides into an engaging video presentation that captivates your audience. To start creating video presentations and other kinds of eLearning content, try iSpring Suite today. Get a 14-day free trial and access all of its advanced features without spending a cent.
Table of Contents
iSpring Suite
Create online courses and assessments in record time.

Content creator
Helen Colman
She enjoys combining in-depth research with expert knowledge of the industry. If you have eLearning insights that you’d like to share, please get in touch .
The 21 Best Video Tutorial Software Programs: Free & Paid
How to Make a How-To Video in a Breeze

The 6 Best Screen Recorders for Windows PC in 2024

We use cookies to give you the best possible experience on our website and also for analytics and marketing purposes. You can enable or disable optional cookies as desired. See our Cookie Policy for more details.
Manage your cookies
Essential cookies are always on. You can turn off other cookies if you wish.
Essential cookies
Analytics cookies
Social media cookies
- Accessories
- Entertainment
- PCs & Components
- Wi-Fi & Networks
- Newsletters
- Digital Magazine – Subscribe
- Digital Magazine – Info
- Smart Answers
- Best laptops
- Best antivirus
- Best monitors
- Laptop deals
- Desktop PC deals
When you purchase through links in our articles, we may earn a small commission. This doesn't affect our editorial independence .
Become a PowerPoint pro: 7 must-know tips and tricks

Microsoft’s PowerPoint is extremely popular in schools, universities, and the corporate world, but it has never been as popular with home users. Not surprising since it’s all about creating presentations, something a private person doesn’t have to do very often.
So, if you suddenly find yourself needing to make a PowerPoint presentation and have no idea how to make it good, rest assured that you aren’t alone and there’s hope for you.
Microsoft Office 365 Home

These days, PowerPoint is more than just a basic slideshow—it can be used to create video presentations with voice-over narration, and it even has an AI-based helper called Designer that gives suggestions on how to make your presentation better.
Here are several smart tips and tricks you can use to improve your PowerPoint presentations and come off as a pro.
1. Customize Quick Access
Have you noticed that PowerPoint—and the other apps in Microsoft 365 for that matter—have a small, narrow toolbar at the very top of the application window? By default, you’ll find shortcut buttons for toggling Auto Save and basic actions like Save, Undo, Repeat, etc.
This nifty toolbar also comes with some app-specific actions that you may or may not use frequently. In PowerPoint, for example, there’s a shortcut to start slideshows from the beginning.
This toolbar is called Quick Access and you can actually customize what actions show up here. You can add frequently used actions while removing the ones you never use.
This can make it easier to find important functions that you would otherwise have to rummage around the ribbon to find.

To customize Quick Ass, select File > Options and then Quick Access Toolbar . The box on the right shows the actions currently on it and their order. The box on the left has all the available actions you can add.
Select an action you want in Quick Access and click on Add . To change the order, highlight the action you want to move and use the the arrow buttons on the right side of the window.
2. Use custom themes and templates
PowerPoint comes with a bunch of ready-made templates for presentations, which have also been themed.
A theme is a collection of settings for typography, colors, and effects that make it easy to maintain a consistent style across presentations. A template is a theme plus ready-made content that makes it easier to make a particular type of presentation again in the future.

For example, a company may have a theme that defines the colors and fonts employees should use in presentations, plus a number of templates for product presentations and quarterly reports.
A template may have a number of ready-made slides with images, charts, and everything else already laid out. When you create a new presentation from a template, you will find these individual page templates in New slide in either Start or Insert .
Creating your own custom theme
New themes can be added at any time as long as you have a presentation open—even if it’s a blank presentation.
Select the Design tab and click on the small down arrow with a dash over it on the right side of the Variants section. This shows the four categories of settings you can designate for a theme.

Select Colors > Customize Colors… and the Create new theme colors dialog box will open. A complete set of theme colors includes two pairs of text and background colors (dark/light, to be used either for dark text on a light background or vice versa), six spot colors used for graphic elements, and two colors for hyperlinks. Enter a name at the bottom and click Save when you are done.
If you also want to change the font, select Fonts > Customize Fonts… and you’ll be able to designate a Heading font and a Body font . I recommend a neutral, easy-to-read font for both.
Under Effects , you can choose the style of effects but there’s no way to customize or create a completely new effect. Under Background Styles , you can select Format Background… to tweak backgrounds.

When you’re done, go to the Themes section of the Design tab and click the down arrow with a line above it, then select Save Current Theme… to save your new theme. Give it a name and save and your new theme will appear among the available themes in the Design tab of all presentations.
Create your own custom templates
To create a new PowerPoint template, you can start from either a blank presentation or an existing template. Don’t add any content of your own yet. Instead, go to the View tab and click on Slide Master .
Start by changing the theme of your new template, under the Themes button. If you created your own theme as described above, it will normally be at the top of the list of available themes.

PowerPoint uses the term layouts for slide templates. Click on the Insert Layout button to create a new slide template.
New layouts are automatically given a header and a footer, but you can remove them if you wish (either by selecting and deleting the elements manually or via checkboxes in the Slide Background tab).
To delete an existing layout, right-click on it in the list and select Delete Layout or select it in the list and press Backspace.

To add new design elements to a layout, click the Insert Placeholder button in the ribbon and select the element type you want. You can then position and resize it, and change the placeholder text for it.
If you want to make per-layout changes, make sure to select that layout in the list before tweaking. For example, you can change a layout’s color theme or switch between the four background formats.
When you’re happy, save the template by selecting File > Save As and changing the format to Powerpoint Template (*.potx) . Templates can be stored either locally on your computer or in OneDrive—and since the theme is included, you can freely share the template with others.

3. Link to Excel data
If you’re making a presentation with figures in tables or charts, you can make your life easier by linking PowerPoint to Excel.
To do this, start by copying a chart in Excel, then switching over to PowerPoint and navigating to the Home tab in the ribbon. Select Paste > Paste Special… , then choose the Paste Link option, select Microsoft Excel Chart Object and finish by clicking OK .

A linked chart, table, or other Excel object can be instantly updated with up-to-date information as the data in the Excel document changes, all without having to copy and paste all over again.
To update the Excel object, right-click on it in PowerPoint and select Update Link . PowerPoint will retrieve the latest data to be reflected in the Excel object. This makes it easy to build a data-heavy report in PowerPoint that can be kept up-to-date with zero hassle.
4. Edit and apply effects to images
Basic slide editing in PowerPoint isn’t difficult, but there are a few tricks you can learn to make your slides both behave the way you want them to and do new things you may not have realized were possible.
For example, did you know that PowerPoint has built-in editing features that can change brightness, contrast, and sharpness of images?

Select an image in a slide and the Picture Format tab will open. Here you’ll find several adjustments you can make:
- Corrections alters brightness, contrast, and sharpness
- Color applies color filters
- Artistic Effects stylizes the image (but apart from the useful Blur effect, most of these feel pretty old-fashioned)
- Transparency makes the image more or less transparent
- Picture Styles can format the image in various ways (e.g., frame, shadow, rounded corners, perspective, etc.)
One thing you’ll notice when you add an image is that PowerPoint automatically generates alternative text—that is, descriptive text that gets read aloud for users with visual impairments. You can set this text to whatever you want, and it’s nice that Microsoft has thought about accessibility in this way.
5. Fill a shape with an image
PowerPoint makes it easy to fill a vector graphic shape with an image instead of just a solid color or gradient.
Create the shape as you want it, then make sure it’s selected before navigating to either the Home or Figure Format tabs in the ribbon. Select Shape Fill > Picture… , then select From a File to pick an image that’s saved on your computer.

If you aren’t satisfied with the positioning of the image in the shape, you can open the Picture Format tab and select Crop > Crop to resize and move the image in relation to the shape, allowing you to center it at a different point and even zoom in or out.
6. Incorporate audio and video
These days, PowerPoint isn’t just for presentations on screen or with a projector—it’s increasingly common to export finished presentations as videos to be sent to recipients, uploaded to the web, embedded in mobile apps, and more.

To make such presentations more vivid and interesting, you can record voice-over audio and/or video from a connected webcam to be placed on top of slides. You can find these features in the Record tab, where PowerPoint has also placed the Export to Video function.
The export function allows you to set the video resolution as well as how long each slide will display in the video.
More on this: How to turn a PowerPoint presentation into a video
7. Get AI help with Designer
Designer is the new name for Design Ideas, a feature that has been around since PowerPoint 2016 and uses machine learning to analyze the content of presentations and suggest improvements.
You can find it as a button in the Home and Design tabs, with Designer itself appearing in a column on the right.

This feature continuously analyzes your presentation and displays a list of suggested changes for the current slide. If you don’t like any of the suggestions, you can click on See More Design Ideas at the bottom and it will generate additional suggestions.
How attractive and useful are the suggestions? Well, it varies. When I tested it myself, they’ve rarely been results that I could use straight away—but the suggestions were helpful in that they gave me several great ideas that I hadn’t thought of myself.
For example, in the image above, you can see a suggestion for a color filter on a photo that looks like it could work really well with bright text and maybe a little blur.
Further reading: PowerPoint keyboard shortcuts worth knowing
This article originally appeared on our sister publication PC för Alla and was translated and localized from Swedish.
Author: Anders Lundberg , Contributor

Anders writes news, reviews and buying guides that touch most categories of consumer tech.
Recent stories by Anders Lundberg:
- How to master Excel: From beginner to pro
- Getting started with Microsoft 365: Everything you need to know
- 8 advanced Microsoft Word tricks you probably missed
Your current User-Agent string appears to be from an automated process, if this is incorrect, please click this link:
AI Presentation Maker - Generate Presentations Instantly
- Generate ready-to-use presentations from a text prompt.
- Select a style and Visme’s AI Presentation Maker will generate text, images, and icon.
- Customize your presentation with a library of royalty-free photos, videos, & graphics.
Generate a presentation with AI

Brought to you by Visme
A leading visual communication platform empowering 27,500,000 users and top brands.

Presentations Engineered With Visme’s AI Presentation Maker
Ai presentation maker prompt 1.
Craft a presentation outlining a leading company’s cutting-edge innovations in AI-powered hardware, emphasizing their impact on enhancing workplace productivity and efficiency.
AI Presentation Maker Prompt 2
Generate a comprehensive presentation highlighting the latest digital marketing trends, focusing on strategies for enhancing brand visibility and customer engagement across diverse platforms.
AI Presentation Maker Prompt 3
Create a detailed presentation elucidating a company’s diversified investment portfolio, emphasizing its robust performance, risk mitigation strategies, and the potential for sustainable long-term growth.
AI Presentation Maker Prompt 4
Develop a compelling presentation showcasing a company’s groundbreaking medical devices and software solutions, emphasizing their role in revolutionizing patient care, treatment efficacy, and healthcare accessibility worldwide.

How it works
How to generate AI presentations with Visme
Save time and create beautiful designs quickly with Visme AI. Available inside the Visme template library, this AI Powerpoint generator is ready to receive your prompts and generate stunning ready-to-use presentations in minutes.

- Log in to the Visme dashboard, and open the template library by clicking on Create New button -> Project -> Presentations. Inside the template library, scroll down and click on the Generate with AI option.
- In the popup that opens, type in a prompt and describe in detail what aspects your presentation should feature. If you don’t provide enough information, chatbot will ask you follow-up questions.
- Visme Chatbot will suggest template styles; choose the most relevant for your presentation, and wait for the AI to create the design. Preview, regenerate or open your project in the Visme editor.
- Customize your project in Visme: Pick a color theme or create your own, edit text, and use assets from Visme’s royalty-free library of photos, videos, and graphics, or create your own with AI tools.
Features of the AI Presentations Maker
Ready-to-use presentations in minutes.
Starting is often the hardest part of a project. Visme’s free AI presentation maker helps you overcome this block and generates results within minutes. Create AI PowerPoint online presentations quickly with a good first draft that is ready to use with minimal or no customization.

Customize every part of your presentation
Visme editor is easy to use and offers you an array of customization options. Change the color theme of your AI-generated presentation, text, fonts, add images, videos and graphics from Visme royalty-free library of assets or generate new ones with AI image generator, AI image touchup tools, or add your own. For more advanced customization, add data visualizations, connect them to live data, or create your own visuals.

Add your branding
Stay on-brand even with AI-generated presentations. Quickly and easily set up your brand kit using AI-powered Visme Brand Wizard or set it up manually. Use your brand colors and fonts in AI-generated presentations. Add your logo and upload your brand assets to make a presentation match your company’s branding.

Download, share or schedule your presentation
Share your presentations generated with Visme AI Designer in many ways. Download them in various formats, including PPTX, PDF and HTML5, present online, share on social media or schedule them to be published as posts on your social media channels. Additionally, you can share your presentations as private projects with a password entry.

More than just an AI Presentation Maker

Beautify your content
Unique Elements & Graphics
Browse through our library of customizable, one-of-a-kind graphics, widgets and design assets like icons, shapes, illustrations and more to accompany your AI-generated presentations.

Visualize your data
Charts & Graphs
Choose from different chart types and create pie charts, bar charts, donut charts, pyramid charts, Mekko charts, radar charts and much more.

Make it engaging
Interactivity
Share AI-generated presentations online with animated and interactive elements to grab your audience’s attention and promote your business.
More AI tools in Visme
Ai image generator.
The Visme AI Image generator will automatically create any image or graphic. All you need to do is write a prompt and let AI magic do the rest.

Visme AI Writer helps you write, proofread, summarize and tone switch any type of text. If you’re missing content for a project, let AI Writer help you generate it.

AI Text-to-Speech Generator
Convert text to speech with the AI Text-to-Speech generator. Input copy, select from 6 voices. Language detection and audio generation are automatic.

AI TouchUp Tools
The Visme AI TouchUp Tools are a set of four image editing features that will help you change the appearance of your images inside any Visme project. Erase and replace objects that you don’t want in your photos.

Save yourself hours of work with AI Resize. This feature resizes your project canvas and adjusts all content to fit the new size within seconds.

The Brand Wizard
The AI-based Visme Brand Wizard populates your brand fonts and styles across a beautiful set of templates.

Make the most of Visme’s features
Choose the perfect visual from our extensive photo and video library . Search and find the ideal image or video using keywords relevant to the project. Drag and drop in your project and adjust as needed.
Incorporate 3D illustrations and icons into all sorts of content types to create amazing content for your business communication strategies. You won’t see these 3D designs anywhere else as they’re made by Visme designers.
When you share your Visme projects, they’ll display with a flipbook effect . Viewers can go from page to page by flipping the page like a digital magazine. If you don’t want the flipbook effect, you can disable it and share as a standard project.
Remove the background from an image to create a cutout and layer it over something else, maybe an AI-generated background. Erase elements of the image and swap them for other objects with AI-powered Erase & Replace feature.
Create scroll-stopping video and animation posts for social media and email communication. Embed projects with video and animation into your website landing page or create digital documents with multimedia resources.
With Visme, you can make, create and design hundreds of content types . We have templates for digital documents, infographics, social media graphics, posters, banners, wireframes, whiteboards, flowcharts.
Design and brainstorm collaboratively with your team on the Visme whiteboard . Build mind maps and flowcharts easily during online planning and strategy sessions. Save whiteboards as meeting minutes and ongoing notes for projects.
Edit your images , photos, and AI image-generated graphics with our integrated editing tools. On top of the regular editing features like saturation and blur, we have 3 AI-based editing features. With these tools, you can unblur an image, expand it without losing quality and erase an object from it.
Frequently Asked Questions (FAQs)
How can i get better results with the ai presentations maker.
Like any AI generator from a text tool, the prompt is everything. To get better results with the AI Presentation maker, you need better prompts. Write the prompt to be as detailed as possible. Include all the content topics you want the presentation to cover. As for style elements, there’s no need to include it in the prompt. Focus on choosing the style that you like from the Chatbot suggestions. Try to select the style that already features the color palette and shapes that you like. AI will change icons and photos based on text it generates.
How many AI Presentations can I generate?
Visme AI Presentation Maker is available in all plans and works on a per-credit basis. Every free account gets 10 credits, Starter accounts get 200, Pro gets 500 and Enterprise is unlimited. Every design generation costs 2 credits and usage of other AI tools costs 1 credit.
Is the Visme AI Designer a third-party API?
No, Visme AI Presentation maker was developed in-house and is a unique tool. However, it does use third-party APIs: ChatGPT and Unsplash.
Are the AI-generated presentations I make copyright-free?
All designs you create with AI Presentation are copyright and royalty-free. You can use them both for personal and commercial use without any problems.
What can Visme AI Designer do?
Visme’s AI design generator can:
- Generate full designs for various content types, including presentations, documents, printables, and social media graphics. Click here to view the full list of document, printable, and social media graphics subcategories.
- Follow your instructions for the text you want in your projects, although not word for word.
- Adapt photos and icons to complement the generated text.
- Create charts, graphs, and tables.
- Handle one project at a time.
- Include animations in projects only if the selected style features animation.
- Generate designs with a maximum length of 10 pages.
What can’t Visme AI Designer do?
Visme’s AI design generator can’t:
- Generate infographics, charts/graphs, whiteboards, web graphics, videos, or GIFs.
- Reproduce your text verbatim.
- Customize based on your specifications for color, shapes, graphics, and design style. Select a style that already resembles what you want in your project, and you can manually edit all design elements in the Visme editor.
- Create or modify diagrams, data widgets or infographics.
- Crawl external websites and gather information from them.
- Handle multiple projects at once.
- Generate designs more than 10 pages in length.
- How to Login
- Use Teams on the web
- Join a meeting in Teams
- Join without a Teams account
- Join on a second device
- Join as a view-only attendee
- Join a breakout room
- Join from Google
- Schedule a meeting in Teams
- Schedule from Outlook
- Schedule from Google
- Schedule with registration
- Instant meeting
- Add a dial-in number
- See all your meetings
- Invite people
- Meeting roles
- Add co-organizers
- Hide attendee names
- Tips for large Teams meeting
- Lock a meeting
- End a meeting
- Manage your calendar
- Meeting controls
- Prepare in a green room
- Share content
- Share slides
- Share sound
- Apply video filters
- Mute and unmute
- Spotlight a video
- Multitasking
- Raise your hand
- Live reactions
- Take meeting notes
- Customize your view
- Laser pointer
- Cast from a desktop
- Use a green screen
- Join as an avatar
- Customize your avatar
- Use emotes, gestures, and more
- Get started with immersive spaces
- Use in-meeting controls
- Spatial audio
- Overview of Microsoft Teams Premium
- Intelligent productivity
- Advanced meeting protection
- Engaging event experiences
- Change your background
- Meeting themes
- Audio settings
- Manage attendee audio and video
- Reduce background noise
- Voice isolation in Teams
- Mute notifications
- Use breakout rooms
- Live transcription
- Language interpretation
- Live captions
- End-to-end encryption
- Presenter modes
- Call and meeting quality
- Meeting attendance reports
- Using the lobby
- Meeting options
- Record a meeting
- Meeting recap
- Play and share a meeting recording
- Delete a recording
- Edit or delete a transcript
- Customize access to recordings or transcripts
- Switch to town halls
- Get started
- Schedule a live event
- Invite attendees
- organizer checklist
- For tier 1 events
- Produce a live event
- Produce a live event with Teams Encoder
- Best practices
- Moderate a Q&A
- Allow anonymous presenters
- Attendee engagement report
- Recording and reports
- Attend a live event in Teams
- Participate in a Q&A
- Use live captions
- Schedule a webinar
- Customize a webinar
- Publicize a webinar
- Manage webinar registration
- Manage what attendees see
- Change webinar details
- Manage webinar emails
- Cancel a webinar
- Manage webinar recordings
- Webinar attendance report
- Get started with town hall
- Attend a town hall
- Schedule a town hall
- Customize a town hall
- Host a town hall
- Use RTMP-In
- Town hall insights
- Manage town hall recordings
- Cancel a town hall
- Can't join a meeting
- Camera isn't working
- Microphone isn't working
- My speaker isn’t working
- Breakout rooms issues
- Immersive spaces issues
- Meetings keep dropping

Share slides in Microsoft Teams meetings with PowerPoint Live
PowerPoint Live in Teams gives both the presenter and audience an inclusive and engaging experience, combining the best parts of presenting in PowerPoint with the connection and collaboration of a Microsoft Teams meeting.

When you’re the presenter, you have a unique view that lets you control your presentation while staying engaged with your audience, seeing people’s video, raised hands, reactions, and chat as needed.
And if you’re an audience member, you can interact with the presentation and personalize your viewing experience with captions, high contrast slides, and slides translated into your native language.
Here’s how it works:
Tip: Are you an audience member? Jump down to learn more about how you can interact during the presentation.
Presenter view

Present your slides

If you're in PowerPoint for the web, select Present > Present in Teams .
Your slides will appear in the Teams meeting, with your Notes next to them.
Navigate through the slides

Use the navigation arrows to go forward and backward.
Use the thumbnail strip to jump ahead or backwards.
Select Go to slide to see a grid view of all slides in the presentation. Select one to jump to it.
Stay connected to the audience
One of the benefits of using PowerPoint Live to present instead of sharing your screen is that you have quick access to all your meeting tools you need to engage with the audience and to read the room in one view. This is especially true if you’re presenting from a single screen.
Turn Chat on or off to view what your audience is saying.
See audience reactions and raised hands in real-time.
Change the Layout of your presentation and choose how your live camera feed appears in your presentation, like Standout or Cameo . It helps the audience read your non-verbal cues and keeps them engaged.
Use the Laser pointer , Pen , Highlighter , or Eraser to clearly reference items on your slides.
Audience view
As an audience member, you’re able to personalize your experience without affecting anyone else. Try these options to find what works best for you:

Note: If presenters don't want people to be able to independently navigate through a PowerPoint file they are sharing, use the Private view toggle to turn it off.
Click any hyperlink on slides to get more context right away.
Interact with videos on slides to adjust the volume or jump to a timestamp and consume it at your own pace.
Use a screen reader to get full access to the slide content.

Switch to a high contrast view to make the slides easier to view if you have low vision. Select More options > View slides in high contrast .
Your viewing experience will be at a higher fidelity, letting you see crisp text and smooth animations. PowerPoint Live also requires significantly less network bandwidth than typical sharing, making it the best option when network connectivity is a problem.
Independent magnifying and panning
You can zoom in and pan on a presentation slide without affecting what others see. Use your mouse, trackpad, keyboard, touch, or the Magnify Slide option as applicable.
To zoom in or out on a slide, do any one of the following:
Hover over the slideshow and pinch or stretch on trackpad.
Pinch or use the stretch touch gesture (on a touch-enabled device).
Press the + or – keys.
Hover over slide, hold down Ctrl key and scroll with mouse wheel.
In the More Actions menu, click the + or – buttons.
To pan around your slide, do any one of the following:
Press the arrow keys.
Click and drag using a mouse.
Click and drag on a trackpad.
Use one finger to touch and drag (on touch-enabled device).
When done zooming and panning, press Esc to reset your screen.
Important:
PowerPoint Live is not supported in Teams live events, CVI devices, and VTC devices.
If you're using Teams on the web, you’ll need Microsoft Edge 18 or later, or Google Chrome 65 or later, to see the presenter view.
Presenter view is hidden by default for small screen devices but can be turned on by selecting More options below the current slide and then Show presenter view (or by selecting the sharing window and then pressing Ctrl+Shift+x).
Meetings recordings won’t capture any videos, animations, or annotation marks in the PowerPoint Live session.
When you share from Teams, the PowerPoint Live section lists the most recent files you've opened or edited in your team SharePoint site or your OneDrive. If you select one of these files to present, all meeting participants will be able to view the slides during the meeting. Their access permissions to the file outside of the meeting won't change.
If you select Browse and choose to present a PowerPoint file that hasn't been uploaded to Teams before, it will get uploaded as part of the meeting. If you're presenting in a channel meeting, the file is uploaded to the Files tab in the channel, where all team members will have access to it. If you're presenting in a private meeting, the file is uploaded to your OneDrive, where only the meeting participants will be able to access it.

Need more help?
Want more options.
Explore subscription benefits, browse training courses, learn how to secure your device, and more.

Microsoft 365 subscription benefits

Microsoft 365 training

Microsoft security

Accessibility center
Communities help you ask and answer questions, give feedback, and hear from experts with rich knowledge.

Ask the Microsoft Community

Microsoft Tech Community

Windows Insiders
Microsoft 365 Insiders
Was this information helpful?
Thank you for your feedback.
How to Make Pro Marketing Plan PowerPoint PPT Presentations (+Video)
Learn how to create a marketing strategy PowerPoint presentation and create effective slides for your business. You'll also find marketing plan example templates for PowerPoint.

Marketing is something we all know we need to do in our business, but it can take us out of our comfort zone. Marketing plan PowerPoint templates can help.

How do you start marketing, and what should you be doing to get the word out about your business? In this tutorial, you’ll find out.
As freelancers and small business leaders, we all play several roles. You might not think of yourself as a marketer, but it’s a crucial part of what you do to run and grow your business.
A marketing plan PowerPoint presentation can serve as the guiding document that all marketing decisions are tied to. In this tutorial, you’ll learn to build a marketing PowerPoint presentation step by step.
Your Quick Start Guide to Learning PowerPoint (Video)
Are you ready to start making pro-marketing plans with PowerPoint? Watch this quick video to find out what you need to know about marketing plans in PPT:
Want more information on marketing plan PowerPoints? Keep reading for more details.
How to Market on a Budget
In this section, I’m going to walk you through building your own marketing PowerPoint presentation. Whether you’re pitching it to someone else or documenting your plan for yourself, it’s important to develop your own marketing plan for PowerPoint (PPT).
If you’re managing a marketing plan , Envato Elements is the perfect service to help you. With so many creative assets included in one single subscription, it’s hard to match its value.
- Stock photos . For any print or web publication, you’ll occasionally need a stock or filler photo to finish up your website.
- WordPress and web templates . You don’t have to hire a web developer to create a website for your small business. You might be surprised how easy it is to grab a web template from Elements and add your own details.
- Graphics . Whether it’s an icon or graphic you’ll use on social media, a graphic can help round out a design
Envato Elements is an all-you-can-download service that includes all these for a single flat rate.

These items are the type of thing that a marketer would benefit from. Instead of buying these and templates one at a time, Elements can be a budget-friendly unlimited marketing package. Even if you don’t call yourself a marketer, having unlimited access to these files is one of the best ways to market on a shoestring.
Download Our Free PDF eBook on Making Great Presentations
Before you read on, we want to make sure you know about this resource. It’ll help you write, design, and deliver the perfect marketing presentation. Download our Free eBook: The Complete Guide to Making Great Presentations .

Now, let’s dive into the tutorial.
Essential Elements of Marketing Plans
Successful marketing efforts don’t happen by accident. Instead, they start with a plan about what you want potential customers to know about your business. Then they outline the steps that it’ll take to drive that message.

You build a marketing plan to formalize and capture your plans to reach customers. The very act of going through the process can help you set the plan and put serious thought into your marketing actions.
What does a marketing plan for PowerPoint (PPT) contain? Here’s what you should include when you’re formalizing your PowerPoint presentation marketing strategy:
Essential Parts of PPT Marketing Plans
Every marketing plan for PowerPoint (PPT) will differ. Here are the key parts that it should contain. These might span many sections or pages, but these are the essentials of a well-formed marketing plan for PowerPoint:
- Situation analysis . This is often called a SWOT analysis (strengths, weaknesses, opportunities, and threats). It aims to assess the current situation that exists.
- Set the strategy and goal . What are the guiding principles for what you want to do? What do you want people to know about your business?
- Define the tactics . What specific steps will you take to help you reach your marketing goals?
- Set measurables and timelines . Define the way that you’ll measure your marketing
It can help to build a marketing PowerPoint presentation to capture all these in one place. Thanks to its ease of use and shareability, PowerPoint is an ideal choice to create a central document that’s got your plan.

How to Make a Marketing Plan PowerPoint Presentation
Besides the file types that I mentioned above, Elements includes professional marketing plan PowerPoint (PPT) templates that you can download and use. This tutorial is going to use a template from Envato Elements to build a professional marketing plan for PowerPoint. You’ll see that following a marketing plan PPT example really speeds up your process.

In this tutorial, I’m going to use the aptly named Marketing Plan PPT presentation template . It’s a marketing presentation with the slides that pros know to include. This is tailor-made for building a marketing plan with each of the key slide types that you might need.

When you use templates, you’ve got marketing plan PowerPoint examples. These give you cues when you’re building a marketing plan PowerPoint of your own. Don’t learn how to do a marketing plan presentation PPT from scratch—use these template’s marketing plan slides instead.
1. Establish the Strategy
The business strategy sets the direction for the entire PowerPoint marketing plan. Every company will approach setting this strategy differently, but the important part is that you’ve got one. Marketing presentations should represent the strategy, not stand on their own.

To showcase this in our marketing presentation, I’m going to use slide design six. I preferred this slide design for its simplicity and singular focus. Spelling out the strategy on a simple marketing plan presentation opener is key.
When setting a strategy, it’s almost always best to focus on a singular idea. Don’t dilute the strategy with an overabundance of details. Instead, condense your idea into a single sentence that’ll resonate in a marketing plan presentation.
2. Assess the Situation
The classic way to assess a situation is to use the SWOT approach. This is short for the s trengths, w eaknesses, o pportunities, and t hreats analysis. This approach helps you understand where your business is positioned in the marketplace and what opportunities might be available to you for growth.
Most marketing plan PPTs include a SWOT.

The Marketing Plan PowerPoint presentation has a pre-built SWOT slide that’s perfect for this purpose. Use slide design 11 and update it with your own view of your business. It’s already tailored for a SWOT analysis with the four key placeholders.
Performing the SWOT analysis forces you to think about your business and where it fits into the marketplace. Documenting it in a slide like this will help you refer to it while preparing tactics. The marketing plan PowerPoint captures the action plan in an easy-to-share format.
3. Set Tactics
In even the largest of companies, professionals often forget the difference between a strategy and a tactic. While a marketing strategy is the guiding principles of what you’ll aim for, tactics are the individual efforts you take to put them in place.
For example, running a Facebook ad is a tactic, not a strategy. Building a mailing list or even rolling out the new company website are both tactics that support the marketing strategy. But they aren’t strategies that stand on their own.
Most marketing tactics will force you to consider the channels that you’ll market to. Simply put, a marketing channel is a platform or avenue that you’ll use to get the word out about your product.
At this stage, it’s a great idea to share the tactics that support the PowerPoint presentation marketing strategy. I like to use a single slide to showcase the tactics that are going to support reaching our marketing goal.

In this case, I’m going to use slide design seven, which has several placeholder boxes. I can use each one of those to list a tactic that I’m going to use to push my marketing plan for PowerPoint. Using this approach will document the tactics that I’ll use in my marketing efforts.
4. Set the Targets
How do you know if you’re succeeding with your PowerPoint marketing plan? The answer is that you’ve got to set targets and measure against them.
The old adage that “ you can’t manage what you don’t measure ” is true. That piece of advice means that if you aren’t measuring your success rate, you’ve got no clue whether the tactics that you’re undertaking are working.
Set targets that are tied to metrics that you can measure. Examples of these metrics could include:
- simple financial measures like sales of your product
- visits to the company website
- new subscriptions to the mailing list
In this example slide, I used slide design eight with three placeholders to substitute in my own metrics that I’ll use in my marketing plan PPT. I’ll refer to this in the future to make sure that my marketing plan is hitting the mark.
5. Set the Budget
As you’re executing the PowerPoint marketing plan, it can be tempting to overspend your budget in the name of reaching your goals. That’s why you’ve got to keep budgetary discipline. If you don’t discuss the spend expectations up front, it can be difficult to have budget allocated for your project or track your marketing spend.

Slide design 33 is the perfect way to log the budget in an easy-to-use table format. Use it in your PPT marketing plan. Add the tactics and budget for each month to log what you plan to spend.
6. Target Markets
A key part of any successful marketing presentation is a slide focusing on your targets. This is how to make a marketing plan presentation that shows how your offerings fit the market.
A target market is the fit between your product and your customer. Working in a global landscape nowadays, this is more important than ever.
To succeed, any marketing plan PPT needs to show this fit. It tells your audience who you’re marketing to and the offer that you bring to the table.

Customizing a slide like #16 in the deck is a breeze. It creates a marketing strategy PPT with a targeted focus.
Remember, specifics are key . Slides like this visually convey your value proposition.
7. Outline Growth Steps
Need to know how to make a marketing presentation succeed? A key component is outlining the growth steps found in your marketing plan.
Remember, marketing plan PPT example slides show a journey. This can be past history, future growth, or both.
By outlining growth steps, you can illustrate progress with your marketing plan PPT. These steps can take many forms. For example, they may be certain sales thresholds or the number of conversions made.
Tailor each of these steps to fit your current plan and the objectives of that plan.

A growth slide like this marketing plan example PowerPoint is crucial to include in a deck. It’s a simple, yet visionary way to showcase success. Try to include this in every marketing plan PowerPoint that you build.
No matter the specifics, every marketing plan focuses on growth. Never miss the chance to illustrate this for your audiences.
8. Track Milestones
Milestones and metrics should always appear in your marketing strategy PPT. A marketing plan doesn’t exist in a vacuum. Rather, it represents how you target customers.
To evaluate (and illustrate) the success of these plans, you need to track milestones. These milestones are specific details that measure the efficacy of your marketing strategy.
Slide 12 in the template is a powerful marketing plan example PowerPoint. It’s data-heavy, with sleek modern bar charts. Customize it as you see fit, showing off the metrics that mean the most.

Slides like this are particularly useful if you’re sharing your deck with investors. They help you show off a documented track record of success.
But remember, milestones don’t always have to be in the past. Like the step above, slides like this can feature future projections too.
A marketing plan presentation PPT like this is a stylish, concise way to highlight your plans.
9. Go Mobile
Thinking of how to make a marketing plan presentation suited to today’s landscape? If so, include a mobile focus. Odds are, your marketing plans have a mobile component.
Mobile marketing might involve SMS messaging campaigns, online ads, and more. These techniques are increasingly popular in marketing. That means that you should feature them in your marketing plan PowerPoint slides.

Slide 28 is a versatile option to build a mobile marketing plan presentation PPT. It features a smartphone device mockup. Use the text boxes to outline the mobile elements of your marketing strategies.
The mockup itself can feature screenshots of mobile ads, for example. This is the perfect way to showcase your mobile marketing strategies.
10. Close Strong
No marketing strategy PPT is complete without a strong close. Keep in mind, last impressions count too. You want your audience to leave with a full understanding of your marketing strategy.
Strong closing slides like this should include a few key elements:
- a final statement of your strategy’s purpose
- specific objectives
- measurements of success (how you’ll determine if your plan is working)
- time for questions

In other words, you’re briefly summarizing the content that you’ve already shared. This reiterates your strategy and clears up any confusion in your audience. Time for questions helps fill knowledge and understanding gaps.
By closing strong, you’ll create a marketing plan presentation that impresses any audience.
Make this marketing PowerPoint presentation a living document. Revisit it regularly to ensure that you’re sticking to your PowerPoint presentation marketing strategy or have good reasons to shift from it. It helps to have this central document that you can refer to.
5 Quick Marketing Plan PowerPoint Presentation Tips
I’ll show you marketing plan PPT tips in this section. We’ll use the Marketing Plan 2.0 template to create great marketing plan slides. With the help of this template, you can integrate all these tips into your PPT marketing plan, easily.
1. Use a Timeline Slide
Time and time again, I recommend using timeline slides in marketing plan PPTs. It’s one of my favorite storytelling tools.
Here’s why I love timelines. They connect the past and excite the audience for the future. In this marketing plan PowerPoint presentation template, slide 28 has a stunning Keynote timeline.

Whether you’re linking up historic events or forecasting the future, consider a timeline. In a marketing proposal PPT, it can build excitement.
2. Show the Strategy With Illustrations
Strategy is the central idea that guides all decisions. In a marketing strategy PowerPoint (PPT) presentation, you show the core of what you’re doing and why. Marketing strategy PPT presentations also help you explore how your business is positioned in the market.
One example of a marketing strategy presentation PowerPoint slide is the SWOT analysis you saw above. Another great business analysis is Porter’s Five Forces .

When you focus on strategy, you show the audience that you know what direction to move in. There are challenges and specifics to resolve, but strategy leads the way.
3. Show a Product in Action
Marketing presentations can sometimes be a bit abstract. While you should focus on strategy as the tip above suggests, don’t forget to show real-world examples too. PPT marketing plans are a great opportunity to excite the audience about your product.

Add a device mockup slide like the one you see above. In this marketing plan example for PowerPoint, the laptop could show your app or website, brought to life.
4. Focus on the Team
Show off your team in a marketing presentation. Not only will they appreciate it, but it’ll build credibility with your audience. If you’re learning how to make a marketing plan presentation PPT, it’s easy to forget how important the team is.

Every marketing proposal PPT should feature the team behind the big idea. You could use it to describe each contributor’s role on the project or their past experiences.
5. Continue the Conversation
Too many presenters think that giving a marketing presentation is all you need to do to grow your business. Instead, use a PPT marketing plan to launch a discussion with potential clients and collaborators.

Devote a marketing proposal PPT slide to share your contact details. You never know who might have been inspired by your marketing plan presentation. When you share your contact details, it might spark a new working relationship.
Top Marketing Plan PowerPoint Presentations From Envato Elements
As mentioned earlier, Envato Elements is the best place to find pro marketing plan PowerPoint templates. Look at some of the best marketing plan PPT presentations that are available with your Envato Elements subscription:
1. Marketing Plan PowerPoint Template

This marketing plan PowerPoint template has a clean and modern design that’ll help your information and data stand out. The template features:
- 30 unique slides
- full HD resolution
- master slide layout
- image placeholders for easy edits
- infographic elements and animations
2. Marketing Plan PowerPoint Presentation

If you’re looking for a bold and modern design, the Marketing Plan PowerPoint presentation is a great choice. The template features:
- 36 unique slides
- image placeholders
- colorful, light, and dark versions
- infographic elements, vector icons, and editable shapes
3. Marketing Plan PowerPoint Template

Here’s the perfect choice if you’re looking for a marketing plan PPT template that’s fully customizable. You’ll get:
- widescreen resolution
- 10 different color schemes
- drag-and-drop image placeholders
- charts, graphs, and editable vector shapes
4. Marketing Firm PowerPoint Template

Consider this marketing plan PowerPoint template if you love the flat design style. The template comes with every slide needed to present your marketing plan in great detail. You’ll find:
- vector icons
- subtle animations and transitions
5. Marketing Plan Template for PowerPoint

Try this Marketing Plan Template for PowerPoint if you’re looking for a colorful and bold PPT template. This template was designed in widescreen resolution and comes with:
- 1000 different slides
- 100 different designs
- picture placeholders
- infographic elements
- editable vector shapes
Grab This eBook on Making Great Presentations ( Free Download )
We’ve got the perfect complement to a professional PowerPoint template. It’ll help you learn how to write, design, and deliver great marketing presentations.
Download The Complete Guide to Making Great Presentations now for FREE with a subscription to the Tuts+ Business Newsletter. Get your ideas formed into a powerful presentation that’ll move your audience.

Download Your Next Marketing Plan PPT Today!!
Are you working on a marketing presentation ? Save time and create a stunning presentation with a marketing plan presentation template from Envato Elements.
Don’t forget to incorporate what you learned in our tips section, too. Show your strategy, the product in action, and focus on your team for success. Marketing plan presentations need these elements to feel well-rounded.
Related Articles
How to Make PPT using ChatGPT in 2024

By Shivam Aggarwal
Marketing, Content & Video editor
Updated on Jun 19, 2024
Introduction
Benefits of using ai for ppt creation, advantages of using chatgpt and fliki ai, why ai is a game-changer for presentations, 1. generate content with chatgpt, 2. copy the generated content, 3. use microsoft word to create slides, 4. export to powerpoint, 5. customize your design, 6. refine your slides, 7. final touches, best practices for using chatgpt to make ppts, effective prompting with chatgpt, what is fliki ai, benefits of using fliki ai presentation maker, step 1: start a new project, step 2: input your topic and preferences, step 3: customize your presentation, step 4: download your presentation, chatgpt (with word online), which tool to choose.
Did you know that over half of businesses use AI to improve and perfect business operations? It highlights the growing reliance on AI tools to enhance efficiency and creativity, and creating stunning PowerPoint presentations is no exception. In this guide, we'll explore how to make a PPT using ChatGPT, a powerful AI chatbot, and introduce Fliki AI, a specialized tool for creating presentations. Whether you're looking to save time or boost the quality of your presentations, these AI solutions can revolutionize how you create and deliver your presentation. Let's dive into the step-by-step processes of using ChatGPT and Fliki AI to craft professional and engaging presentations.

Why Use AI for Creating PPTs?
Creating compelling and professional PowerPoint presentations can be time-consuming and challenging, especially if you lack design experience. AI tools like ChatGPT and Fliki offer innovative solutions to streamline this process. Here's why you should consider using AI for your next presentation:
1. Time-Saving
Efficient Content Generation : AI tools can quickly generate content for your slides, from titles and bullet points to detailed explanations.
Automated Design : AI can suggest design elements and layouts, saving you hours of manual work.
2. Creativity Boost
Idea Generation : AI can provide fresh ideas and perspectives, helping you create more engaging and dynamic presentations.
Customization : Tailor content and design suggestions to suit your specific needs and audience.
3. Error Reduction
Grammar and Spelling : AI tools can help ensure your PPT content is free from grammatical and spelling errors.
Consistency : AI can help keep a consistent tone and style throughout your presentation.
Versatile Content Creation : Generate text for various parts of your presentation, including introductions, summaries, and detailed sections.
Interactive Assistance : Engage with ChatGPT to refine and enhance your content based on your feedback.
Specialized PPT Maker : Specifically designed to create presentations, offering AI media and automated designs tailored to your content.
User-Friendly Interface : Easy to use, even for those without extensive technical or design skills.
Adaptability : AI tools can adapt to different styles and purposes, whether you need a formal business presentation or a creative educational slideshow.
Continuous Improvement : AI continuously learns and improves, offering better suggestions and more accurate content.
Using AI for PPT creation enhances efficiency and elevates the overall quality of your presentations. By leveraging tools like ChatGPT and Fliki AI, you can focus more on delivering your message effectively rather than getting bogged down by design and content creation details. In the following sections, we'll dive deeper into how to use these tools to create stunning presentations effortlessly.
How to Make a PowerPoint Using ChatGPT
Creating a presentation can be time-consuming, but with ChatGPT, you can streamline the process significantly. Follow these steps to create a professional PowerPoint presentation quickly and efficiently using ChatGPT.

To start, you need to generate the content for your presentation. Here's how you can do it:
Prompt : Ask ChatGPT for an outline. For example, "Give me the content for a presentation about the future of artificial intelligence and spread it across five slides."
Content : If you need detailed content, ask ChatGPT to expand on each point from the outline.
Once ChatGPT provides the content:
Select and Copy : Highlight the entire response and press Ctrl + C to copy it.

Now, you need to paste the content into a Word document:
New Document : Open your browser and go to Word Online or use the desktop application.
Paste Content : Paste the copied content into the new document. Ensure the first line is the title of your presentation.

Convert your Word file into a PowerPoint presentation:
Export : Go to File > Export > Export to PowerPoint Presentation.
Choose Template : Select a template from the options provided or click "See more templates" for additional choices.

Export : Click Export and Open Presentation to view it in PowerPoint Online.
To enhance your presentation's look:
Open in PowerPoint : Open the presentation in the desktop version of PowerPoint.
Adjust Fonts : Go to View > Slide Master, then Fonts > Customize Fonts. Choose readable fonts for headings and body text.
Add Images : Insert relevant stock images via Insert > Stock Images to make your slides visually appealing.
Designer Suggestions : Use the Designer tab for layout suggestions that effectively incorporate your images and text.

Enhance readability and design:
Text Formatting : Change all uppercase text to sentence case by selecting the text and adjusting the settings.
Layouts : Use the Designer tab for different layout options, such as a timeline layout for topics like the evolution of AI.
Complete your presentation:
Check Animations : Some suggested layouts include animations. Preview these to ensure they fit your presentation style.
Adjustments : Make final adjustments to text size, boldness, and layout to improve legibility and visual appeal.
💡 Pro Tip : You can use Fliki PPT to video to convert your presentations into video with high-quality voiceovers, enhancing their reach and accessibility for a wider audience.
Tips for Better Presentation
Review and Edit : Always review and edit the generated content to ensure accuracy and relevance.
Combine with Visuals : Pair the text with appropriate images, charts, and graphics to enhance your presentation.
Seek Feedback : Use ChatGPT to generate multiple versions and seek feedback from colleagues or peers to choose the best content.
Design Your Layout : Consider creating your layouts rather than relying solely on predefined options for a unique look.
Content Impact : Remember, the content you add will influence the suggestions from the Designer tab. Choose images and icons that enhance your message.
Tips for Crafting Prompts
Be Specific : Provide clear and specific prompts to get relevant responses.
Example: "Generate a slide explaining the benefits of using AI in education."
Iterate : Refine your prompts based on the responses to get the most accurate and useful content.
Examples of Prompts
Titles and Headings : "Suggest a title for a presentation on renewable energy."
Bullet Points : "List three key points about the impact of social media on marketing."
Detailed Explanations : "Explain the process of photosynthesis in simple terms for a biology presentation."
With ChatGPT and some additional tweaks in Microsoft Word and PowerPoint, you can create an impressive presentation quickly and efficiently. This method saves time and ensures you have a solid foundation to build upon for a standout presentation.
Easier way to create PPTs with AI
While creating PPTs with ChatGPT was quite straightforward, there’s an even easier way to create PPTs with the help of Fliki AI presentation maker . It is a specialized tool designed to simplify creating visually appealing presentations. Here's how Fliki AI stands out and how you can use it to create stunning PPTs effortlessly.
Overview : Fliki AI is an advanced presentation maker that leverages AI to generate professional-quality slides based on your input.
Features : Includes customizable layouts, AI-generated media, and intuitive design tools to enhance your presentations.
User-Friendly : Easy-to-use interface, even for those without technical or design skills.
Customization : Offers a good degree of customization to ensure your presentation meets your specific needs.
Efficiency : Significantly reduces the time required to create a polished and engaging presentation.
How to make PPT with AI (Fliki)

Select "Files" from the Top Panel : Navigate to the top panel of Fliki and click on the "Files" option.
Create a New File for Presentation : Click the "New File" button.
Enter File Details : Select 'design,' enter the file name, and select the language. Choose the aspect ratio as landscape (16:9).
Choose Your Design Type : Under the "Start With" section, select "Presentation" and then hit "Submit."

Write the Topic or Title : Input the topic or title of your presentation to help the AI generate relevant content.
Select the Number of Slides : Select the number of slides you want in your presentation by dragging the pages slider.
Select Media Type : Choose stock or AI-generated media for your background.
Submit : Click "Submit" to proceed.

Preview : The AI will generate a presentation based on your input. Review the created presentation.
Add and Edit Layers :
Text Layers : Add more text to your presentation to make it informative and engaging. Customize the font, size, color, and placement to match your brand.
Media Layers : Include additional images or graphics to enhance the visual appeal.
Shapes and Elements : Experiment with shapes and other design layers to make your presentation stand out.

Review : Ensure all elements are aligned and visually appealing.
Download Options : Click the button on the top panel and choose your preferred format (PPTX, PDF, etc.). You can also download individual slides as zipped images in JPG, PNG, or WEBP format.
Choosing Between ChatGPT (with Word Online) and Fliki AI for Your PPT Needs
When it comes to creating presentations, both ChatGPT and Fliki AI offer unique advantages. Here's a comparison to help you decide which tool is best for your needs.
Versatile Content Creation : Generate a wide range of content, from detailed explanations to concise bullet points.
Interactive Assistance : Receive real-time suggestions and refine your content through interactive prompts.
Flexibility : Ideal for users who need to generate text-heavy slides or require detailed content.
Manual Integration : Requires manual transfer of generated content into presentation software.
Limited Design Assistance : Focuses primarily on textual content creation, with less emphasis on visual design.
Specialized Design Tools : Specifically designed for creating presentations, focusing on visual appeal.
Ease of Use : An intuitive interface accessible even to users without design experience.
Comprehensive Customization : Offers extensive customization options to tailor the presentation to your needs.
Chat-based UI : While it is great at creating good presentations, it doesn’t offer a chat-based interface for generating content as ChatGPT.
Use ChatGPT If:
You need extensive content creation , ideal for generating detailed text and structured content.
You prefer interactive feedback : It is beneficial for refining and enhancing your content based on iterative feedback.
Use Fliki AI If:
You prioritize design and layout : Perfect for visually appealing slides with minimal effort.
You want an all-in-one solution : Best for a streamlined tool that efficiently handles content and design.
By understanding the strengths and limitations of both ChatGPT and Fliki AI, you can choose the tool that best fits your presentation needs. In the following sections, we'll offer tips for enhancing your presentations and addressing common challenges you might encounter.
By harnessing the strengths of ChatGPT and Fliki AI, you can streamline your workflow, save valuable time, and deliver presentations that effectively captivate and inform your audience.
As AI evolves, these tools will become more sophisticated, offering even greater possibilities for creativity and productivity in presentation creation. Integrating AI into your presentation can elevate your work whether you're a business professional, educator, or student.
Embrace innovation, enhance your storytelling, and stay ahead in today's competitive landscape with the power of AI-driven presentation tools.
Start creating impactful presentations today with ChatGPT and Fliki AI, and let your ideas shine through with clarity and creativity.
Continue reading

Attention Economy 101: The Value of Capturing and Retaining Attention
Learn what the attention economy is and how AI tools like Fliki are revolutionizing video content creation. Empower your business in the attention economy.
Read more →

How to Make a Thumbnail for YouTube Videos
Learn how to make a thumbnail for YouTube videos with these easy steps. Boost your video's CTR and engagement using Fliki AI Thumbnail Maker.

How to Create Training Videos with AI in 2024
Learn how to create training videos with AI in 2024! Explore the benefits, best practices and AI tools for creating captivating training videos in minutes
Stop wasting time, effort and money creating videos
Hours of content you create per month: 4 hour s
To save over 96 hours of effort & $ 4800 per month
No technical skills or software download required.
IMAGES
VIDEO
COMMENTS
On the File menu, select Save to ensure all your recent work has been saved in PowerPoint presentation format (.pptx). Select File > Export > Create a Video. (Or, on the Recording tab of the ribbon, select Export to Video .) In the first drop-down box under the Create a Video heading, select the video quality you want, which pertains to the ...
To turn a PowerPoint presentation into a video, first, open your presentation with the PowerPoint app on your Windows or Mac computer. In the top-left corner of PowerPoint, click the "File" option. From the sidebar that opens after clicking the "File" option, select "Export." In the "Export" menu, click "Create a Video."
Learn how to publish your own video using Microsoft PowerPoint with narration, annotations, animations, and timings. As full disclosure, I work at Microsoft ...
Join 400,000+ professionals in our courses here 👉 https://link.xelplus.com/yt-d-all-coursesLearn how to create a video using PowerPoint. I'll first show you...
Watch this video to learn how to convert your PowerPoint presentation into a video. When you make a recording of a presentation, all its elements (narration,...
In the Seconds spent on each slide box, select the default time you want to spend on each slide. Select Create Video. Enter a file name and then browse to the location you want to save your video. In the Save As type box, select if you want to save the video as a MPEG-4 Video or Windows Media Video. Tip: The MPEG-4 Video format is recommended ...
Choose the option Create a Video at the very bottom of the right-hand side of the screen. 3. Find the Create a Video tab if you want to see the available video quality options. 4. Click on the downward-pointing arrow next to the Computer & HD Displays option and choose from the three available options.
You can record your PowerPoint presentation—or just a single slide—and capture voice, ink gestures, and your video presence. The completed recording is like any other presentation. You can play it for your audience in Slide Show or you can export it as a video file. So instead of just handing the deck to someone, people can see your ...
Under the Save & Send menu, find and click on Create a Video. Click on the Computer & HD Displays option to customise the video size and quality (small, medium and large size & quality). Click the Don't Use Recorded Timings and Narrations to select if you're using timings and narrations. Click Create Video and another dialogue box opens.
Record new layer: Pick this for recording your video as a new layer on top of an existing recording. 2. Click Record at the bottom of the Record panel. 3. Drag over the area of your screen you wish to record. Click Start Recording. Press Space to start recording the full screen. 4. Click Stop to finish recording.
To get started, open the PowerPoint presentation you would like to turn into a video and click the "File" tab in the top-left corner of the window. IDG / Marshall Gunnell. Next, click ...
On the PowerPoint window, in the left sidebar, click the slide in which you want to add a video. At the top of the PowerPoint window, click the "Insert" tab. In the "Insert" tab, under the "Media" section (which is to the extreme right side of the interface), click "Video." You'll now see an "Insert Video From" menu.
Adjust the playback settings. Select the video and click the Playback tab. You'll be able to edit how your video plays on the slide. To adjust when the video plays, click the drop-down menu next to Start:.Select In Click Sequence, Automatically, or When Clicked On.; Check the boxes to apply any of the following: Play Full Screen, Hide While Not Playing, Loop until Stopped, and/or Rewind after ...
Edit and Adjust Playback: Under Playback / Video Options, Change the Start option from 'On Click' to 'Automatically'. This means the video will play when the slide is visible. To insert an existing video: Insert video: We navigate to the Insert tab, then Media then Video and the Video on my PC option.
Method 1: How to record your webcam in PowerPoint. Step 1. Open Microsoft PowerPoint and navigate to the record tab. Head over to the PowerPoint application to start your webcam recording in PowerPoint. Next, click on the record tab to launch recording options. Step 2.
To re-record, delete the recording and then start over. Alternatively, you can also press "F9" to pause and resume the recording and "F10" to stop the recording. If you use a Mac, click the Camtasia icon on the Apple menu bar and press the "Stop Recording" button. To re-record, click on the "Start Over" button.
Step 1: From PowerPoint, open the slide with which you want to start your presentation. Step 2: Select Record from the upper right hand corner of the PowerPoint window. Step 3: Make sure your recording and voice settings are set properly, then click the round Record button. Begin your presentation.
Step 1: On the File menu, select Save to make sure you have saved all your recent work in PowerPoint presentation format (.pptx). Step 2: On the File menu, select Save As. Step 3: Select the folder location where you want to store your PowerPoint Show file. Step 4: In the Save as type box, choose PowerPoint Show (*.ppsx).
In this step-by-step tutorial, learn how to record your PowerPoint presentation as video. Watch how to insert a narration, video, and then export your PowerP...
Getting Started. 1. Open PowerPoint and click 'New.'. A page with templates will usually open automatically, but if not, go to the top left pane of your screen and click New. If you've already created a presentation, select Open and then double-click the icon to open the existing file. Image Source.
For this example case, we're going to imagine we're introducing a new app using a PowerPoint presentation. This is just one example of making a creative presentation to showcase a new product, but you can use your own content to get similar results. 1. Grab Your Audience's Attention.
To do that, simply go up to the Home tab and click on New Slide. This inserts a new slide in your presentation right after the one you were on. You can alternatively hit Ctrl+M on your keyboard to insert a new blank slide in PowerPoint. To learn more about this shortcut, see my guide on using Ctrl+M in PowerPoint.
Here's a PowerPoint presentation tips and tricks guide that takes you through how to make a good PowerPoint presentation. License; Pricing; Get unlimited downloads. Learn Learn / Marketing / Presentation Templates / Tips ... Luckily, it's easy to add and embed a YouTube video in your next PowerPoint presentation. 47. Add Charts & Graphs.
Add a video narration. Open your slides in PowerPoint. Then go to the iSpring Suite tab and click on Manage Narration. This can function as a video presentation maker. Once the iSpring Narration Editor window appears, you can either record a new video narration or import an existing video file.
To create a new PowerPoint template, you can start from either a blank presentation or an existing template. Don't add any content of your own yet. Instead, go to the View tab and click on Slide ...
Turn a spark of inspiration into personalized presentations with Copilot in PowerPoint. Copilot will turn existing Word documents into presentations, create new presentations from simple prompts or outlines, or find the best places for impactful imagery—and will help you leave audiences dazzled with skillful storytelling.
Change the color theme of your AI-generated presentation, text, fonts, add images, videos and graphics from Visme royalty-free library of assets or generate new ones with AI image generator, AI image touchup tools, or add your own. For more advanced customization, add data visualizations, connect them to live data, or create your own visuals.
When you need to present your PowerPoint slides in Microsoft Teams, PowerPoint Live gives both the presenter and audience an inclusive and engaging experience, combining the best parts of presenting with the connection and collaboration of a Teams meeting. ... When you're the presenter, you have a unique view that lets you control your ...
Make this marketing PowerPoint presentation a living document. Revisit it regularly to ensure that you're sticking to your PowerPoint presentation marketing strategy or have good reasons to shift from it. It helps to have this central document that you can refer to. 5 Quick Marketing Plan PowerPoint Presentation Tips
Ensure the first line is the title of your presentation. 4. Export to PowerPoint. Convert your Word file into a PowerPoint presentation: Export: Go to File > Export > Export to PowerPoint Presentation. Choose Template: Select a template from the options provided or click "See more templates" for additional choices.